Nikon 9609 D60 User's Manual - Page 100
Printing Multiple Photographs, Print select
 |
UPC - 018208096091
View all Nikon 9609 manuals
Add to My Manuals
Save this manual to your list of manuals |
Page 100 highlights
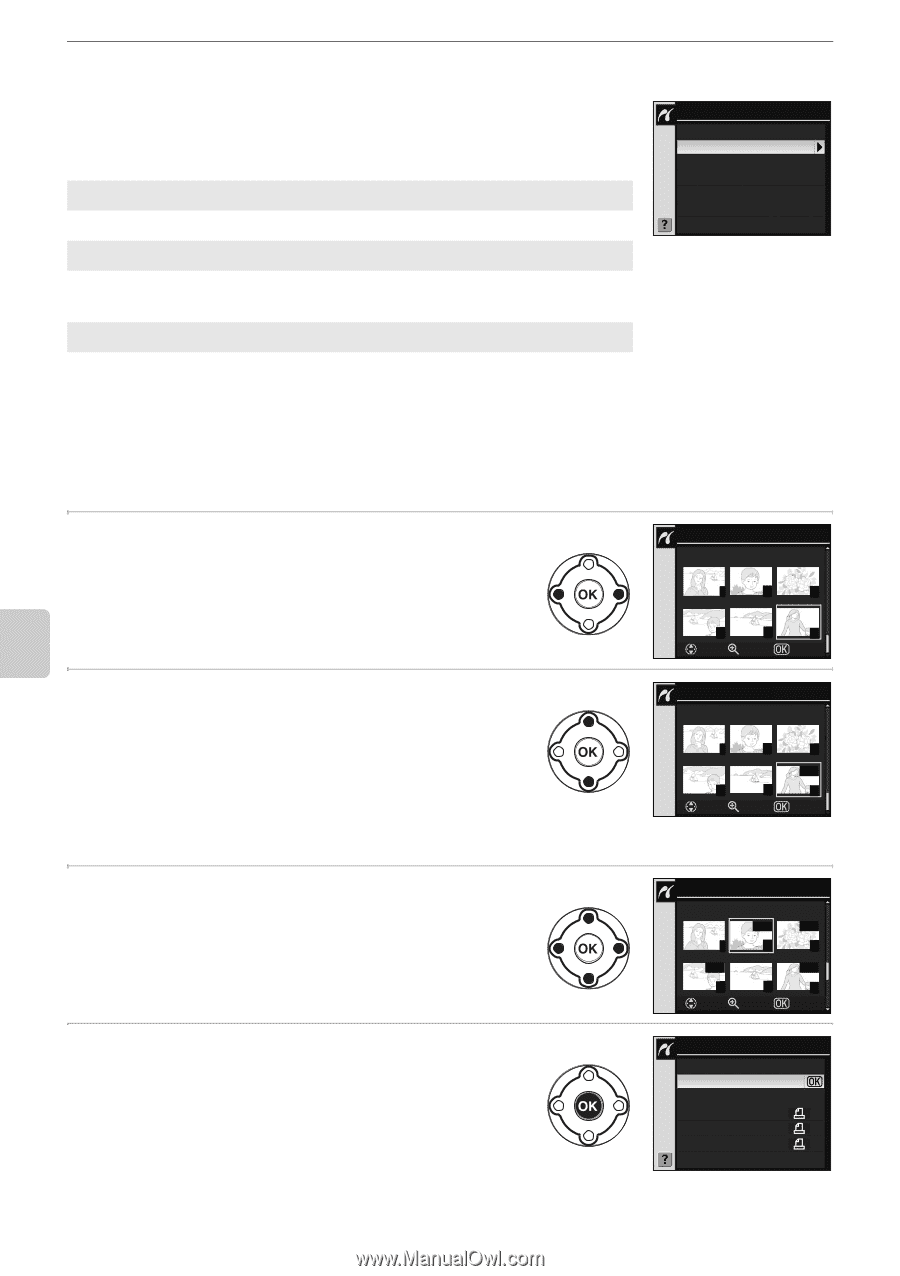
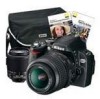
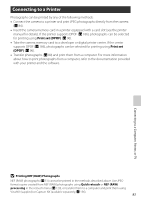
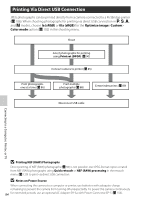
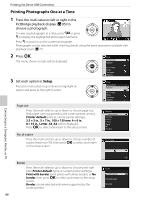
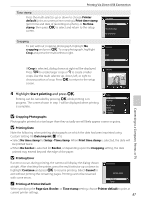
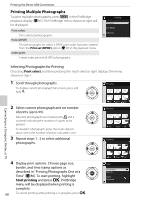
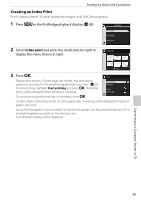
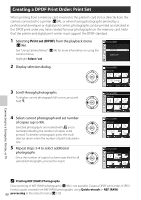
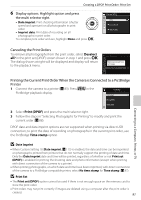
Printing Via Direct USB Connection Printing Multiple Photographs To print multiple photographs, press O in the PictBridge playback display (A 85). The PictBridge menu shown at right will be displayed. Print select Print selected photographs. Print (DPOF) Print photographs for which a DPOF print order has been created from the Print set (DPOF) option (A 90) in the playback menu. Index print Create index print of all JPEG photographs. Pictbridge Print select Print (DPOF) Index print Connecting to a Computer, Printer, or TV Selecting Photographs for Printing Choosing Print select and then pressing the multi selector right displays the menu shown in step 1. 1 Scroll through photographs. To display current photograph full screen, press and hold K. Print select 9 10 11 2 Select current photograph and set number of prints (up to 99). Selected photographs are marked with m and a numeral indicating the number of copies to be printed. To deselect photograph, press the multi selector down when the number of prints indicated is one. 3 Repeat steps 1-2 to select additional photographs. 4 Display print options. Choose page size, border, and time stamp options as described in "Printing Photographs One at a Time" (A 86). To start printing, highlight Start printing and press Q. PictBridge menu will be displayed when printing is complete. 88 To cancel printing while printing is in progress, press Q. 12 13 14 Set Zoom OK Print select 9 10 12 13 Set Zoom 11 01m 14 OK Print select 9 02m 12 Set 04 m 10 13 Zoom 02m 11 01m 14 OK Setup Start printing Page size Border Time stamp
-
 1
1 -
2
-
3
-
4
-
5
-
6
-
7
-
8
-
9
-
10
-
11
-
12
-
13
-
14
-
15
-
16
-
17
-
18
-
19
-
20
-
21
-
22
-
23
-
24
-
25
-
26
-
27
-
28
-
29
-
30
-
31
-
32
-
33
-
34
-
35
-
36
-
37
-
38
-
39
-
40
-
41
-
42
-
43
-
44
-
45
-
46
-
47
-
48
-
49
-
50
-
51
-
52
-
53
-
54
-
55
-
56
-
57
-
58
-
59
-
60
-
61
-
62
-
63
-
64
-
65
-
66
-
67
-
68
-
69
-
70
-
71
-
72
-
73
-
74
-
75
-
76
-
77
-
78
-
79
-
80
-
81
-
82
-
83
-
84
-
85
-
86
-
87
-
88
-
89
-
90
-
91
-
92
-
93
-
94
-
 95
95 -
 96
96 -
 97
97 -
 98
98 -
 99
99 -
 100
100 -
 101
101 -
 102
102 -
 103
103 -
 104
104 -
 105
105 -
106
-
107
-
108
-
109
-
110
-
111
-
112
-
113
-
114
-
115
-
116
-
117
-
118
-
119
-
120
-
121
-
122
-
123
-
124
-
125
-
126
-
127
-
128
-
129
-
130
-
131
-
132
-
133
-
134
-
135
-
136
-
137
-
138
-
139
-
140
-
141
-
142
-
143
-
144
-
145
-
146
-
147
-
148
-
149
-
150
-
151
-
152
-
153
-
154
-
155
-
156
-
157
-
158
-
159
-
160
-
161
-
162
-
163
-
164
-
165
-
166
-
167
-
168
-
169
-
170
-
171
-
172
-
173
-
174
-
175
-
176
-
177
-
178
-
179
-
180
-
181
-
182
-
183
-
184
-
185
-
186
-
187
-
188
-
189
-
190
-
191
-
192
-
193
-
194
-
195
-
196
-
197
-
198
-
199
-
200
-
201
-
202
-
203
-
204
 |
 |