Nikon 9609 D60 User's Manual - Page 172
Caring for the Optical Low-Pass Filter, Clean image sensor, Clean now
 |
UPC - 018208096091
View all Nikon 9609 manuals
Add to My Manuals
Save this manual to your list of manuals |
Page 172 highlights
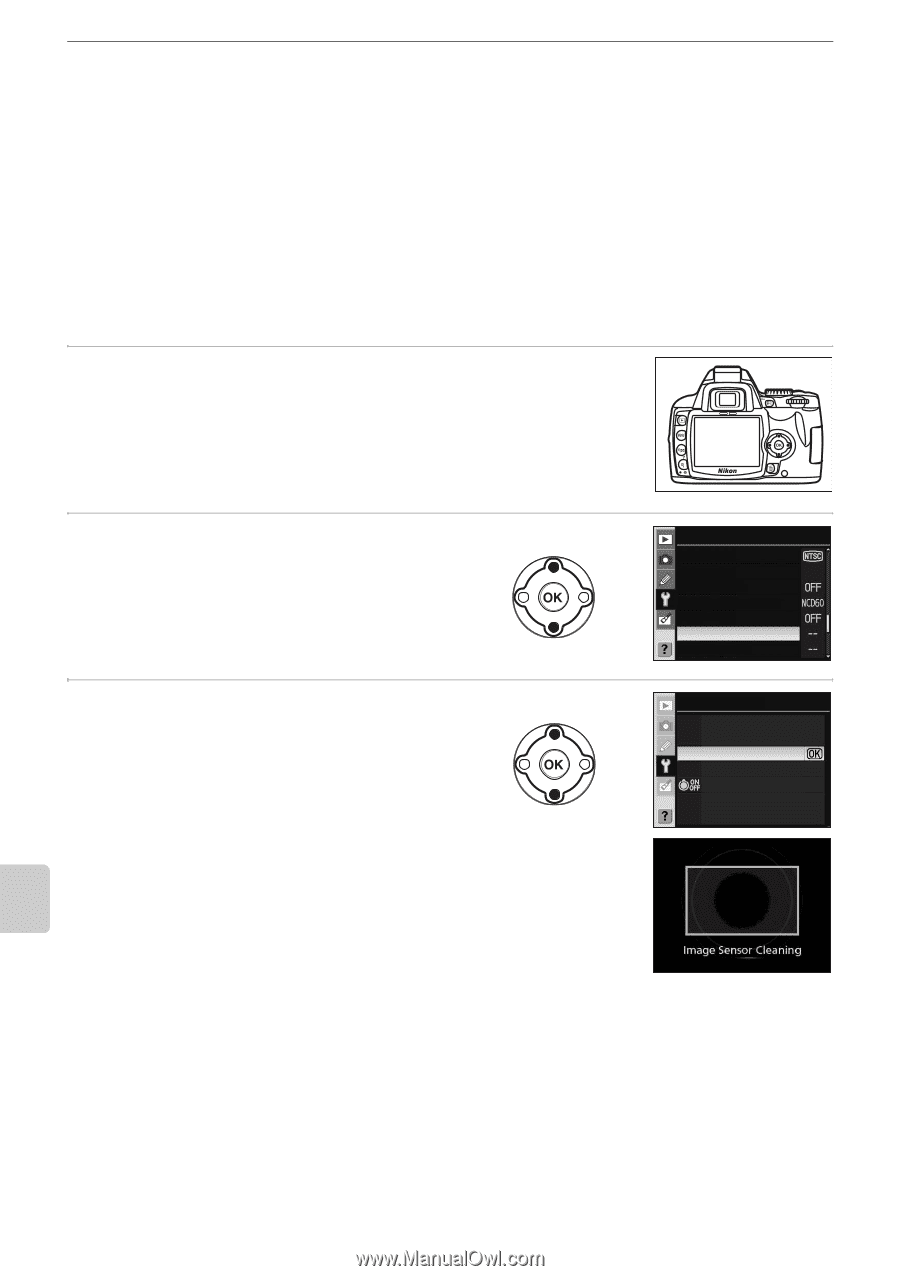
Caring for the Camera Caring for the Optical Low-Pass Filter Automatic Low-Pass Filter Cleaning (Clean Image Sensor) The image sensor that acts as the camera's photograph element is fitted with a low-pass filter to prevent moiré. If you suspect that dirt or dust on the filter is appearing in photographs, you can clean the filter using the Clean image sensor option in the setup menu. The filter can be cleaned at any time using the Clean now option, or cleaning can be performed automatically when the camera is turned on or off. Cleaning from the Setup Menu Option 1 Place the camera base down. Image sensor cleaning is most effective when the camera is placed base down as shown at right. 2 Display the Clean image sensor menu. Highlight Clean image sensor in the setup menu and press the multi selector right. 3 Select Clean now. Highlight Clean now and press Q to start cleaning. The message shown at right will be displayed while cleaning is in progress. SETUP MENU Video mode Language En Image comment Folders File no. sequence Clean image sensor Mirror lock-up Clean image sensor Clean now Clean at Maximizing the Life of the Camera C Image Sensor Cleaning The following interrupt image sensor cleaning: - Pressing the shutter-release button. - Pressing D, F, C, or A. Cleaning is performed by vibrating the image sensor. If dust cannot be fully removed using the options in the Clean image sensor menu, clean the image sensor manually (A 162) or consult a Nikon-authorized service representative. If image sensor cleaning is performed several times in succession, image sensor cleaning may be temporarily disabled to protect the camera's internal circuitry. Cleaning can be performed again after a short wait. 160
-
 1
1 -
2
-
3
-
4
-
5
-
6
-
7
-
8
-
9
-
10
-
11
-
12
-
13
-
14
-
15
-
16
-
17
-
18
-
19
-
20
-
21
-
22
-
23
-
24
-
25
-
26
-
27
-
28
-
29
-
30
-
31
-
32
-
33
-
34
-
35
-
36
-
37
-
38
-
39
-
40
-
41
-
42
-
43
-
44
-
45
-
46
-
47
-
48
-
49
-
50
-
51
-
52
-
53
-
54
-
55
-
56
-
57
-
58
-
59
-
60
-
61
-
62
-
63
-
64
-
65
-
66
-
67
-
68
-
69
-
70
-
71
-
72
-
73
-
74
-
75
-
76
-
77
-
78
-
79
-
80
-
81
-
82
-
83
-
84
-
85
-
86
-
87
-
88
-
89
-
90
-
91
-
92
-
93
-
94
-
95
-
96
-
97
-
98
-
99
-
100
-
101
-
102
-
103
-
104
-
105
-
106
-
107
-
108
-
109
-
110
-
111
-
112
-
113
-
114
-
115
-
116
-
117
-
118
-
119
-
120
-
121
-
122
-
123
-
124
-
125
-
126
-
127
-
128
-
129
-
130
-
131
-
132
-
133
-
134
-
135
-
136
-
137
-
138
-
139
-
140
-
141
-
142
-
143
-
144
-
145
-
146
-
147
-
148
-
149
-
150
-
151
-
152
-
153
-
154
-
155
-
156
-
157
-
158
-
159
-
160
-
161
-
162
-
163
-
164
-
165
-
166
-
 167
167 -
 168
168 -
 169
169 -
 170
170 -
 171
171 -
 172
172 -
 173
173 -
 174
174 -
 175
175 -
 176
176 -
 177
177 -
178
-
179
-
180
-
181
-
182
-
183
-
184
-
185
-
186
-
187
-
188
-
189
-
190
-
191
-
192
-
193
-
194
-
195
-
196
-
197
-
198
-
199
-
200
-
201
-
202
-
203
-
204
 |
 |