Nintendo GAMECUBE Instruction Booklet - Page 13
Erasing a File, Formatting a Memory Card
 |
UPC - 045496940027
View all Nintendo GAMECUBE manuals
Add to My Manuals
Save this manual to your list of manuals |
Page 13 highlights
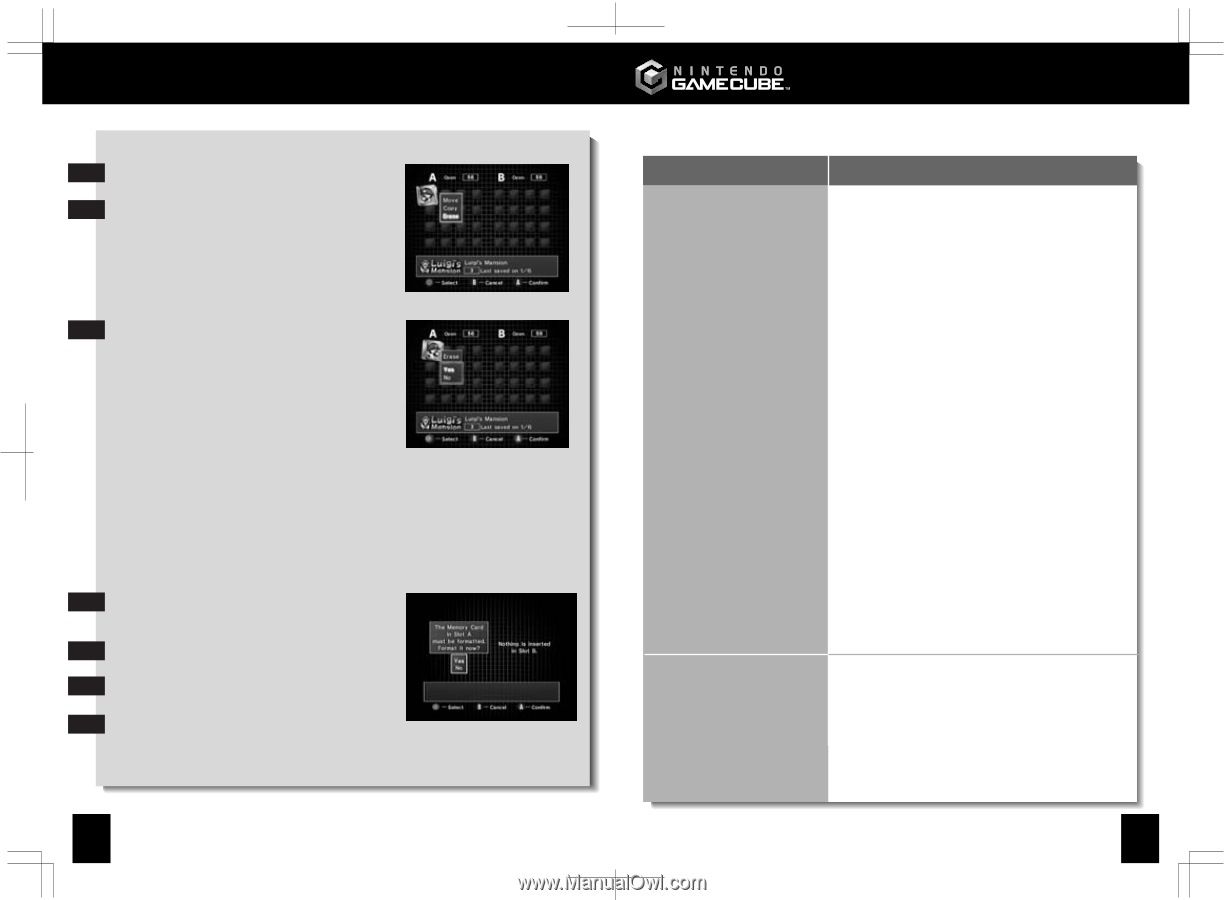
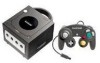
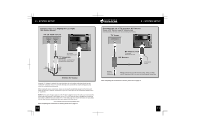
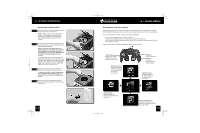
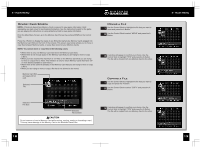
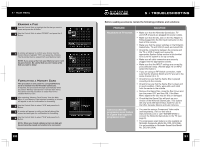
4 • MAIN MENU Erasing a File Use the Control Stick to highlight the file that you want to 1 erase and press the A Button. Use the Control Stick to select "ERASE" and press the A 2 Button. A window will appear to confirm your choice. Use the 3 Control Stick to highlight "YES" and press the A Button. The file will be then be erased from your Memory Card. NOTE: If you erase a file from your Memory Card, it will be gone forever. Be careful that you don't erase a file that you want to keep! Formatting a Memory Card This procedure is only used if a corrupted Memory Card is inserted into the Nintendo GameCube. If required, this procedure will begin automatically when you select "Memory Card Screen" from the main menu. You cannot use this procedure to erase files from a useable Memory Card. After selecting "Memory Card Screen" from the Main 1 Menu, if your Memory Card requires formatting, a window will appear to ask for confirmation for formatting. Use the Control Stick to select "YES" and press the A 2 Button. A window will appear to notify you that all data will be 3 erased and ask again for confirmation for formatting. Use the Control Stick to select "YES" and press the A 4 Button. NOTE: When you format a Memory Card, all data will be permanently erased and unable to be recovered. 20 5 • TROUBLESHOOTING Before seeking assistance review the following problems and solutions: PROBLEM No picture on TV screen. Cannot access the progressive scan feature in a game that supports progressive scan. SOLUTION • Make sure that the Nintendo GameCube, TV and VCR (if used) are plugged into power outlets. • Make sure that the DC Jack on the AC Adapter is firmly plugged into the DC Input Connector on the back of the console. • Make sure that the power switches on the Nintendo GameCube, TV and VCR (if used) are turned ON. • Check the connections between the console and the TV or VCR (if used) and review the appropriate System Setup section in this booklet to be sure the system is set up correctly. • Make sure all cable connectors are securely plugged into the appropriate sockets. • Make sure that the INPUT settings are correct for your particular setup. (Review page 12 on INPUT select information.) • If you are using an RF Switch connection, make sure that the Channel Switch and TV are set to the same channel (3 or 4). • Check to be sure that the Game Disc is placed correctly into the console. • Check to be sure that the Game Disc is clean and in good condition. If dirty, wipe with a soft cloth from the center to the outside. • Remove the Game Disc, close the Disc Cover and turn the power OFF and then ON. If the Main Menu appears the disc may be dirty or damaged. • Check that the Game Disc will work on your version of the Nintendo GameCube. This system will only work with Game Discs made for use in the USA, Canada, Mexico and Latin America. • You must be using a Component Video cable (sold separately, visit our web site at www.nintendo.com or call 1-800-255-3700) to connect the Nintendo GameCube to the TV (see page 9). • The progressive scan feature is only available on Nintendo Gamecube Model No. DOL-001(USA). It is not available on Nintendo GameCube Model No. DOL101(USA). 21
-
 1
1 -
2
-
3
-
4
-
5
-
6
-
7
-
 8
8 -
 9
9 -
 10
10 -
 11
11 -
 12
12 -
 13
13 -
 14
14 -
 15
15 -
 16
16
 |
 |