Nokia 5190 User Guide - Page 23
Draw a new picture, Save a picture, Transfer a group logo to your phone, Transfer a picture message
 |
View all Nokia 5190 manuals
Add to My Manuals
Save this manual to your list of manuals |
Page 23 highlights
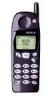
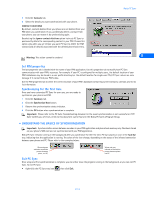
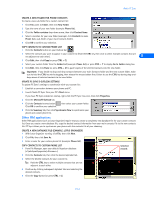
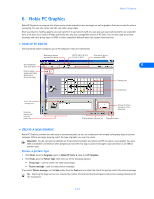
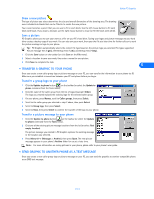
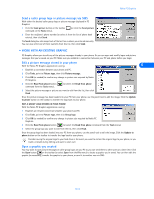
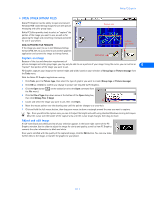
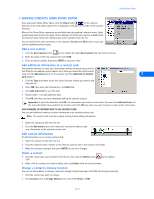
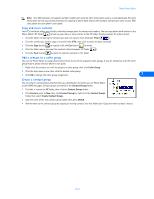
Nokia PC Graphics Draw a new picture The type of picture you select determines the size and overall dimensions of the drawing area. The drawing area is divided into blocks that can be filled in to create the new picture. Your cursor becomes a pencil that you can use to fill in each block. Use the left mouse button to fill each block with black. If you make a mistake, use the right mouse button to erase (or fill the block with white). Save a picture PC Graphics allows you to save your work as a file on your PC's hard drive. Saving your logos and picture messages to your hard drive creates a backup copy of your work. You can also save your work, then open the file at a later time for further edits or to send the picture message or logo to your phone. Tip: PC Graphics automatically selects the correct file type based on the picture type you selected. File types supported: Picture message files (*.gms), OTA Bitmap Files (*.otb), and Bitmap files (*.bmp). 1 Click the Save button on the toolbar (or click Save on the File menu). 2 Select a location to save your work, then enter a name for your picture. 3 Click Save to complete the task. 6 • TRANSFER A GRAPHIC TO YOUR PHONE Once you create a new caller group logo or picture message on your PC, you can transfer the information to your phone via IR. Make sure you establish a connection between your PC and phone before you begin. Transfer a group logo to your phone 1 Click the Update to phone button on the toolbar (or select the Update to phone command from the Tools menu). 2 Click the name of the caller group from the list of logos (example: Other). The logo you created replaces the existing logo for the selected caller group. 3 On your phone, press Names, scroll to Caller groups, then press Select. 4 Scroll to the caller group you selected in step 2 above, then press Select. 5 Scroll to Group logo, then press Select. 6 Scroll to View, then press Select to confirm the transfer of the logo to your phone. Transfer a picture message to your phone 1 Click the Update to phone button on the toolbar (or select the Update to phone command from the Tools menu). 2 Click one of the existing picture message locations from the list (or select First empty location). The picture message you created in PC Graphics replaces the existing message in the location you selected. 3 Press Menu 01-7 (Messages > Archive), then press Open. The new picture message appears in your phone's Archive folder for use at a later time. Note: For more information on saving pictures in your phone, please refer to your phone's user guide. • SEND GRAPHIC TO ANOTHER PHONE AS A TEXT MESSAGE Once you create a new caller group logo or picture message on your PC, you can send the graphics to another compatible phone as an SMS text message. [ 19 ]
-
 1
1 -
2
-
3
-
4
-
5
-
6
-
7
-
8
-
9
-
10
-
11
-
12
-
13
-
14
-
15
-
16
-
17
-
 18
18 -
 19
19 -
 20
20 -
 21
21 -
 22
22 -
 23
23 -
 24
24 -
 25
25 -
 26
26 -
 27
27 -
 28
28 -
29
-
30
-
31
-
32
-
33
-
34
-
35
-
36
-
37
-
38
-
39
-
40
-
41
-
42
-
43
-
44
-
45
-
46
-
47
-
48
-
49
-
50
-
51
-
52
 |
 |