Nokia 5190 User Guide - Page 27
Add a new contact, Add additional information to a contact card, Edit contact information, Delete
 |
View all Nokia 5190 manuals
Add to My Manuals
Save this manual to your list of manuals |
Page 27 highlights
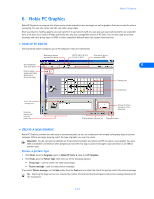
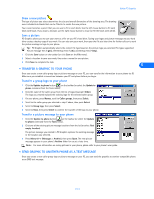
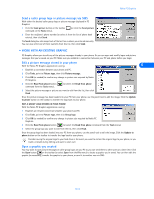
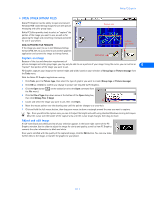
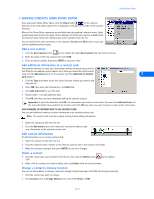
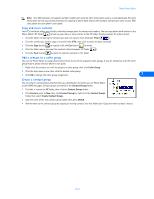
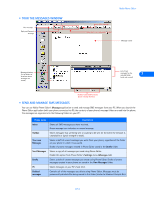
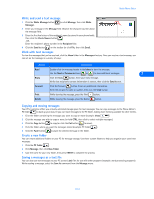
Nokia Phone Editor • MANAGE CONTACTS USING PHONE EDITOR Once you launch Nokia Phone Editor, click the Phone folder in the contacts directory. A list of all phone book entries is displayed in the pane to the right of the contacts directory. Many of the Phone Editor commands are available from the program's shortcut menu. Select a phone book entry to edit, then right-click to display a list of the menu options available from the shortcut menu. Select the command you wish to perform from the list. You can also find the same commands in the program's Contact and Edit menus, or you can use the available toolbar buttons. Add a new contact 1 Click the New Contact button on the toolbar (or select New Contact from the shortcut menu). 2 Enter the name of the new contact, then press TAB. 3 Enter the phone number, then press ENTER to save your entry Add additional information to a contact card Your phone's memory can store up to five phone numbers per name and up to four text fields (e-mail address, postal address, etc.). Once you create the initial contact card, click the Add entry button on the contact card. The Add Entry to Contact 7 Card appears. 1 Click the Type drop-down arrow, then select the type of data you want to add from the list. 2 Press TAB, then enter the information in the Data field. 3 Click Add and Create to save the data. 4 Repeat steps 1-3 to add additional data. 5 Click OK only when you have completed editing the selected contact. Important: If you enter data then click OK, the information you entered is not saved. You must click Add and Create for the new information to be added to the contact card. Click OK only when you want to return to the contact card viewer. ADD NUMBERS OR INFORMATION TO AN EXISTING CARD You can add additional numbers or other information to an existing contact card. Note: The contact card must be in phone memory before adding information. 1 Select the contact to edit from the list. 2 Click the Add entry button, then follow the instructions above to add new information to the selected contact card. Edit contact information To edit information in an existing contact card: 1 Select the contact to edit from the list. 2 Click the contact's name, number, or the field you want to edit in the contact card viewer. 3 Make the necessary changes, then press ENTER to save your changes. Delete a contact • Click the contact you want to delete from the list, then click the Delete button -OR- on the toolbar. • Right-click the contact you want to delete, then click Delete from the shortcut menu. Change a contact's memory location You can use Phone Editor to change a contact's storage location (example: from SIM card to phone memory). 1 Click the contact you want to change. 2 Click Contact, point to Change Memory, then click either Phone or SIM. [ 23 ]
-
 1
1 -
2
-
3
-
4
-
5
-
6
-
7
-
8
-
9
-
10
-
11
-
12
-
13
-
14
-
15
-
16
-
17
-
18
-
19
-
20
-
21
-
 22
22 -
 23
23 -
 24
24 -
 25
25 -
 26
26 -
 27
27 -
 28
28 -
 29
29 -
 30
30 -
 31
31 -
 32
32 -
33
-
34
-
35
-
36
-
37
-
38
-
39
-
40
-
41
-
42
-
43
-
44
-
45
-
46
-
47
-
48
-
49
-
50
-
51
-
52
 |
 |
