Nokia 6280 User Manual - Page 76
Record sound, List of recordings, Define a storage folder, Equalizer, Stereo widening
 |
View all Nokia 6280 manuals
Add to My Manuals
Save this manual to your list of manuals |
Page 76 highlights
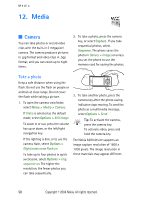
Media Record sound 1. Select Menu > Media > Voice recorder. To use the graphical keys , , or on the display, scroll left or right to the desired key, and select it. 2. To start the recording, select . To start the recording during a call, select Options > Record. While recording a call, all parties to the call hear a faint beeping sound about every 5 seconds. When recording a call, hold the phone in the normal position near to your ear. 3. To end the recording, select . The recording is saved in Gallery > Recordings. 4. To listen to the latest recording, select Options > Play last recorded. 5. To send the last recording using infrared, Bluetooth wireless technology, or a multimedia message, select Options > Send last recorded. List of recordings Select Menu > Media > Voice recorder > Options > Recordings list. The list of folders in the Gallery is shown. Open Recordings to see the list with recordings. Select Options to select options for files in the Gallery. See "Gallery," p. 57. Define a storage folder To use another folder than Recordings as the default folder in Gallery, select Menu > Media > Voice recorder > Options > Select memory. Scroll to a folder, and select Set. ■ Equalizer You can control the sound quality when using the music player by amplifying or diminishing frequency bands. Select Menu > Media > Equaliser. To activate a set, scroll to one of the equalizer sets, and select Activate. To view, edit, or rename a selected set, select Options > View, Edit, or Rename. Not all sets can be edited or renamed. ■ Stereo widening To enhance the sound that is available in stereo with a wider stereo effect, select Menu > Media > Stereo widening > On. Copyright © 2006 Nokia. All rights reserved. 63
-
 1
1 -
2
-
3
-
4
-
5
-
6
-
7
-
8
-
9
-
10
-
11
-
12
-
13
-
14
-
15
-
16
-
17
-
18
-
19
-
20
-
21
-
22
-
23
-
24
-
25
-
26
-
27
-
28
-
29
-
30
-
31
-
32
-
33
-
34
-
35
-
36
-
37
-
38
-
39
-
40
-
41
-
42
-
43
-
44
-
45
-
46
-
47
-
48
-
49
-
50
-
51
-
52
-
53
-
54
-
55
-
56
-
57
-
58
-
59
-
60
-
61
-
62
-
63
-
64
-
65
-
66
-
67
-
68
-
69
-
70
-
 71
71 -
 72
72 -
 73
73 -
 74
74 -
 75
75 -
 76
76 -
 77
77 -
 78
78 -
 79
79 -
 80
80 -
 81
81 -
82
-
83
-
84
-
85
-
86
-
87
-
88
-
89
-
90
-
91
-
92
-
93
-
94
-
95
-
96
-
97
-
98
-
99
-
100
-
101
-
102
-
103
-
104
-
105
-
106
-
107
-
108
-
109
-
110
-
111
-
112
 |
 |
