Nokia Digital Pen SU-1B User Guide - Page 17
Using the Nokia Digital Pen with a PC, Installing the PC application - driver
 |
View all Nokia Digital Pen SU-1B manuals
Add to My Manuals
Save this manual to your list of manuals |
Page 17 highlights
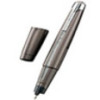
4. Using the Nokia Digital Pen with a PC ■ Installing the PC application To use your pen with your PC, you need to install the PC application provided on CD-ROM. 1. Insert the CD in the CD drive of your PC and follow the instructions on the screen. 2. Plug the Connectivity Stand into the USB port of your PC and connect it with a charger cable to an AC wall outlet, if you want to charge the pen while it is in the Connectivity Stand, see Figure 2 (2). 3. Remove the cap from the pen and place the pen in the Connectivity Stand. Your PC detects the new hardware and loads the appropriate drivers automatically. Your PC is ready to receive and save notes from your pen. Copyright © 2003 Nokia. All rights reserved. 17
-
 1
1 -
2
-
3
-
4
-
5
-
6
-
7
-
8
-
9
-
10
-
11
-
 12
12 -
 13
13 -
 14
14 -
 15
15 -
 16
16 -
 17
17 -
 18
18 -
 19
19 -
 20
20 -
 21
21 -
 22
22 -
23
-
24
 |
 |

17
Copyright
©
2003 Nokia. All rights reserved.
4.
Using the Nokia Digital Pen with a PC
■
Installing the PC application
To use your pen with your PC, you need to install the PC application provided on
CD-ROM.
1.
Insert the CD in the CD drive of your PC and follow the instructions on the
screen.
2.
Plug the Connectivity Stand into the USB port
of your PC and connect it with a charger cable
to an AC wall outlet, if you want to charge the
pen while it is in the Connectivity Stand, see
Figure 2 (2).
3.
Remove the cap from the pen and place the pen
in the Connectivity Stand.
Your PC detects the new hardware and loads
the appropriate drivers automatically.
Your PC is ready to receive and save notes from
your pen.