Nokia IP390 Installation Guide - Page 33
Using Nokia Network Voyager - console settings
 |
View all Nokia IP390 manuals
Add to My Manuals
Save this manual to your list of manuals |
Page 33 highlights
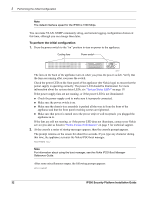
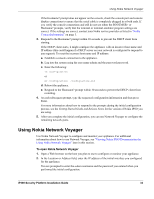
Using Nokia Network Voyager If the Hostname? prompt does not appear on the console, check the console port and console display connections to ensure that the serial cable is completely plugged in at both ends. If you verify the console connections and still do not see either the BOOTMGR> or Hostname? prompts, verify that the terminal or terminal emulator program settings are correct. If the settings are correct, contact your Nokia service provider as listed in "Nokia Contact Information" on page 3. 3. Respond to the Hostname? prompt within 30 seconds to prevent the DHCP client from starting. If the DHCP client starts, it might configure the appliance with an incorrect host name and IP address (this could happen if a DHCP server on your network is configured to respond to any request). To reset the incorrect host name and IP address: a. Establish a console connection to the appliance. b. Log into the system using the user name admin and the password password. c. Enter the following: rm /config/active or mv /config/active /config/active.old d. Reboot the appliance. e. Respond to the Hostname? prompt within 30 seconds to prevent the DHCP client from restarting. 4. At each subsequent prompt, type the requested configuration information and then press Enter. For more information about how to respond to the prompts during the initial configuration process, see the Getting Started Guide and Release Notes for the version of Nokia IPSO you are using. 5. After you complete the initial configuration, you can use Network Voyager to configure the remaining network ports. Using Nokia Network Voyager Use Nokia Network Voyager to configure and monitor your appliance. For additional information about how to use Network Voyager, see "Viewing Nokia IPSO Documentation by Using Nokia Network Voyager" later in this section. To open Nokia Network Voyager 1. Open a Web browser on the host you plan to use to configure or monitor your appliance. 2. In the Location or Address field, enter the IP address of the initial interface you configured for the appliance. You are prompted to enter the admin username and the password you entered when you performed the initial configuration. IP390 Security Platform Installation Guide 33
-
 1
1 -
2
-
3
-
4
-
5
-
6
-
7
-
8
-
9
-
10
-
11
-
12
-
13
-
14
-
15
-
16
-
17
-
18
-
19
-
20
-
21
-
22
-
23
-
24
-
25
-
26
-
27
-
 28
28 -
 29
29 -
 30
30 -
 31
31 -
 32
32 -
 33
33 -
 34
34 -
 35
35 -
 36
36 -
 37
37 -
 38
38 -
39
-
40
-
41
-
42
-
43
-
44
-
45
-
46
-
47
-
48
-
49
-
50
-
51
-
52
-
53
-
54
-
55
-
56
-
57
-
58
-
59
-
60
-
61
-
62
-
63
-
64
-
65
-
66
-
67
-
68
-
69
-
70
-
71
-
72
-
73
-
74
-
75
-
76
-
77
-
78
-
79
-
80
-
81
-
82
-
83
-
84
-
85
-
86
-
87
-
88
-
89
-
90
-
91
-
92
-
93
-
94
-
95
-
96
-
97
 |
 |
