Oki B6200 B6200/6300 Series Setup Guide - English - Page 27
cover into the notches of the printer 1. Fit the protrusions at
 |
View all Oki B6200 manuals
Add to My Manuals
Save this manual to your list of manuals |
Page 27 highlights
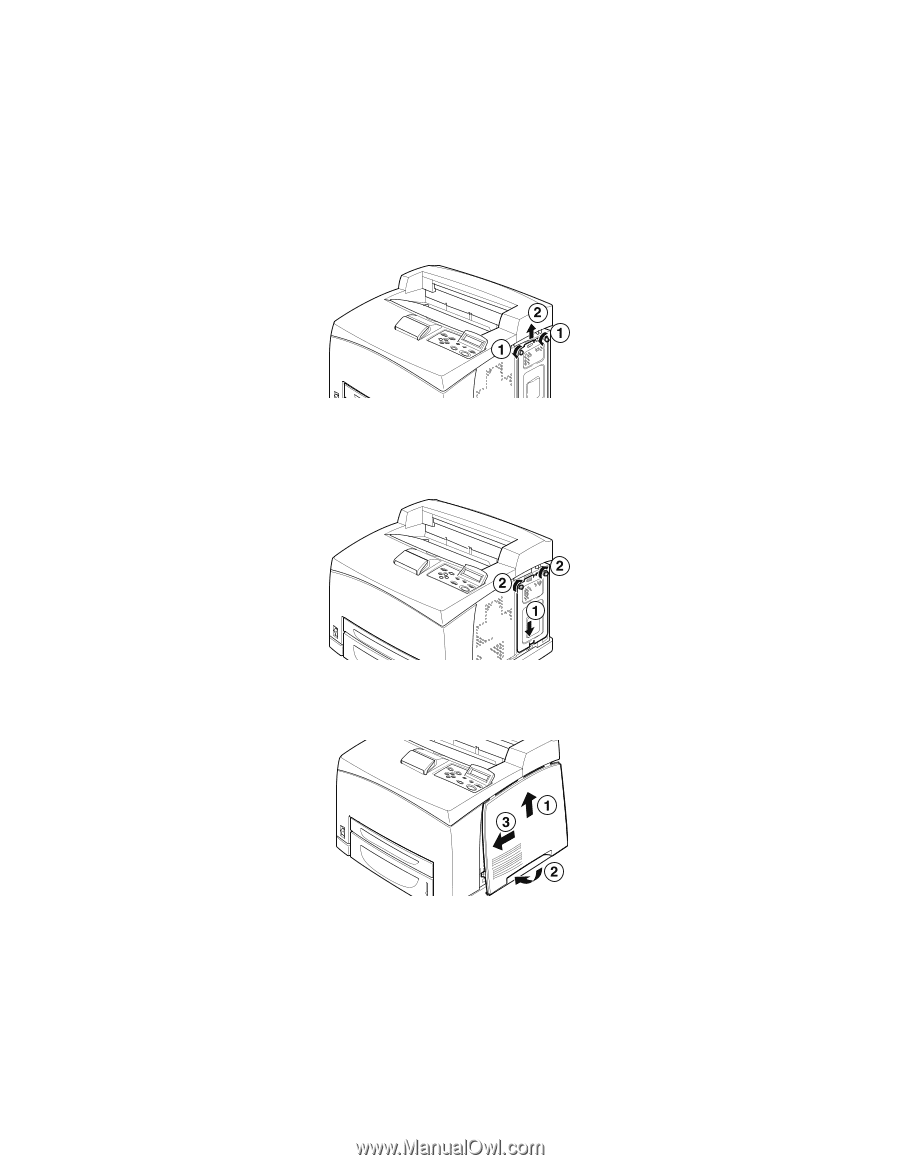
3. Remove the two screws on top of the metal cover (1), and pull the metal cover upwards (2). Closing the printer 1. Align and insert the protrusion at the bottom of the metal cover into the notch of the printer (1), and tighten the two screws on the top of the cover (2). 2. Align and insert the protrusions at the top of the right detachable cover into the notches of the printer (1). Fit the protrusions at the bottom of the cover into the printer (2) and slide the cover towards the front of the printer (3). 3. Tighten the screw on the right detachable cover. INSTALLATION AND RELOCATION PROCEDURE > 27
-
 1
1 -
2
-
3
-
4
-
5
-
6
-
7
-
8
-
9
-
10
-
11
-
12
-
13
-
14
-
15
-
16
-
17
-
18
-
19
-
20
-
21
-
 22
22 -
 23
23 -
 24
24 -
 25
25 -
 26
26 -
 27
27 -
 28
28 -
 29
29 -
 30
30 -
 31
31 -
 32
32 -
33
-
34
-
35
-
36
-
37
-
38
-
39
-
40
-
41
-
42
-
43
-
44
-
45
-
46
-
47
-
48
-
49
-
50
-
51
-
52
-
53
-
54
-
55
-
56
-
57
-
58
-
59
-
60
-
61
-
62
-
63
-
64
-
65
-
66
 |
 |
INSTALLATION AND RELOCATION PROCEDURE > 27
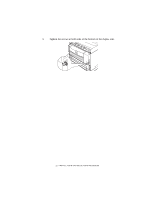
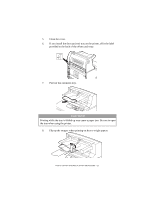
3.
Remove the two screws on top of the metal cover (1), and pull the
metal cover upwards (2).
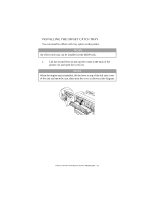
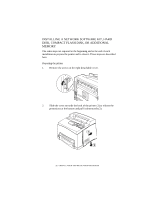
Closing the printer
1.
Align and insert the protrusion at the bottom of the metal cover
into the notch of the printer (1), and tighten the two screws on the
top of the cover (2).
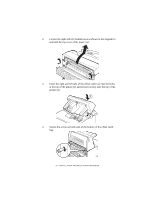
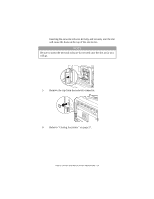
2.
Align and insert the protrusions at the top of the right detachable
cover into the notches of the printer (1). Fit the protrusions at the
bottom of the cover into the printer (2) and slide the cover towards
the front of the printer (3).
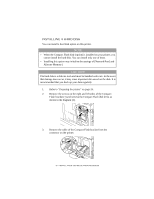
3.
Tighten the screw on the right detachable cover.