Oki B6200 B6200/6300 Series Setup Guide - English - Page 31
Tighten the screws on both sides of the hard disk.
 |
View all Oki B6200 manuals
Add to My Manuals
Save this manual to your list of manuals |
Page 31 highlights
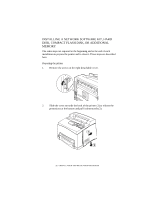
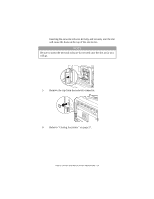
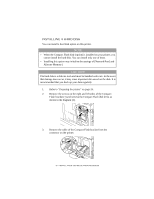
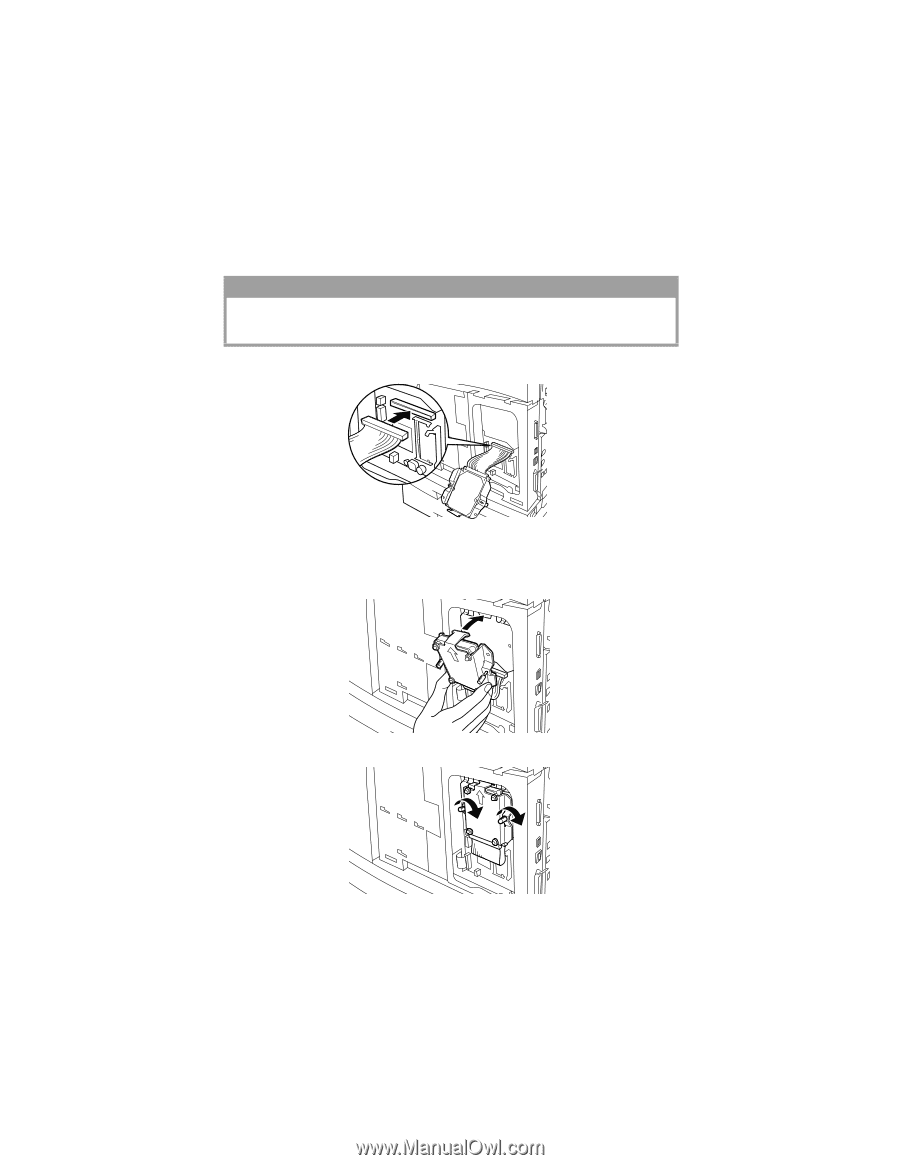
4. Connect the cable of the hard disk to the connector on the printer as shown in the diagram. CAUTION! When connecting the cable, hold the disk firmly by hand to prevent it from dropping. 5. Hold the hard disk as shown in the diagram, and install it in the printer. Align the arrow on the hard disk with the arrow on the printer, and insert the bracket at the top of the disk into the install position. 6. Tighten the screws on both sides of the hard disk. 7. Refer to "Closing the printer" on page 27. INSTALLATION AND RELOCATION PROCEDURE > 31
-
 1
1 -
2
-
3
-
4
-
5
-
6
-
7
-
8
-
9
-
10
-
11
-
12
-
13
-
14
-
15
-
16
-
17
-
18
-
19
-
20
-
21
-
22
-
23
-
24
-
25
-
 26
26 -
 27
27 -
 28
28 -
 29
29 -
 30
30 -
 31
31 -
 32
32 -
 33
33 -
 34
34 -
 35
35 -
 36
36 -
37
-
38
-
39
-
40
-
41
-
42
-
43
-
44
-
45
-
46
-
47
-
48
-
49
-
50
-
51
-
52
-
53
-
54
-
55
-
56
-
57
-
58
-
59
-
60
-
61
-
62
-
63
-
64
-
65
-
66
 |
 |
INSTALLATION AND RELOCATION PROCEDURE > 31
4.
Connect the cable of the hard disk to the connector on the printer
as shown in the diagram.
5.
Hold the hard disk as shown in the diagram, and install it in the
printer. Align the arrow on the hard disk with the arrow on the
printer, and insert the bracket at the top of the disk into the install
position.
6.
Tighten the screws on both sides of the hard disk.
7.
Refer to
“Closing the printer” on page 27
.
CAUTION!
When connecting the cable, hold the disk firmly by hand to prevent it from
dropping.