Oki C532dn Wireless LAN Manual - Page 5
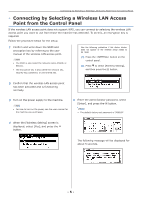
Connecting by Selecting a Wireless LAN Access Point from the Control Panel
 |
View all Oki C532dn manuals
Add to My Manuals
Save this manual to your list of manuals |
Page 5 highlights
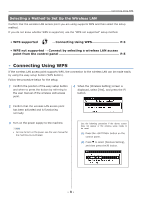
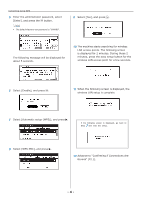
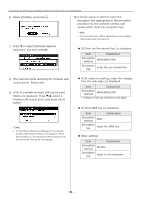
Connecting by Selecting a Wireless LAN Access Point from the Control Panel ••Connecting by Selecting a Wireless LAN Access Point from the Control Panel If the wireless LAN access point does not support WPS, you can connect by selecting the wireless LAN access point you want to use from those the machine has detected. To do this, an encryption key is required. Follow the procedure below for the setup. 1 Confirm and write down the SSID and encryption key by referring to the user manual of the wireless LAN access point. Memo •• The SSID is also called the network name, ESSID, or ESS-ID. •• The encryption key is also called the network key, security key, password, or pre-shared key. Use the following procedure if the above screen does not appear or the wireless setup needs to be reset. (1) Press the button on the control panel. (2) Press to select [Wireless Setting], and then press the OK button. 2 Confirm that the wireless LAN access point has been activated and is functioning normally. 3 Turn on the power supply to the machine. Memo •• For how to turn on the power, see the user manual for the machine you purchased. 5 Enter the administrator password, select [Enter], and press the OK button. Memo •• The default factory-set password is "999999". 4 When the [Wireless Setting] screen is displayed, select [Yes], and press the OK button. The following message will be displayed for about 5 seconds. - 5 -
-
 1
1 -
 2
2 -
 3
3 -
 4
4 -
 5
5 -
 6
6 -
 7
7 -
 8
8 -
 9
9 -
 10
10 -
 11
11 -
12
-
13
-
14
-
15
 |
 |
