Olympus E-PM1 E-PM1 Instruction Manual (English) - Page 48
Setting the image aspect, ISO sensitivity, Record mode, Pixel count, Frame rate, File format - sensor size
 |
View all Olympus E-PM1 manuals
Add to My Manuals
Save this manual to your list of manuals |
Page 48 highlights
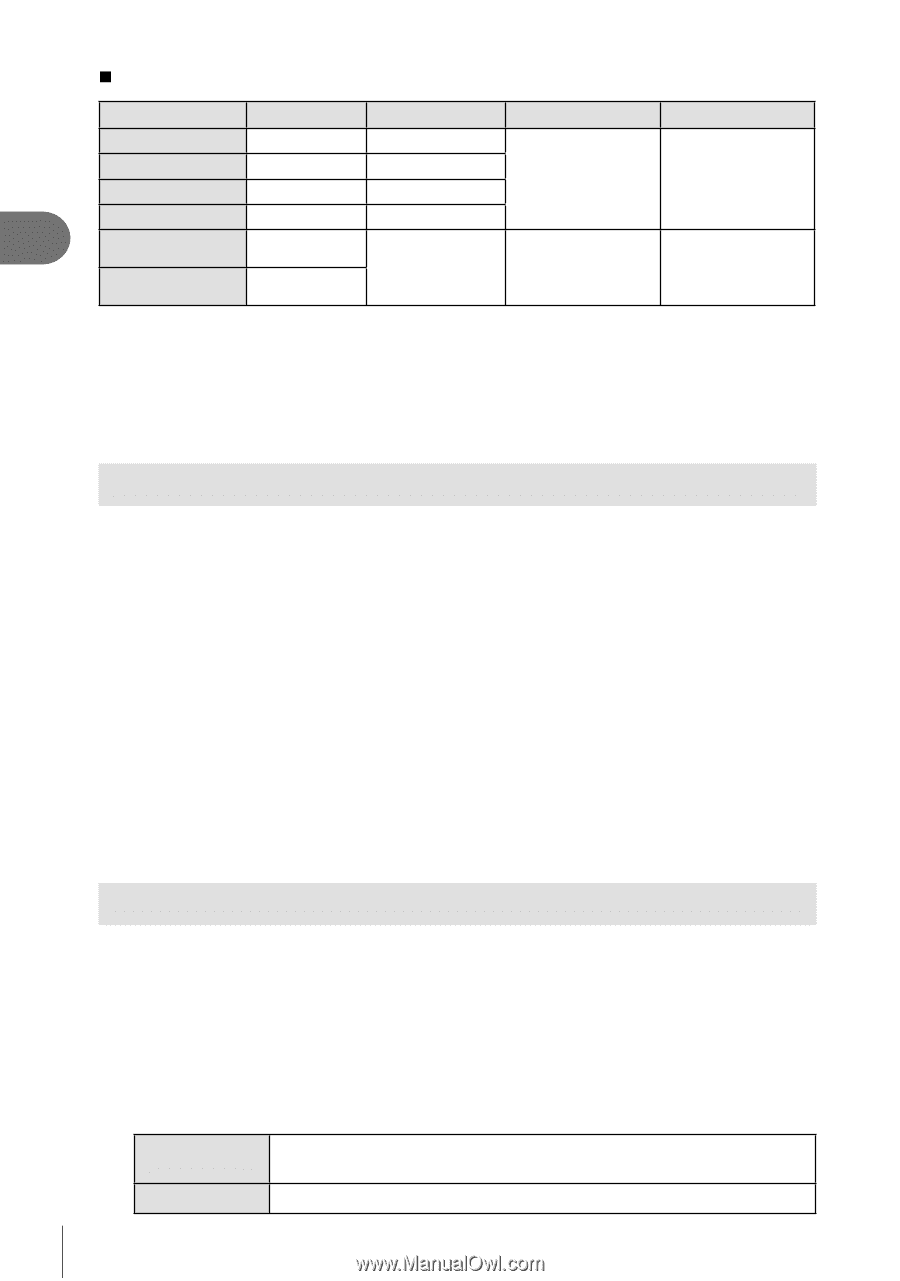
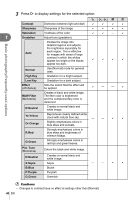
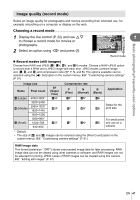
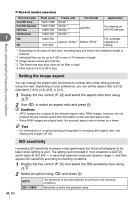
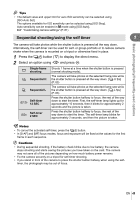
„ Record modes (movies) Record mode Pixel count Frame rate File format Application Full HD Fine 1920×1080 59.94i *2 Full HD Normal HD Fine 1920×1080 59.94i *2 1280×720 59.94p *2 AVCHD*1 For viewing on AVCHD devices. 1 HD Normal HD SD 1280×720 1280×720 640×480 59.94p *2 Approx. 30 fps*3 Motion JPEG*4 For computer playback or editing. • Depending on the type of card used, recording may end before the maximum length is reached. *1 Individual files can be up to 4 GB in size or 29 minutes in length. *2 Image sensor output about 30 fps. *3 The frame rate may drop when an art filter is used. *4 Files may be up to 2 GB in size. Basic photography/frequently-used options Setting the image aspect You can change the aspect ratio (horizontal-to-vertical ratio) when taking pictures using live view. Depending on your preference, you can set the aspect ratio to [4:3] (standard), [16:9], [3:2], [6:6], or [3:4]. 1 Display the live control (P. 22) and select the aspect ratio item using FG. 2 Use HI to select an aspect ratio and press Q. # Cautions • JPEG images are cropped to the selected aspect ratio; RAW images, however, are not cropped but are instead saved with information on the selected aspect ratio. • When RAW images are played back, the selected aspect ratio is shown by a frame. % Tips • For information on cropping existing photographs or changing their aspect ratio, see "Editing still images" (P. 67). ISO sensitivity Increasing ISO sensitivity increases noise (graininess) but allows photographs to be taken when lighting is poor. The setting recommended in most situations is [AUTO], which starts at ISO 200 - a value that balances noise and dynamic range - and then adjusts ISO sensitivity according to shooting conditions. 1 Display the live control (P. 22) and select the ISO sensitivity item using FG. 2 Select an option using HI and press Q. AUTO 200 - 12800 The sensitivity is set automatically according to the shooting conditions. Sensitivity is set to the selected value. 48 EN
-
 1
1 -
2
-
3
-
4
-
5
-
6
-
7
-
8
-
9
-
10
-
11
-
12
-
13
-
14
-
15
-
16
-
17
-
18
-
19
-
20
-
21
-
22
-
23
-
24
-
25
-
26
-
27
-
28
-
29
-
30
-
31
-
32
-
33
-
34
-
35
-
36
-
37
-
38
-
39
-
40
-
41
-
42
-
 43
43 -
 44
44 -
 45
45 -
 46
46 -
 47
47 -
 48
48 -
 49
49 -
 50
50 -
 51
51 -
 52
52 -
 53
53 -
54
-
55
-
56
-
57
-
58
-
59
-
60
-
61
-
62
-
63
-
64
-
65
-
66
-
67
-
68
-
69
-
70
-
71
-
72
-
73
-
74
-
75
-
76
-
77
-
78
-
79
-
80
-
81
-
82
-
83
-
84
-
85
-
86
-
87
-
88
-
89
-
90
-
91
-
92
-
93
-
94
-
95
-
96
-
97
-
98
-
99
-
100
-
101
-
102
-
103
-
104
-
105
-
106
-
107
-
108
-
109
-
110
-
111
-
112
-
113
-
114
-
115
-
116
-
117
-
118
-
119
-
120
-
121
-
122
-
123
-
124
-
125
-
126
-
127
-
128
-
129
 |
 |