Olympus E-PM1 E-PM1 Instruction Manual (English) - Page 59
Flash shooting, Using a, ash photography - user manual
 |
View all Olympus E-PM1 manuals
Add to My Manuals
Save this manual to your list of manuals |
Page 59 highlights
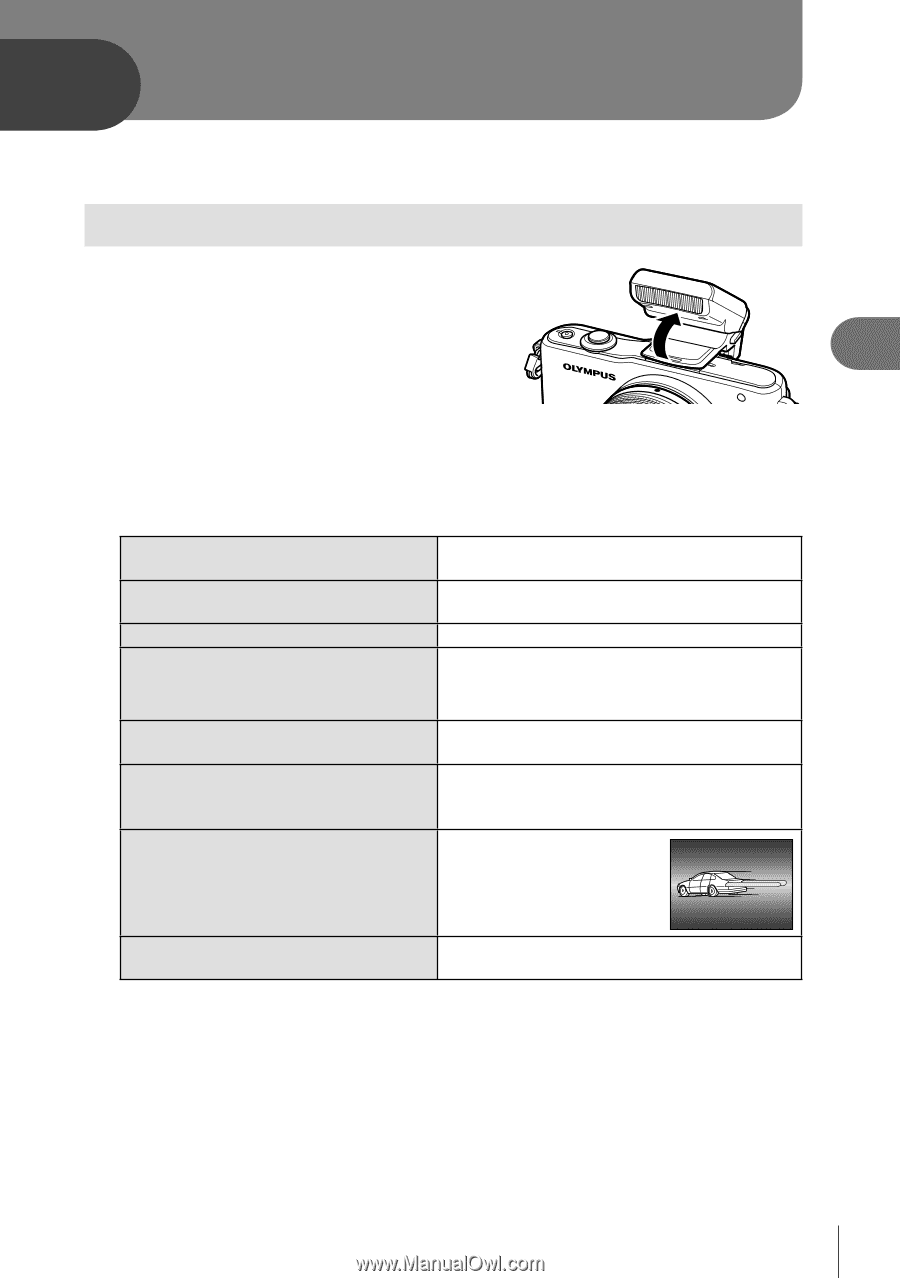
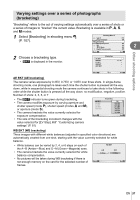
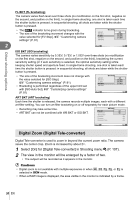
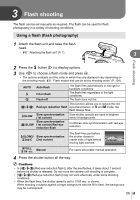
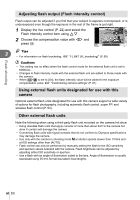
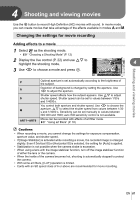
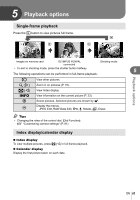
3 Flash shooting The flash can be set manually as required. The flash can be used for flash photography in a variety of shooting conditions. Using a flash (flash photography) 1 Attach the flash unit and raise the flash head. • g "Attaching the flash unit" (P. 7) 3 Flash shooting 2 Press the # button (I) to display options. 3 Use HI to choose a flash mode and press Q. • The options available and the order in which they are displayed vary depending on the shooting mode. g "Flash modes that can be set by shooting mode" (P. 104) AUTO # $ Auto flash Fill-in flash Flash off The flash fires automatically in low light or backlight conditions. The flash fires regardless of the light conditions. The flash does not fire. This function allows you to reduce the red!/#! Red-eye reduction flash eye phenomenon. In S and M mode, the flash always fires. #SLOW !SLOW Slow synchronization (1st curtain) Slow synchronization (1st curtain)/Red-eye reduction flash Slow shutter speeds are used to brighten dimly-lit backgrounds. Combines slow synchronization with red-eye reduction. #SLOW2/ Slow synchronization #2nd-C (2nd curtain) The flash fires just before the shutter closes to create trails of light behind moving light sources. #FULL, #1/4 etc. Manual For users who prefer manual operation. 4 Press the shutter button all the way. # Cautions • In [!/#!(Red-eye reduction flash)], after the pre-flashes, it takes about 1 second before the shutter is released. Do not move the camera until shooting is complete. • [!/#!(Red-eye reduction flash)] may not work effectively under some shooting conditions. • When the flash fires, the shutter speed is set to 1/160 sec. or slower. When shooting a subject against a bright background with the fill-in flash, the background may be overexposed. EN 59
-
 1
1 -
2
-
3
-
4
-
5
-
6
-
7
-
8
-
9
-
10
-
11
-
12
-
13
-
14
-
15
-
16
-
17
-
18
-
19
-
20
-
21
-
22
-
23
-
24
-
25
-
26
-
27
-
28
-
29
-
30
-
31
-
32
-
33
-
34
-
35
-
36
-
37
-
38
-
39
-
40
-
41
-
42
-
43
-
44
-
45
-
46
-
47
-
48
-
49
-
50
-
51
-
52
-
53
-
 54
54 -
 55
55 -
 56
56 -
 57
57 -
 58
58 -
 59
59 -
 60
60 -
 61
61 -
 62
62 -
 63
63 -
 64
64 -
65
-
66
-
67
-
68
-
69
-
70
-
71
-
72
-
73
-
74
-
75
-
76
-
77
-
78
-
79
-
80
-
81
-
82
-
83
-
84
-
85
-
86
-
87
-
88
-
89
-
90
-
91
-
92
-
93
-
94
-
95
-
96
-
97
-
98
-
99
-
100
-
101
-
102
-
103
-
104
-
105
-
106
-
107
-
108
-
109
-
110
-
111
-
112
-
113
-
114
-
115
-
116
-
117
-
118
-
119
-
120
-
121
-
122
-
123
-
124
-
125
-
126
-
127
-
128
-
129
 |
 |