Olympus PT-038 PT-038 Underwater Housing Instruction Manual (16.4 MB) - Page 59
Mounting and removing the lens cap., Perform the final checks.
 |
UPC - 050332160354
View all Olympus PT-038 manuals
Add to My Manuals
Save this manual to your list of manuals |
Page 59 highlights
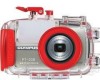
Mounting and removing the lens cap. Fit the lens cap onto the lens ring as shown in the figure. Be sure to remove the lens cap before shooting. EN Perform the final checks. Visual Inspection After sealing the Case, check the sealing part of front and rear lid visually to confirm that the O-ring is not twisted or out of the groove and that no foreign matter has been caught. Also check that the Case is not broken or cracked. CAUTION: Hairs, fibers, and other narrow items are not very apparent, but they may cause entry of water. In addition, pay special attention to breaks and cracks on the Case. EN 21
-
 1
1 -
2
-
3
-
4
-
5
-
6
-
7
-
8
-
9
-
10
-
11
-
12
-
13
-
14
-
15
-
16
-
17
-
18
-
19
-
20
-
21
-
22
-
23
-
24
-
25
-
26
-
27
-
28
-
29
-
30
-
31
-
32
-
33
-
34
-
35
-
36
-
37
-
38
-
39
-
40
-
41
-
42
-
43
-
44
-
45
-
46
-
47
-
48
-
49
-
50
-
51
-
52
-
53
-
 54
54 -
 55
55 -
 56
56 -
 57
57 -
 58
58 -
 59
59 -
 60
60 -
 61
61 -
 62
62 -
 63
63 -
 64
64 -
65
-
66
-
67
-
68
-
69
-
70
-
71
-
72
-
73
-
74
-
75
-
76
-
77
-
78
-
79
-
80
-
81
-
82
-
83
-
84
-
85
-
86
-
87
-
88
-
89
-
90
-
91
-
92
-
93
-
94
-
95
-
96
-
97
-
98
-
99
-
100
-
101
-
102
-
103
-
104
-
105
-
106
-
107
-
108
-
109
-
110
-
111
-
112
-
113
-
114
-
115
-
116
-
117
-
118
-
119
-
120
-
121
-
122
-
123
-
124
-
125
-
126
-
127
-
128
-
129
-
130
-
131
-
132
-
133
-
134
-
135
-
136
-
137
-
138
-
139
-
140
-
141
-
142
-
143
-
144
-
145
-
146
-
147
-
148
-
149
-
150
-
151
-
152
-
153
-
154
-
155
-
156
-
157
-
158
-
159
-
160
-
161
-
162
-
163
-
164
-
165
-
166
-
167
-
168
-
169
-
170
-
171
-
172
-
173
-
174
-
175
-
176
-
177
-
178
-
179
-
180
-
181
-
182
-
183
-
184
-
185
-
186
-
187
-
188
-
189
-
190
-
191
-
192
-
193
-
194
-
195
-
196
-
197
-
198
-
199
-
200
-
201
-
202
-
203
-
204
-
205
-
206
-
207
-
208
-
209
-
210
-
211
-
212
-
213
-
214
-
215
-
216
-
217
-
218
-
219
-
220
-
221
-
222
-
223
-
224
-
225
-
226
-
227
-
228
-
229
-
230
-
231
-
232
-
233
-
234
-
235
-
236
-
237
-
238
-
239
-
240
-
241
-
242
-
243
-
244
-
245
-
246
-
247
-
248
-
249
-
250
-
251
-
252
-
253
-
254
-
255
-
256
-
257
-
258
-
259
-
260
-
261
-
262
-
263
-
264
-
265
-
266
-
267
-
268
 |
 |

EN 21
EN
Mounting and removing the lens cap.
Perform the final checks.
Visual Inspection
After sealing the Case, check the sealing part of front and rear lid visually
to confirm that the O-ring is not twisted or out of the groove and that no
foreign matter has been caught. Also check that the Case is not broken or
cracked.
Fit the lens cap onto the lens ring as
shown in the figure. Be sure to
remove the lens cap before
shooting.
CAUTION:
Hairs, fibers, and other narrow items are not very apparent, but they may
cause entry of water. In addition, pay special attention to breaks and cracks on
the Case.