Olympus VN-801PC VN-801PC Instructions (English) - Page 10
File Menu
 |
View all Olympus VN-801PC manuals
Add to My Manuals
Save this manual to your list of manuals |
Page 10 highlights
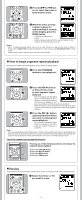
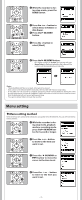
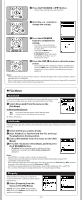
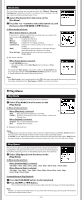
5 Press the `OK/MENU or 9 button. • Moves to the setting of the selected item. 6 Press the + or − button to change the setting. 7 Press the `OK/MENU button to complete the setting. • You will be informed that the settings have been established via the screen. • Pressing the 0 button without pressing the `OK/MENU button will cancel the settings and return you to the previous screen. 8 Press the STOP (4) button to close the menu screen. • If you enter the menu during recording or playback and press the 0 button, it will allow you to return back to the previous screen without interrupting recording or playback. Notes: • The recorder will stop if you leave it idle for 3 minutes during a menu setup operation, when a selected item is not applied. • When entering menu settings during recording or playback, the menu settings will be cancelled if 8 seconds elapse with no buttons being pressed. h File Menu Erase Lock Locking a file keeps important data from being accidentally erased. Locked files are not erased when you select to erase all files from a folder. 1 Select [Erase Lock] from the menu on the a [File Menu]. In Menu mode selection: [On]: Locks the file and prevents it from being erased. [Off]: Unlocks the file and allows it to be erased. a File lock indicator File Divide Files with large capacities and long recording times can be split so that they are easier to manage and edit. 1 Select the file you want to divide. 2 Start Playback or fast-forward the file, and stop the playback at divide position. 3 Select [File Divide] from the menu on the [File Menu]. 4 Press the + button to select [Start], and then press the `OK/MENU button. • [Dividing!] will be displayed and file splitting will start. Splitting is completed when [File divide completed] is displayed. Notes: • Only MP3 file recorded on this recorder can be divided. • The recorder cannot divide files when the number of files in the folder exceeds 198. • Locked files cannot be divided. • After splitting the file, the front part of the file will be renamed as [File name_1.MP3] and the latter part of the file will be named as [File name_2.MP3]. • If a file has an extremely short recording time, it may not be divide even if it is a MP3 file. • Do not remove the battery during dividing file. This may damage the data. Property Select the files for which you would like to confirm information in advance before operating the menu. 1 Select [Property] from the menu on the [File Menu]. [Name] (File name), [Date] (Time stamp), [Size] (File size), [Bit Rate] (File format) will appear on the display. - 10 -
-
 1
1 -
2
-
3
-
4
-
 5
5 -
 6
6 -
 7
7 -
 8
8 -
 9
9 -
 10
10 -
 11
11 -
 12
12 -
 13
13 -
 14
14 -
 15
15 -
16
-
17
-
18
 |
 |
