Onkyo TX-SV525 Owner Manual - Page 28
concerning
 |
View all Onkyo TX-SV525 manuals
Add to My Manuals
Save this manual to your list of manuals |
Page 28 highlights
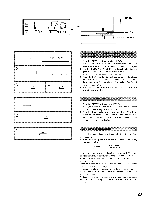
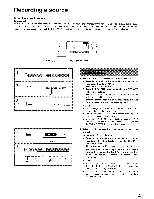
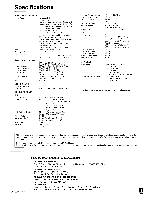
Recording a source Recording and dubbing to a tape deck connected to TAPE-2 1. Press the input selector button of the source to be recorded. (other than TAPE-2) 2. Start playing back the device selected in step 1, and start recording on the tape deck connected to TAPE-2. NOTES: • When the TAPE-2 MONITOR is off, any source signals can be monitored through the speakers or the headphones (this is normal operation). • If tape deck 2 is 3-head type however. you can monitor the recording directly of the tape by turning TAPE-2 MIONITOR on. Refer to the tape deck instruction manuals for more details. Set the recording level using the controls on the tape deck used for recording. Using the graphic equalizer TAPE-2 MENTOR 1. Connect the graphic equalizer to the TAPE-2 jacks on the rear panel. 2. If a second tape deck is used, connect it to the tape jacks on the graphic equalizer. 3. Press the TAPE-2 MONITOR button to turn on the TAPE- 2 MONITOR indicator. Follow the graphic equalizer operation instructions. To record an equalized signal, use the tape deck (connect to the equalizer) for rcording. VCR recording Data can be recorded from video-disc players• video cassette recorders connected to VIDEO-2 and 3. Connect the VCR to VIDEO-2 and/or VIDEO-3. Refer to each instruction manual for information concerning video-disc players, video camcorders, video cassette recorders and monitor TV. TEE OUT 3 REC OUT SOURCE Blink Recording to VIDEO-2 and VIDEO-3 a. Recording the source being played back. 1. Select the source to be recorded with the input selector buttons. 2. Press the REC OUT button. 3. Press the REC OUT button again while the REC OUT indicator is flashing. The SOURCE and the source you have chosen will be displayed in red boxes. (*) 4. Start the source selected in step 1, and start recording on the VCR connected to VIDEO-2 and/or VIDEO-3. Lit RE, 4 T [I (*) REC OUT SOURCE Blink b. Recording a source different from the one being played back Press the REC OUT button. Press the input selector button of the source to be recorded while the REC OUT indicator is flashing. The chosen source will be displayed in a red box. (') Start the source selected in step 2, and start recording on the VCR connected to VIDEO-2 and/or VIDEO-3. ! Lit (5) 28
-
 1
1 -
2
-
3
-
4
-
5
-
6
-
7
-
8
-
9
-
10
-
11
-
12
-
13
-
14
-
15
-
16
-
17
-
18
-
19
-
20
-
21
-
22
-
 23
23 -
 24
24 -
 25
25 -
 26
26 -
 27
27 -
 28
28 -
 29
29 -
 30
30 -
 31
31 -
 32
32
 |
 |
