Optoma X313 User Manual - Page 9
Using the Product
 |
View all Optoma X313 manuals
Add to My Manuals
Save this manual to your list of manuals |
Page 9 highlights
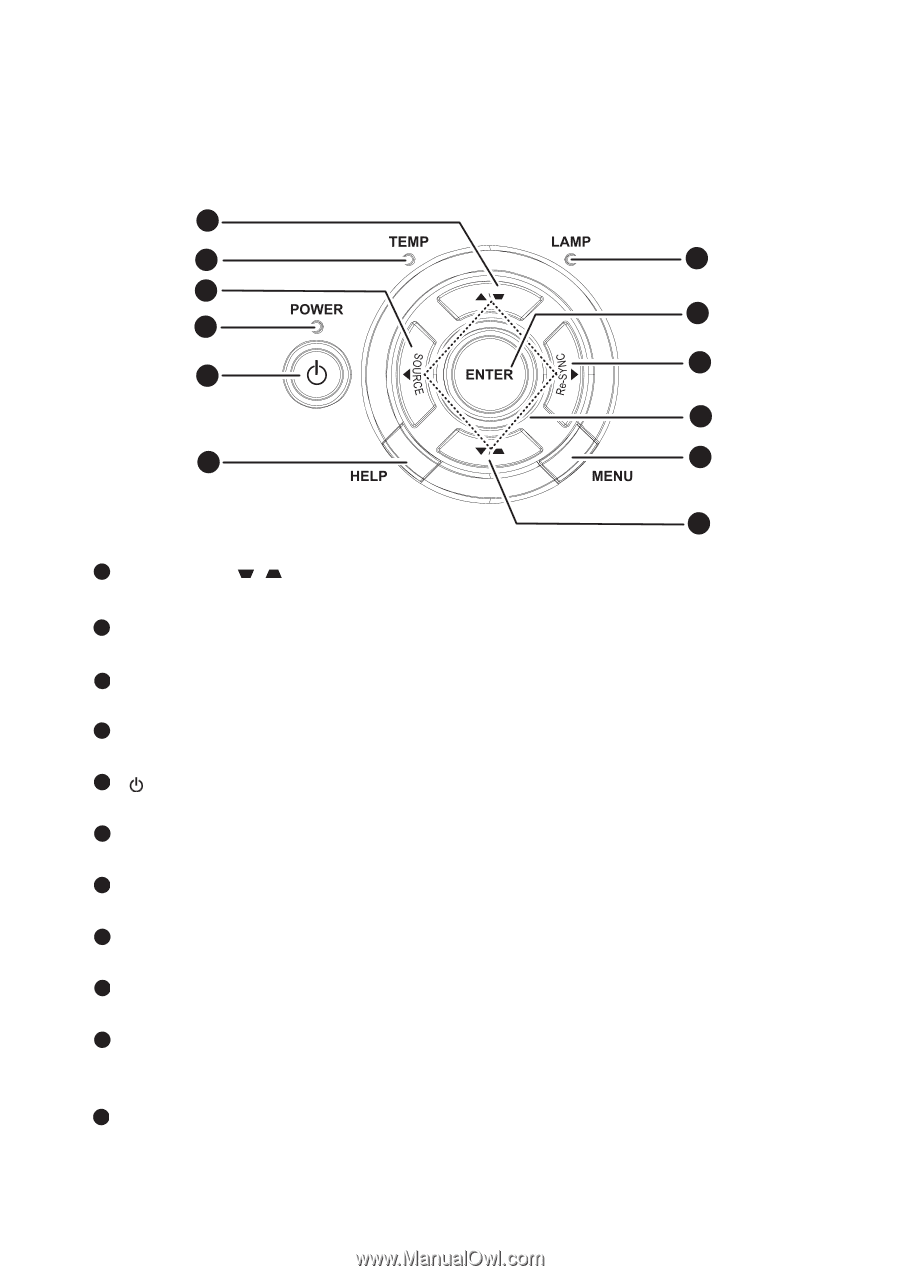
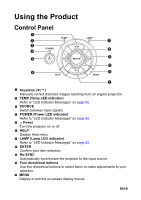
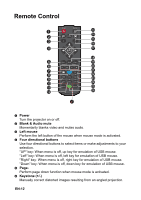
Using the Product Control Panel 1 2 7 3 8 4 9 5 10 6 11 1 1 Keystone ( / ) Manually correct distorted images resulting from an angled projection. 2 TEMP (Temp LED indicator) Refer to "LED Indicator Messages" on page 62. 3 SOURCE Switch between input signals. 4 POWER (Power LED indicator) Refer to "LED Indicator Messages" on page 62. 5 Power Turn the projector on or off. 6 HELP Display Help menu. 7 LAMP (Lamp LED indicator) Refer to "LED Indicator Messages" on page 62. 8 ENTER Confirm your item selection. 9 Re-SYNC Automatically synchronize the projector to the input source. 10 Four directional buttons Use four directional buttons to select items or make adjustments to your selection. 11 MENU Display or exit the on-screen display menus. EN-9
-
 1
1 -
2
-
3
-
 4
4 -
 5
5 -
 6
6 -
 7
7 -
 8
8 -
 9
9 -
 10
10 -
 11
11 -
 12
12 -
 13
13 -
 14
14 -
15
-
16
-
17
-
18
-
19
-
20
-
21
-
22
-
23
-
24
-
25
-
26
-
27
-
28
-
29
-
30
-
31
-
32
-
33
-
34
-
35
-
36
-
37
-
38
-
39
-
40
-
41
-
42
-
43
-
44
-
45
-
46
-
47
-
48
-
49
-
50
-
51
-
52
-
53
-
54
-
55
-
56
-
57
-
58
-
59
-
60
-
61
-
62
-
63
-
64
-
65
-
66
-
67
 |
 |