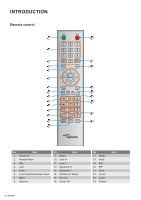
Optoma ZU1050 ZU1050 User Manual - Page 14
Install the lens onto the projector., Rotate the lens clockwise to lock the lens in place.
 |
View all Optoma ZU1050 manuals
Add to My Manuals
Save this manual to your list of manuals |
Page 14 highlights
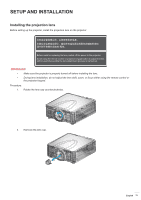
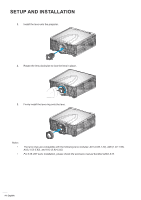
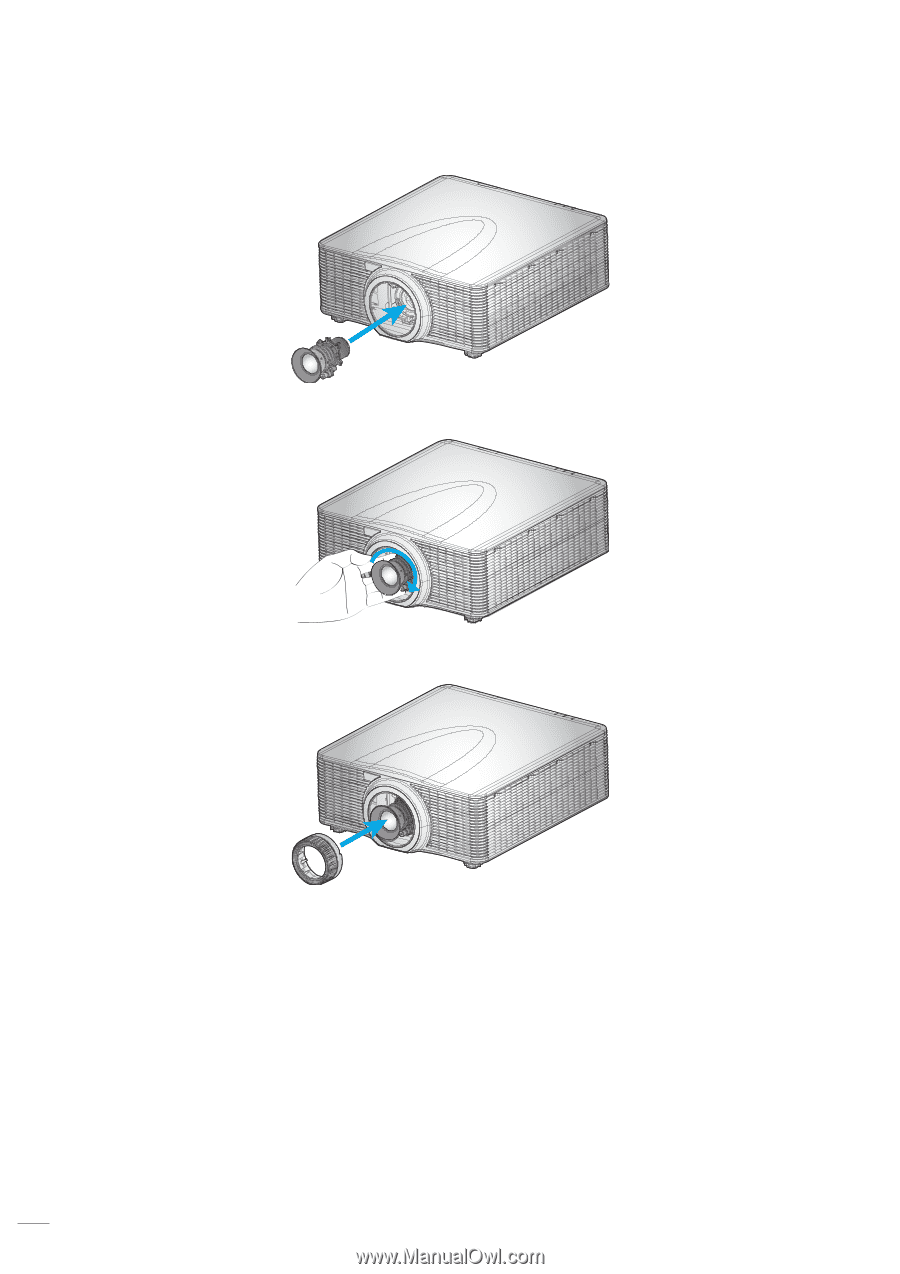
SETUP AND INSTALLATION 3. Install the lens onto the projector. 4. Rotate the lens clockwise to lock the lens in place. 5. Firmly install the lens ring onto the lens. Note: ‡‡ ‡‡ The lens rings are compatible with the following lens modules: A01 (0.95-1.22), A06 (1.22-1.52), A03 (1.53-2.92), and A13 (2.90-5.50). For A16 UST Lens installation, please check the exclusive manual bundled within A16. 14 English
-
 1
1 -
2
-
3
-
4
-
5
-
6
-
7
-
8
-
 9
9 -
 10
10 -
 11
11 -
 12
12 -
 13
13 -
 14
14 -
 15
15 -
 16
16 -
 17
17 -
 18
18 -
 19
19 -
20
-
21
-
22
-
23
-
24
-
25
-
26
-
27
-
28
-
29
-
30
-
31
-
32
-
33
-
34
-
35
-
36
-
37
-
38
-
39
-
40
-
41
-
42
-
43
-
44
-
45
-
46
-
47
-
48
-
49
-
50
-
51
-
52
-
53
-
54
-
55
-
56
-
57
-
58
-
59
-
60
-
61
-
62
-
63
-
64
-
65
-
66
-
67
-
68
 |
 |
English
14
SETUP AND INSTALLATION
3.
Install the lens onto the projector.
4.
Rotate the lens clockwise to lock the lens in place.
5.
Firmly install the lens ring onto the lens.
Note:
±
The lens rings are compatible with the following lens modules: A01 (0.95-1.22), A06 (1.22-1.52),
A03 (1.53-2.92), and A13 (2.90-5.50).
±
For A16 UST Lens installation, please check the exclusive manual bundled within A16.