Palsonic TFTV535WS Owners Manual - Page 21
Adjusting Image in D-Sub mode
 |
View all Palsonic TFTV535WS manuals
Add to My Manuals
Save this manual to your list of manuals |
Page 21 highlights
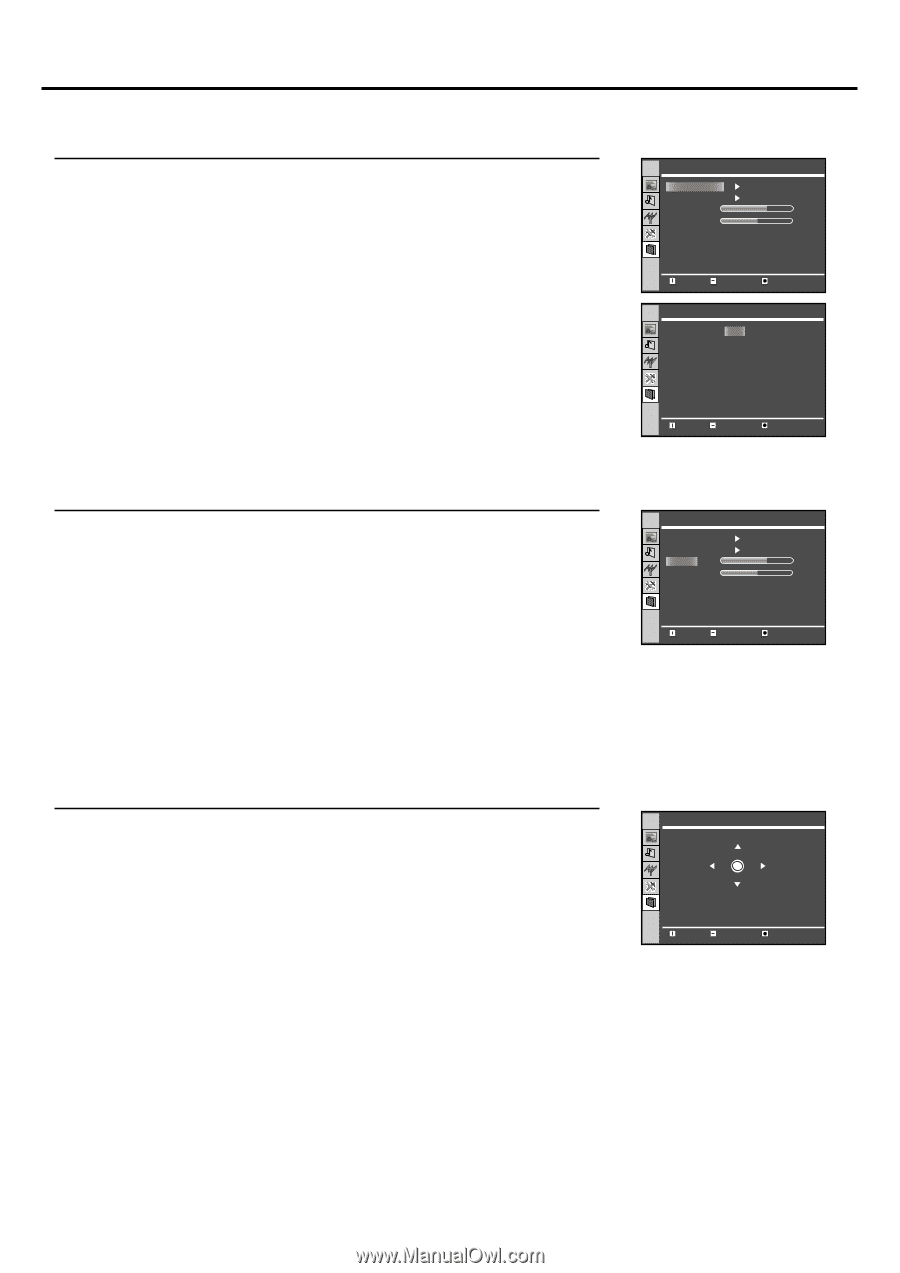
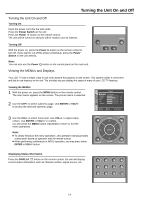
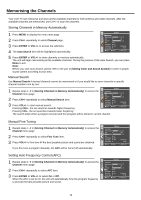
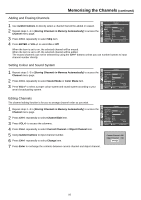
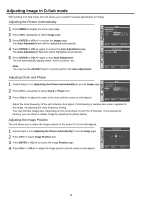
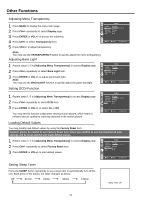
Adjusting Image in D-Sub mode With working in D-Sub mode, this unit allows you to perform several adjustments for image Adjusting the Picture Automatically 1 Press MENU to display the menu main page. 2 Press CH+/- repeatedly to select Image page. Image Auto Adjustment Image Position Phase Clock 30 1328 3 Press ENTER or VOL+/- to access the Image page. The Auto Adjustment item will be highlighted automatically. 4 Press ENTER or VOL+/- again to access the Auto Adjustment page. The Auto Adjustment / Yes item will be highlighted automatically. Move Select Menu to exit Auto Adjustment Auto Adjustment Yes 5 Press ENTER or VOL+/- again to start Auto Adjustment. The unit automatically adjusts phase, clock or position, etc. Note: You may use the ADJUST button to quickly perform the Auto Adjustment. Move Select Menu to exit Adjusting Clock and Phase 1 Repeat steps 1-3 in [Adjusting the Picture Automatically] to access Image page. Image Auto Adjustment Image Position 2 Press CH+/- repeatedly to select Clock or Phase item. Phase Clock 30 1328 3 Press VOL+/- to adjust the value of the item until the screen is well-aligned. Move Select Menu to exit Adjust the clock frequency of the set's internal clock signal. If shimmering or rainbow-like noise is apparent in the image, try adjusting the clock frequency setting. You may find that images blur, depending on the clock phase of your PC's Processor. If you experience blurring, you can obtain a clearer image by adjusting the phase setting. Adjusting the Image Position The unit allows you to adjust the image position of the screen if it is not well-aligned. 1 Repeat steps 1~3 in [Adjusting the Picture Automatically] to access Image page. 2 Press CH+/- to select Image Position item. 3 Press ENTER or VOL+/- to access the Image Position page. 4 Press CH+/- or VOL+/- to adjust the image position until the screen is well-aligned. Image Position 0 Move Select 0 Menu to exit 19
-
 1
1 -
2
-
3
-
4
-
5
-
6
-
7
-
8
-
9
-
10
-
11
-
12
-
13
-
14
-
15
-
 16
16 -
 17
17 -
 18
18 -
 19
19 -
 20
20 -
 21
21 -
 22
22 -
 23
23 -
 24
24 -
 25
25 -
 26
26 -
27
 |
 |