Panasonic AG DVC20 3 Ccd Dv Camcorder - Page 18
Record mode, Check before recording
 |
UPC - 791871302958
View all Panasonic AG DVC20 manuals
Add to My Manuals
Save this manual to your list of manuals |
Page 18 highlights
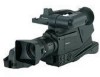
Record mode Record mode Check before recording Check the following by trying recording before important events such as weddings in order to verify that the image recording and audio recording work properly and that you know how to use the camera-recorder. ª Holding the camera-recorder for recording Normal recording. For more stable pictures. ≥When walking while recording, keep both eyes open so that you can see where you are going and what is happening around you. ≥Place the camera-recorder on your right shoulder and hold it firmly with both hands. ≥Hold the eyecup of the viewfinder as close as possible to your right eye. ≥Take a firm stance with the legs slightly apart. ≥For stable images, it is recommended to use a tripod (optional) whenever possible. Low-angle recording. ≥Stabilize the camera-recorder by resting your elbows on a table or another stable horizontal surface. ª Check points ≥Remove the lens cap. (-9-) (When the camera is turned on with the lens cap fitted, the automatic white balance adjustment may not function properly. Please turn the camera on after removing the lens cap.) ≥Grip belt adjustment (-9-) ≥Power supply (-10-) ≥Insert a cassette (-12-) ≥Setting date/time (-15-) ≥Adjustment of LCD monitor/viewfinder (-15-) ≥Getting the remote control ready (-16-) ≥Setting SP/LP mode (-19-) ª About auto mode ≥Set the [AUTO/MANUAL/FOCUS] switch to [AUTO], and color balance (white balance) and focusing will be adjusted automatically. ≥Auto white balance: -39≥Auto focusing: -39- Adjust the angle of the LCD monitor according to the position in which the camera-recorder is held. ≥If the camera-recorder is not held firmly in stable position, the picture in the LCD monitor cannot be watched properly. ≥For easier low-angle recording, the sub recording start/stop button and the sub zoom lever on the front of the camera- recorder can be used. AUTO MANUAL FOCUS ≥Color balance and focus may not be adjusted depending on light sources or scenes. If so, manually adjust the white balance and focus. ≥Scene mode setting (-23-) ≥White balance setting (-24-) ≥Shutter speed setting (-25-) ≥Iris/gain value setting (-25-) ≥Focus setting (-25-) Recording from a high position. 18
-
 1
1 -
2
-
3
-
4
-
5
-
6
-
7
-
8
-
9
-
10
-
11
-
12
-
 13
13 -
 14
14 -
 15
15 -
 16
16 -
 17
17 -
 18
18 -
 19
19 -
 20
20 -
 21
21 -
 22
22 -
 23
23 -
24
-
25
-
26
-
27
-
28
-
29
-
30
-
31
-
32
-
33
-
34
-
35
-
36
-
37
-
38
-
39
-
40
-
41
-
42
 |
 |
