Panasonic AW-SF100 Installation Instructions - Page 4
Setting the Remote Camera
 |
View all Panasonic AW-SF100 manuals
Add to My Manuals
Save this manual to your list of manuals |
Page 4 highlights
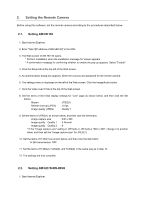
2. Setting the Remote Camera Before using this software, set the remote camera according to the procedures described below. 2.1. Setting AW-HE130 1. Start Internet Explorer. 2. Enter "http://[IP address of AW-HE130]" in the URL. 3. The Web screen of AW-HE130 opens. * Perform installation when the installation message for Viewer appears. * A confirmation message for confirming whether to enable the pop-up appears. Select "Enable". 4. Click the Setup tab at the top left of the Web screen. 5. An authentication dialog box appears. Enter the account and password for the remote camera. 6. The settings menu is displayed on the left of the Web screen. Click the Image/Audio button. 7. Click the Video over IP tab at the top of the Web screen. 8. Set the items of the Initial display settings for "Live" page as shown below, and then click the Set button. Stream : JPEG(1) Refresh interval (JPEG) : 10 fps Image quality (JPEG) : Quality 1 9. Set the items of JPEG(1) as shown below, and then click the Set button. Image capture size : 640 x 360 Image quality Quality 1 : 5 Normal Image quality Quality 2 : 8 * If the "Image capture size" setting in JPEG(2) or JPEG(3) is "640 x 360", change it to another value, and then set the "Image capture size" for JPEG(1). 10. Set the items of H.264(1) as shown below, and then click the Set button. H.264 transmission: OFF 11. Set the items of H.264(2), H.264(3), and H.264(4) in the same way as in step 10. 12. The settings are thus complete. 2.2. Setting AW-UE70/AW-HE40 1. Start Internet Explorer.
-
 1
1 -
 2
2 -
 3
3 -
 4
4 -
 5
5 -
 6
6 -
 7
7 -
 8
8 -
 9
9 -
 10
10 -
11
-
12
 |
 |
