Panasonic CF-Y5LWEZZBM User Manual - Page 31
Getting Started, Useful Information, Troubleshooting, Appendix, Running the Diagnostic Check
 |
View all Panasonic CF-Y5LWEZZBM manuals
Add to My Manuals
Save this manual to your list of manuals |
Page 31 highlights
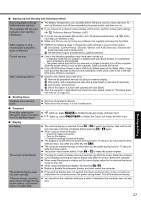
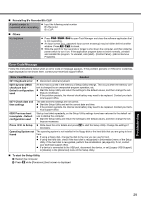
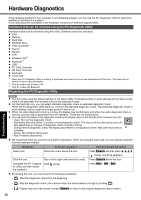
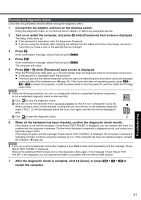
Troubleshooting Useful Information Getting Started Running the Diagnostic Check Disconnect any peripheral devices before running the diagnostic check. 1 Connect the AC adaptor, and turn on the wireless switch. During the diagnostic check, do not remove the AC adaptor, or attach any peripheral devices. 2 Turn on or restart the computer, and press F2 while [Panasonic] boot screen is displayed. The Setup Utility starts up. z If the password is requested, enter the Supervisor Password. z If you are using the computer after changing the settings from the status at the time of purchase, we recom- mend that you make a note of the settings that are changed. 3 Press F9. At the confirmation message, select [Yes] and press Enter. 4 Press F10. At the confirmation message, select [Yes] and press Enter. The computer will restart. 5 Press Ctrl + F7 while [Panasonic] boot screen is displayed. When the PC-Diagnostic Utility starts up, it will automatically begin the diagnostic check for all hardware components. z If the password is requested, enter the password. z The touch pad and the internal keyboard cannot be used until alternating blue and yellow colors are displayed on the left side of the hardware icon (Î page 30). If the touch pad does not operate properly, press Ctrl + Alt + Del to restart the computer, or slide the power switch to turn the power off, and then restart the PC-Diag- nostic Utility. NOTE z Using the following procedure, you can run a diagnostic check on a specified hardware component, or run an extended diagnostic check on the hard disk. A Click to stop the diagnostic check. B Click the icon for the hardware that is not to be checked, so that the icon is displayed in gray (B). When running a check on the hard disk, clicking the icon once will turn on the extended diagnostic check ("FULL" (C) will be displayed below the icon); click again, and the icon will be displayed in gray. C Click to start the diagnostic check. C 6 When all the hardware has been checked, confirm the diagnostic check results. If the display is red and the message "Check Result TEST FAILED" is displayed, you can assume that there is a problem with the computer's hardware. Confirm which hardware component is displayed as red, and contact your technical support office. If the display is green and the message "Check Result TEST PASSED" is displayed, the computer's hardware is operating normally. Continue using the computer as it is. If the computer still does not operate properly, reinstall the software. (Î page 24) NOTE z If you run a memory diagnostic check after installing a new RAM module (sold separately) and the message "Check Result TEST FAILED" is displayed: Remove the additional RAM module and run the diagnostic check again. If the message "Check Result TEST FAILED" is still displayed, you can assume that there is a problem with the internal RAM module. 7 After the diagnostic check is complete, click (close), or press Ctrl + Alt + Del to restart the computer. Appendix 31
-
 1
1 -
2
-
3
-
4
-
5
-
6
-
7
-
8
-
9
-
10
-
11
-
12
-
13
-
14
-
15
-
16
-
17
-
18
-
19
-
20
-
21
-
22
-
23
-
24
-
25
-
 26
26 -
 27
27 -
 28
28 -
 29
29 -
 30
30 -
 31
31 -
 32
32 -
 33
33 -
 34
34 -
 35
35 -
 36
36
 |
 |