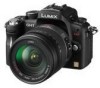
Panasonic DMC-GH1K Digital Still Camera - Page 24
Inserting/Removing the Battery, in the direction of the arrow
 |
UPC - 037988989553
View all Panasonic DMC-GH1K manuals
Add to My Manuals
Save this manual to your list of manuals |
Page 24 highlights
Preparation Inserting/Removing the Battery • Check that this unit is turned off. • Close the flash. Slide the release lever in the direction of the arrow (OPEN side) and then open the battery door. • Always use genuine Panasonic batteries (DMW-BLB13PP). • If you use other batteries, we cannot guarantee the quality of this product. Insert until it is locked by the lever A being careful about the direction you insert it. Pull the lever A in the direction of the arrow to remove the battery. 1: Close the battery door. 2: Slide the release lever in the direction of the arrow (LOCK side) and then close it firmly. Note • Remove the battery after use. • Do not remove the battery while the power is on as the settings on the camera may not be stored properly. • The supplied battery is designed only for the camera. Do not use it with any other equipment. • Before removing the battery, turn the camera off, and wait until the status indicator has gone off completely. (Otherwise, this unit may no longer operate normally and the card itself may be damaged or the recorded pictures may be lost.) 24 VQT2A61
-
 1
1 -
2
-
3
-
4
-
5
-
6
-
7
-
8
-
9
-
10
-
11
-
12
-
13
-
14
-
15
-
16
-
17
-
18
-
 19
19 -
 20
20 -
 21
21 -
 22
22 -
 23
23 -
 24
24 -
 25
25 -
 26
26 -
 27
27 -
 28
28 -
 29
29 -
30
-
31
-
32
-
33
-
34
-
35
-
36
-
37
-
38
-
39
-
40
-
41
-
42
-
43
-
44
-
45
-
46
-
47
-
48
-
49
-
50
-
51
-
52
-
53
-
54
-
55
-
56
-
57
-
58
-
59
-
60
-
61
-
62
-
63
-
64
-
65
-
66
-
67
-
68
-
69
-
70
-
71
-
72
-
73
-
74
-
75
-
76
-
77
-
78
-
79
-
80
-
81
-
82
-
83
-
84
-
85
-
86
-
87
-
88
-
89
-
90
-
91
-
92
-
93
-
94
-
95
-
96
-
97
-
98
-
99
-
100
-
101
-
102
-
103
-
104
-
105
-
106
-
107
-
108
-
109
-
110
-
111
-
112
-
113
-
114
-
115
-
116
-
117
-
118
-
119
-
120
-
121
-
122
-
123
-
124
-
125
-
126
-
127
-
128
-
129
-
130
-
131
-
132
-
133
-
134
-
135
-
136
-
137
-
138
-
139
-
140
-
141
-
142
-
143
-
144
-
145
-
146
-
147
-
148
-
149
-
150
-
151
-
152
-
153
-
154
-
155
-
156
-
157
-
158
-
159
-
160
-
161
-
162
-
163
-
164
-
165
-
166
-
167
-
168
-
169
-
170
-
171
-
172
-
173
-
174
-
175
-
176
-
177
-
178
-
179
-
180
-
181
-
182
-
183
-
184
-
185
-
186
-
187
-
188
-
189
-
190
-
191
-
192
-
193
-
194
-
195
-
196
-
197
-
198
-
199
-
200
 |
 |
