Panasonic DVD-S35S Dvd Player - Page 21
MAINTENANCE, Picture, Sound, Unit displays, Television displays
 |
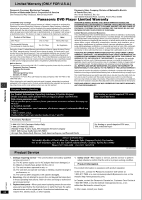
UPC - 037988406722
View all Panasonic DVD-S35S manuals
Add to My Manuals
Save this manual to your list of manuals |
Page 21 highlights
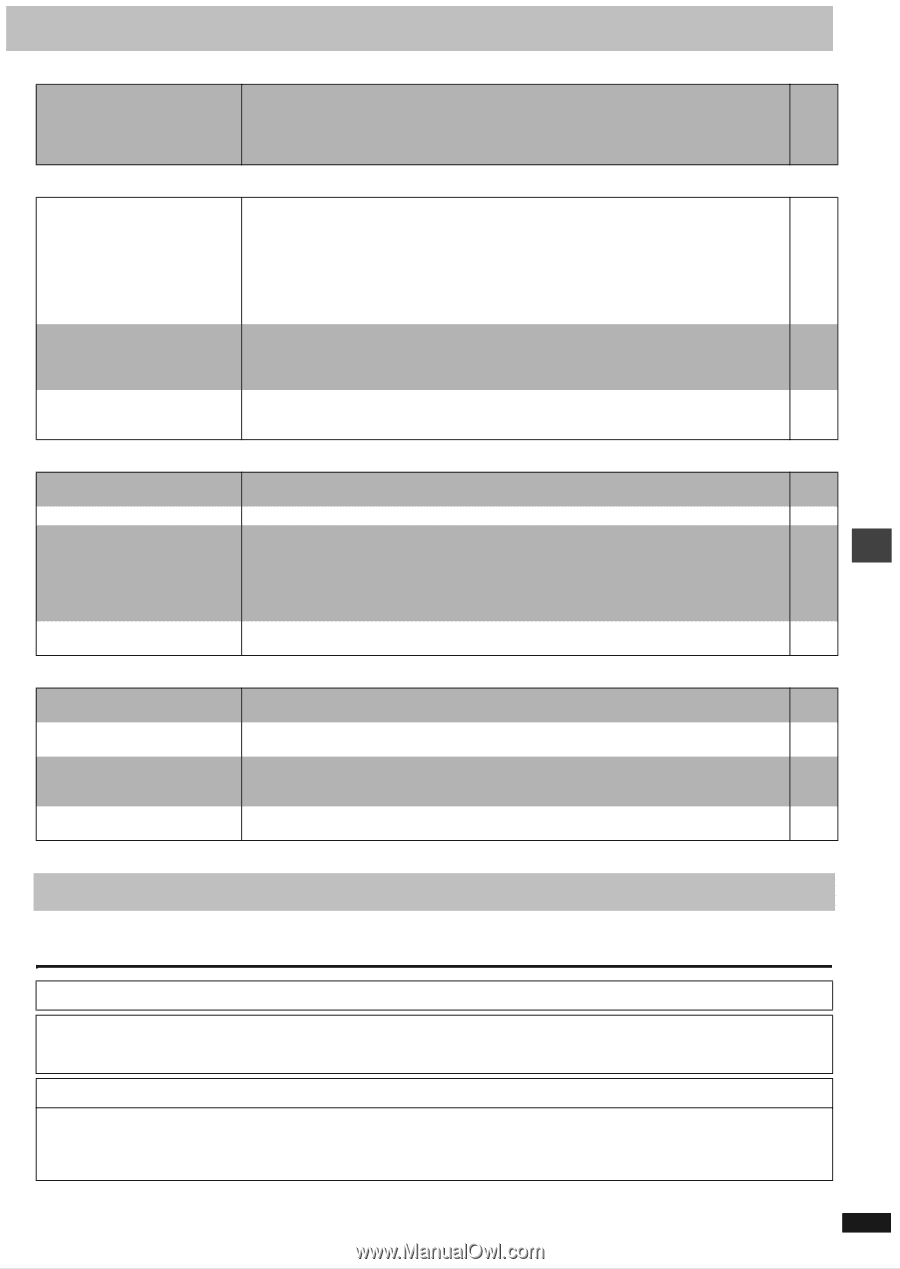
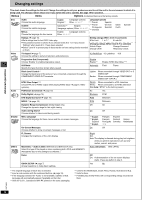
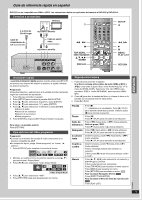
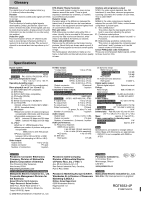
Picture The SETUP menus and other screens shown on the television are displayed incorrectly. Colors appear faded. ≥The unit and television are using different video systems. [Units\for\the\Middle\East,\South\Africa,\Russia,\Australia\and\N.Z.] Use a multi-system or PAL television. [Units\for\other\areas] Use a multi-system or NTSC television. Page - Sound No sound. Distorted sound. Piercing noise comes from the speakers. Effects do not work. ≥Check the connections. 4, 5 ≥Check the volume on the equipment you have connected. - ≥Ensure that the input settings on the other equipment are correct. - ≥Turn Advanced Surround off if it causes distortion. 15 ≥Output from this unit will be in stereo (two channels) when Advanced Surround is on. Turn Advanced 15 Surround off if you are using three or more speakers. ≥Press [1] (PLAY) to restore normal play after changing the speed. 16 ≥Noise may occur when playing WMA files. - ≥If you have connected this unit to other equipment through the DIGITAL AUDIO OUT terminal, 19 ensure you have selected the correct settings for "Dolby Digital", "DTS Digital Surround" and "MPEG§" in the SETUP menus' Audio menu. §For the Middle East, South Africa, Russia, Australia and N.Z. ≥Dialogue Enhancer and Advanced Surround do not work when the unit is outputting bitstream - signals. ≥Advanced Surround does not work if you have changed the play speed. 16 Unit displays "NoPLAY" "CHECK DISC" "H stands for a number. "NoDISC" ≥You inserted a disc the unit cannot play; insert one it can. 6 ≥You inserted a blank DVD-RAM. - ≥Disc is dirty: Wipe it clean. 6 ≥Trouble may have occurred. The number following "H" depends on the status of the unit. - Reset procedure: Press [POWER Í/I] to switch the unit to the standby mode and then back to ON. Alternatively, press [POWER Í/I] to switch the unit to the standby mode, disconnect the AC power supply cord, and then reconnect it. ≥If the service numbers fail to clear, note the service number and contact a qualified service person. - ≥You haven't inserted a disc: Insert one. - ≥You haven't inserted the disc correctly: Insert it correctly. 8 Television displays "Cannot display group xx, picture ≥You are trying to display incompatible pictures. 11 xx" "The progressive out is set to ≥Go to Video in the SETUP menus, and select "Enable" in "Progressive Out (Component)". 18 "Disable"" No on-screen display or only partially displayed. ≥Go to Display in the SETUP menus, and select "On" for "On-Screen Messages". 18 ≥Press [DISPLAY], and press [2, 1] to highlight the Bar Position icon, then press [3, 4] to adjust the 16 position. The disc's menu is displayed in a ≥Go to Disc in the SETUP menus, and select the preferred language for "Menus". 18 different language. Reference Maintenance Clean this unit with a soft, dry cloth. ≥Never use alcohol, paint thinner or benzine to clean this unit. Manufactured under license from Dolby Laboratories. "Dolby" and the double-D symbol are trademarks of Dolby Laboratories. Manufactured under license from Digital Theater Systems, Inc. US Pat. No. 5,451,942, 5,956,674, 5,974,380, 5,978,762 and other world-wide patents issued and pending. "DTS" and "DTS Digital Surround" are registered trademarks of Digital Theater Systems, Inc. Copyright 1996, 2000 Digital Theater Systems, Inc. All rights reserved. Apparatus Claims of U.S. Patent Nos. 4,631,603, 4,577,216, and 4,819,098, licensed for limited viewing uses only. This product incorporates copyright protection technology that is protected by method claims of certain U.S. patents and other intellectual property rights owned by Macrovision Corporation and other rights owners. Use of this copyright protection technology must be authorized by Macrovision Corporation, and is intended for home and other limited viewing uses only unless otherwise authorized by Macrovision Corporation. Reverse engineering or disassembly is prohibited. RQT6933 21
-
 1
1 -
2
-
3
-
4
-
5
-
6
-
7
-
8
-
9
-
10
-
11
-
12
-
13
-
14
-
15
-
 16
16 -
 17
17 -
 18
18 -
 19
19 -
 20
20 -
 21
21 -
 22
22 -
 23
23 -
 24
24
 |
 |