Panasonic KV-S1057C Operating Instructions - Page 44
Push scan using the 7-segment LED, If you are using a KV-SL1066, KV-SL1056
 |
View all Panasonic KV-S1057C manuals
Add to My Manuals
Save this manual to your list of manuals |
Page 44 highlights
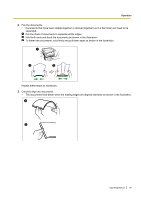
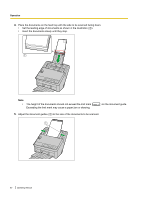
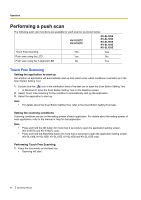
Operation Push scan using the 7-segment LED If you are using a KV-SL1066, KV-SL1056, KV-SL1055, KV-SL1036 or KV-SL1035 with Image Capture Plus, you can perform a push scan using the 7-segment LED. A registered job number is displayed on the 7-segment LED. Use the cursor button (A) to select a job number. Note • Register jobs in advance. For details about registering jobs, refer to the Image Capture Plus help. 1 2 1. Place the documents on the feed tray. 2. Use or of the cursor button (A) to select a job number. 3. Press the Start/Stop button (B). • Scanning will start. 44 Operating Manual
-
 1
1 -
2
-
3
-
4
-
5
-
6
-
7
-
8
-
9
-
10
-
11
-
12
-
13
-
14
-
15
-
16
-
17
-
18
-
19
-
20
-
21
-
22
-
23
-
24
-
25
-
26
-
27
-
28
-
29
-
30
-
31
-
32
-
33
-
34
-
35
-
36
-
37
-
38
-
 39
39 -
 40
40 -
 41
41 -
 42
42 -
 43
43 -
 44
44 -
 45
45 -
 46
46 -
 47
47 -
 48
48 -
 49
49 -
50
-
51
-
52
-
53
-
54
-
55
-
56
-
57
-
58
-
59
-
60
-
61
-
62
-
63
-
64
-
65
-
66
-
67
-
68
-
69
-
70
-
71
-
72
-
73
-
74
-
75
 |
 |

Push scan using the 7-segment LED
If you are using a KV-SL1066, KV-SL1056, KV-SL1055, KV-SL1036 or KV-SL1035 with Image Capture Plus,
you can perform a push scan using the 7-segment LED. A registered job number is displayed on the 7-segment
LED. Use the cursor button (
A
) to select a job number.
Note
•
Register jobs in advance. For details about registering jobs, refer to the Image Capture Plus help.
1
2
1.
Place the documents on the feed tray.
2.
Use
or
of the cursor button (
A
) to select a job number.
3.
Press the Start/Stop button (
B
).
•
Scanning will start.
44
Operating Manual
Operation