Panasonic KX-HNC600 Installation Guide - US - Page 22
Appendix, Testing the motion detection range, Adjusting the infrared sensor range
 |
View all Panasonic KX-HNC600 manuals
Add to My Manuals
Save this manual to your list of manuals |
Page 22 highlights
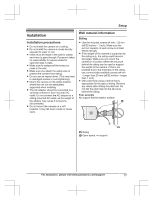
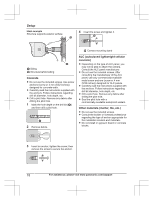
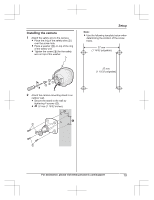
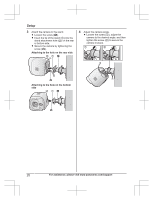
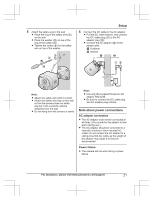
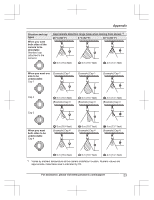
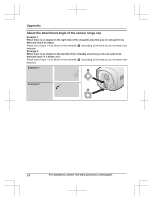
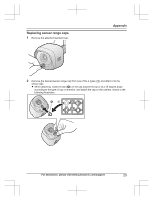
Appendix Testing the motion detection range After you have installed the [Home Network] app on your mobile device, you can use your mobile device to test the performance of the camera's motion detection features. For details about these operations, refer to the User's Guide (page 26). 1 Start the [Home Network] app and display live images from the camera. 2 Move to an area within the camera's viewable area. 3 While moving near the camera, use your mobile device to observe where you are in the viewable area when the camera's motion detection features are triggered. R When the motion detection features are triggered, the camera's LED indicator lights in red for about 3 seconds. 4 Note the areas of the viewable area where movement is detected, and make adjustments as necessary. Note: R You can adjust the area detectable by the visual sensor. For more information, refer to the User's Guide (page 26). R You can adjust the area detectable by the infrared sensor. See "Adjusting the infrared sensor range", page 22. Adjusting the infrared sensor range If there are objects that you do not want the infrared sensor to detect, you can adjust the detectable area by attaching sensor range caps. Sensor range cap types and detectable area In addition to the standard cap (already attached to the camera), there are 4 cap types (cap 1-4). Each cap blocks different areas of the sensor range and can be attached at 45-degree increments. Refer to the following and attach the proper cap at the proper angle. R The detectable areas shown here are an approximation for when the [IR Sensor] setting is set to [Normal]. For more information, refer to the User's Guide (page 26). R The detectable area rotates according to the sensor range cap angle. Testing the microphone To test the microphone, speak loudly and clearly into the microphone while a mobile device user is viewing live images from the camera. 22 For assistance, please visit www.panasonic.com/support
-
 1
1 -
2
-
3
-
4
-
5
-
6
-
7
-
8
-
9
-
10
-
11
-
12
-
13
-
14
-
15
-
16
-
 17
17 -
 18
18 -
 19
19 -
 20
20 -
 21
21 -
 22
22 -
 23
23 -
 24
24 -
 25
25 -
 26
26 -
 27
27 -
28
-
29
-
30
-
31
-
32
-
33
-
34
-
35
-
36
-
37
-
38
-
39
-
40
-
41
-
42
-
43
-
44
-
45
-
46
-
47
-
48
-
49
-
50
-
51
-
52
-
53
-
54
-
55
-
56
 |
 |
