Panasonic PT47WXD63 PT47WXD63 User Guide - Page 29
Convergence cont., Procedure, CONVERGENCE ADJ., NINE POINT CONVERGENCE CORRECTION, Cable Module Info
 |
View all Panasonic PT47WXD63 manuals
Add to My Manuals
Save this manual to your list of manuals |
Page 29 highlights
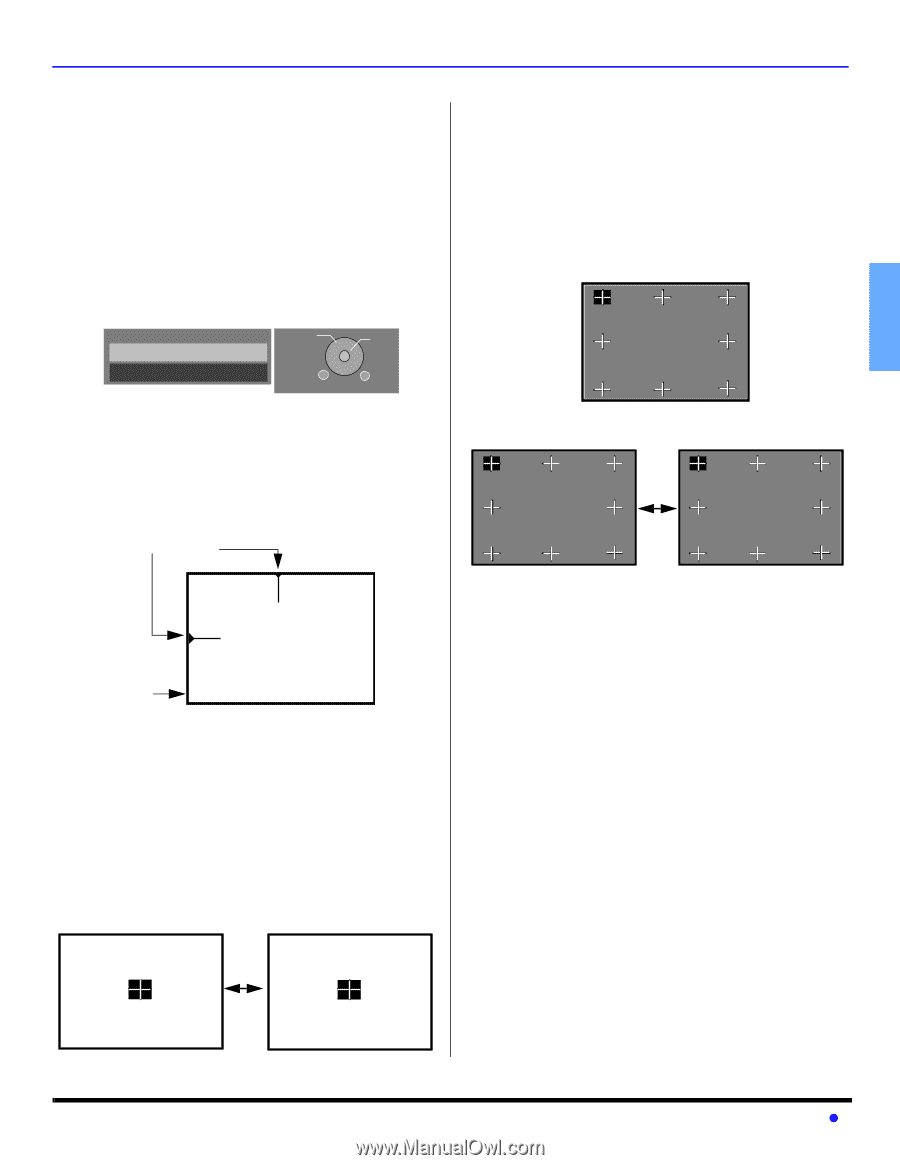
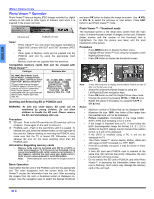
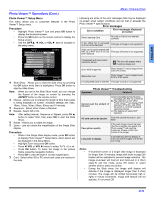
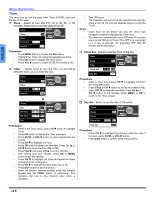
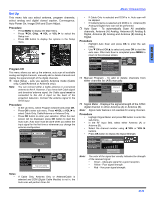
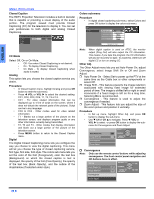
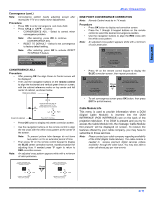
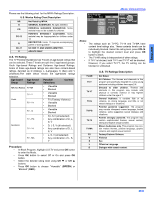
ENGLISH Convergence (cont.) Note: Convergence seldom needs adjusting except after moving the PTV or to make minor adjustments. Procedure • Press OK to enter convergence sub-menu field. • Press CH or CH to select: • CONVERGENCE ADJ. - Select to correct minor convergence problem. Note: After selecting, press OK to continue CONVERGENCE ADJ. • RESET TO DEFAULT - Select to set convergence to factory default setting. Note: After selecting, press OK to activate RESET TO DEFAULT feature. Convergence Convergence Adj. SELECT OK Reset to Default MENU to return EXIT CONVERGENCE ADJ. Procedure • After pressing OK the align Green to Center screen will be displayed. • Then use the navigation buttons on the remote control to align the horizontal and vertical green lines on screen, with the cabinet reference marks on top center and left center of cabinet, as shown below. Reference Marks Front of cabinet Press CH And VOL Key To Align Green Lines To The Center Mark On The Cabinet Up Left Right Down Press Ok To Continue • Press OK button to display red center correction screen. • • Note: Use the navigation buttons on the remote control to align the red cross with the white cross pattern at the center of the screen. Note: To prevent picture tube damage do not leave test pattern on for an extended period of time. Then press "0" on the remote control keypad to display the BLUE center correction screen, repeat procedure for adjusting blue. If needed press "0" again to return to RED correction screen. An adjusted cross pattern appears white with a minimum of color protrusion. MENU OPERATIONS NINE POINT CONVERGENCE CORRECTION Note: Remote Control must be in TV mode. Procedure • Press OK button to display red correction screen. • Press the 1 through 9 keypad buttons on the remote control to select the desired convergence position. • Use the navigation buttons to align the RED cross with the white cross pattern. Note: An adjusted cross pattern appears white with a minimum of color protrusion. 1 2 3 Press # Key To Select Pos. Press CH And VOL Key To Corr. 4 6 Correcting Red PPRreEsSsS0ATCoTAIOdNjusTtOBEluXeIT Press Ok To Exit 7 8 9 • Press "0" on the remote control keypad to display the BLUE correction screen, then repeat procedure. 1 2 Press # Key To Select Pos. Press CH And VOL Key To Corr. 4 Correcting Red PPRreEsSsS0ATCoTAIOdNjusTtOBEluXeIT Press Ok To Exit 7 8 3 Press 6 "0" 9 1 2 3 Press # Key To Select Pos. Press CH And VOL Key To Corr. 4 6 Correcting Blue PPRrEesSsS0ATCoTAIOdNjuTsOt REeXdIT Press Ok To Exit 7 8 9 • To exit convergence screen press OK button, then press EXIT to quit all menus. Cable Module Info This menu is used to provide information when a DCM (Digital Cable Module) is inserted into the DCM INTERFACE (POD INTERFACE) slot on the back of the projection television. If no DCM is present and you try to access the Cable Module Info, the message 'Cable Module Not present' will be displayed on screen. To receive the features offered by your cable company, you may have to subscribe to those services. Note: Please contact your cable company regarding availability of the DCM (Digital Cable Module). The cable module is needed to receive premium digital services (where available) through the cable input. You may also able to order call-ahead pay per view events. If Red Is Protruding From Center Cross, Press CH And VOL Key To Correct Up Left Right Down PRESS 0 To Adjust Blue Press Ok To Continue Press "0" If Blue Is Protruding From Center Cross, Press CH And VOL Key To Correct Up Left Right Down PRESS 0 To Adjust Red Press Ok To Continue 27 z
-
 1
1 -
2
-
3
-
4
-
5
-
6
-
7
-
8
-
9
-
10
-
11
-
12
-
13
-
14
-
15
-
16
-
17
-
18
-
19
-
20
-
21
-
22
-
23
-
 24
24 -
 25
25 -
 26
26 -
 27
27 -
 28
28 -
 29
29 -
 30
30 -
 31
31 -
 32
32 -
 33
33 -
 34
34 -
35
-
36
-
37
-
38
-
39
-
40
-
41
-
42
-
43
-
44
-
45
-
46
-
47
-
48
-
49
-
50
-
51
-
52
-
53
-
54
-
55
-
56
-
57
-
58
-
59
-
60
-
61
-
62
-
63
-
64
-
65
-
66
-
67
-
68
-
69
-
70
-
71
-
72
-
73
-
74
-
75
-
76
-
77
-
78
-
79
-
80
-
81
-
82
-
83
-
84
-
85
-
86
-
87
-
88
 |
 |