Panasonic PV GS19 Digital Video Camera - Page 19
EASY TO USE MODE DIAL, HOW TO USE THE JOYSTICK CONTROL, Basic Joystick Control Operations - camcorder manual
 |
UPC - 037988977994
View all Panasonic PV GS19 manuals
Add to My Manuals
Save this manual to your list of manuals |
Page 19 highlights
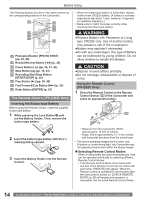
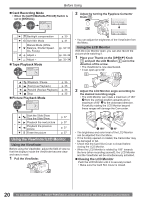
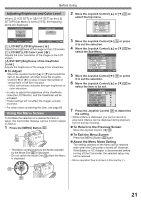
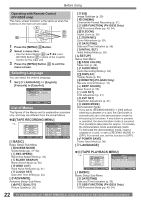
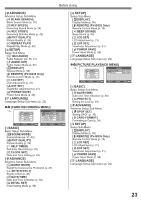
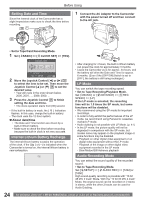
Before Using Easy to Use Mode Dial You can choose a desired mode by rotating the Mode Dial. 1 Rotate the Mode Dial 34 . • Set your desired mode to 1 . 34 Joystick Control (See below) 1 : Tape Recording Mode Use this mode when recording pictures on a tape. Also, you can record still pictures on the card simultaneously while recording on a tape. : Tape Playback Mode Use this mode when playing back the recorded scene on a tape. : Card Recording Mode Use this mode when recording still pictures on a card. : Picture Playback Mode Use this mode when playing back the recorded still picture on a card. : PC Mode Use this mode when you want to connect the Camcorder to your Personal Computer. You can view or edit the images recorded on a card on your personal computer. How to Use the Joystick Control Basic Joystick Control Operations Operations on the menu screen and selection of files to be played back on the multi-image display. Move the Joystick Control or ►] to select an item or file, and then press in the center to set it. 1 4 3 5 2 One-Touch Navigation icon 1 Select by moving [▲]. 2 Select by moving [►]. 3 Select by moving [▼]. 4 Select by moving [◄]. 5 Push the center to select the item. Joystick Control and Screen Display Press the center of the Joystick Control, and One-Touch Navigation icon will be displayed on the lower right of the screen. Each press switches the display as follows depending on the mode. Move the Joystick Control or ►] to select an item. • In the Tape Playback Mode or the Picture Playback Mode, the One-Touch Navigation icon will be automatically on the lower right of the screen. „ Tape Recording Mode • When the [AUTO/MANUAL/FOCUS] Switch is set to [AUTO]. One-Touch Navigation icon OFF 1/2 2/2 ◄ Fade pp. 29~30 1/2 ► Backlight compensation p. 30 ▼ Soft Skin Mode p. 31 ▲ 2/2 ▼ MagicPix Mode Recording Check p. 30 p. 25 „ Tape Recording Mode • When the [AUTO/MANUAL/FOCUS] Switch is set to [MANUAL]. One-Touch Navigation icon OFF 1/3 2/3 3/3 ◄ Fade pp. 29~30 1/3 ► Backlight compensation p. 30 ▼ Soft Skin Mode p. 31 ▲ 2/3 ▼ MagicPix Mode Recording Check p. 30 p. 25 ▼ 3/3 ◄ Manual Mode (White Balance, Shutter Speed, Iris, Focus) Adjust + pp. 32~34 pp. 32~34 ► Adjust - pp. 32~34 „ Card Recording Mode • When the [AUTO/MANUAL/FOCUS] Switch is set to [AUTO]. One-Touch Navigation icon OFF 1/1 ► 1/1 ▼ Backlight compensation Soft Skin Mode p. 30 p. 31 19
-
 1
1 -
2
-
3
-
4
-
5
-
6
-
7
-
8
-
9
-
10
-
11
-
12
-
13
-
 14
14 -
 15
15 -
 16
16 -
 17
17 -
 18
18 -
 19
19 -
 20
20 -
 21
21 -
 22
22 -
 23
23 -
 24
24 -
25
-
26
-
27
-
28
-
29
-
30
-
31
-
32
-
33
-
34
-
35
-
36
-
37
-
38
-
39
-
40
-
41
-
42
-
43
-
44
-
45
-
46
-
47
-
48
-
49
-
50
-
51
-
52
-
53
-
54
-
55
-
56
-
57
-
58
-
59
-
60
-
61
-
62
-
63
-
64
-
65
-
66
-
67
-
68
-
69
-
70
-
71
-
72
-
73
-
74
-
75
-
76
-
77
-
78
-
79
-
80
 |
 |
