Panasonic SCXH50 SAXH50 User Guide - Page 14
Linked operations with the TV
 |
View all Panasonic SCXH50 manuals
Add to My Manuals
Save this manual to your list of manuals |
Page 14 highlights
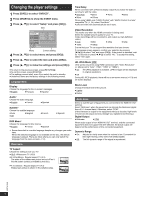
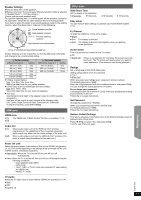
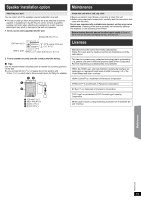
Getting Started Playing Discs Play Speed [DVD-V] To change play speed - from "k0.6" to "k1.4" (in 0.1-unit steps) ≥ Press [1 PLAY]5 to return to normal play. ≥ After you change the speed - Dolby Pro Logic II has no effect. - Audio output switches to 2-channel stereo. - Sampling frequency of 96 kHz is converted to 48 kHz. ≥ This function may not work depending on the disc's recording. Repeat Mode (B 13, Repeat play) A-B Repeat (To repeat a specified section) Except [JPEG] Press [OK]8 at the starting and ending points. ≥ Select "Off" to cancel. Subtitle [DVD-V] (with multiple subtitles) To select subtitle language ≥ On iR/iRW, a subtitle number may be shown for subtitles that are not displayed. Angle [DVD-V] (with multiple angles) To select a video angle Menu 2 (Video) Transfer Mode To select the method of conversion for video output to suit the type of material Auto, Video ≥ When the content is distorted, select "Video". ≥ This may have no effect with some sources. Zoom To select zoom Normal, 1, 2, 3 Menu 3 (Audio) Dialog Enhancer To make the dialog in movies easier to hear [DVD-V] (Dolby Digital, 3-channel or higher, with the dialog recorded in the center channel) Off, On Linked operations with the TV (VIERA LinkTM "HDAVI ControlTM") What is VIERA Link "HDAVI Control"? VIERA LinkTM is a new name for EZ SyncTM. VIERA Link "HDAVI Control" is a convenient function that offers linked operations of this unit, and a Panasonic TV (VIERA) under "HDAVI Control". You can use this function by connecting the equipment with the HDMI cable. See the operating instructions for connected equipment for operational details. Preparation ≥ Confirm that the HDMI connection has been made (B 7). 1 Set "VIERA Link" to "On" (B 17). (The default setting is "On".) 2 Set the "HDAVI Control" operations on the connected equipment (e.g., TV). 3 Turn on all "HDAVI Control" compatible equipment and select this unit's input channel on the connected TV so that the "HDAVI Control" function will work properly. Whenever the connection or settings are changed, repeat this procedure and reconfirm the points in "Setting the audio link" (B below). Setting the audio link ∫ Setting the audio link with the TV Select "AUX", "ARC"§1 or "DIGITAL IN" for TV audio link. Refer to TV audio setting in Easy setup (B 8) or "TV Audio" in HDMI menu (B 17). Confirm the TV audio connection to the AUX terminal (for "AUX"), HDMI AV OUT terminal (for "ARC"§1) or DIGITAL AUDIO IN OPTICAL terminal (for "DIGITAL IN") on the main unit (B 7). ∫ Setting the audio link with the STB Select "D-IN" for STB audio link. Refer to STB setting in "Making settings for digital audio input" (B 10). Confirm the STB audio connection to the DIGITAL AUDIO IN OPTICAL terminal (for "D-IN") on the main unit (B 7). ≥ VIERA Link "HDAVI Control", based on the control functions provided by HDMI which is an industry standard known as HDMI CEC (Consumer Electronics Control), is a unique function that we have developed and added. As such, its operation with other manufacturers' equipment that supports HDMI CEC cannot be guaranteed. ≥ This unit supports "HDAVI Control 5" function. "HDAVI Control 5" is the newest standard (current as of December, 2010) for Panasonic's HDAVI Control compatible equipment. This standard is compatible with Panasonic's conventional HDAVI equipment. ≥ Please refer to individual manuals for other manufacturers' equipment supporting VIERA Link function. Auto lip-sync (For "HDAVI Control 3 or later") This function automatically provides synchronized audio and video output. (This works only when the source is "DVD/CD", "AUX"§2, "ARC"§1, 2 or "D-IN"§2, 3.) ≥ When using "DVD/CD" as the source, set "Time Delay" in Video menu to "0ms/Auto" (B 16). Other Operations Reference RQTX1326 14
-
 1
1 -
2
-
3
-
4
-
5
-
6
-
7
-
8
-
 9
9 -
 10
10 -
 11
11 -
 12
12 -
 13
13 -
 14
14 -
 15
15 -
 16
16 -
 17
17 -
 18
18 -
 19
19 -
20
-
21
-
22
-
23
-
24
-
25
-
26
 |
 |