Panasonic WJ-GXE100 Installation Guide - Page 21
supply* to the power cord plug., FOR UL LISTED MODELS, ONLY CONNECT 12 V DC
 |
View all Panasonic WJ-GXE100 manuals
Add to My Manuals
Save this manual to your list of manuals |
Page 21 highlights
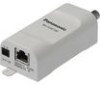
When using 12 V DC power supply* q Loosen the screws of the power cord plug (accessory). w Connect the cable of the 12 V DC power supply* to the power cord plug. Strip the end of the wire by 3 mm - 7 mm {1/8 inches - 9/32 inches}, and twist the stripped part of the wire sufficiently to avoid short circuit. Specification of cable (wire): 16 AWG - 24 AWG, Single core, twisted • Check whether the stripped part of the wire is not exposed and is securely connected. e Tighten the screws of the power cord plug. (Recommended tightening torque: 0.34 N·m {0.25 lbf·ft}) r Connect the power cord plug to the 12 V DC power supply terminal on the unit. t Tie the power cord and LAN cable together using the cable tie (accessory). Tie the cables together so that they cannot be easily pulled out from the unit by leaving sufficient slack in the cables. * FOR UL LISTED MODEL(S), ONLY CONNECT 12 V DC CLASS 2 POWER SUPPLY. IMPORTANT: • Be sure to use the power cord plug provided with this product. • Be sure to fully insert the power cord plug (accesso- ry) into the 12 V DC power supply terminal. Otherwise, it may damage the unit or cause malfunction. • Make connections so that excessive force is not applied to the power cord or the LAN cable when they are connected. • Be sure to use an AC adaptor compliant with the Specifications regarding power source and power consumption. (☞ Page 28) Power cord plug (accessory) (12 V DC) (GND) To 12 V DC power supply Cable tie (accessory) 21
-
 1
1 -
2
-
3
-
4
-
5
-
6
-
7
-
8
-
9
-
10
-
11
-
12
-
13
-
14
-
15
-
 16
16 -
 17
17 -
 18
18 -
 19
19 -
 20
20 -
 21
21 -
 22
22 -
 23
23 -
 24
24 -
 25
25 -
 26
26 -
27
-
28
-
29
-
30
-
31
-
32
 |
 |
