Panasonic WVCW384 WVCW384 User Guide - Page 16
Adjust the focus, Setting C/L
 |
UPC - 791871505830
View all Panasonic WVCW384 manuals
Add to My Manuals
Save this manual to your list of manuals |
Page 16 highlights
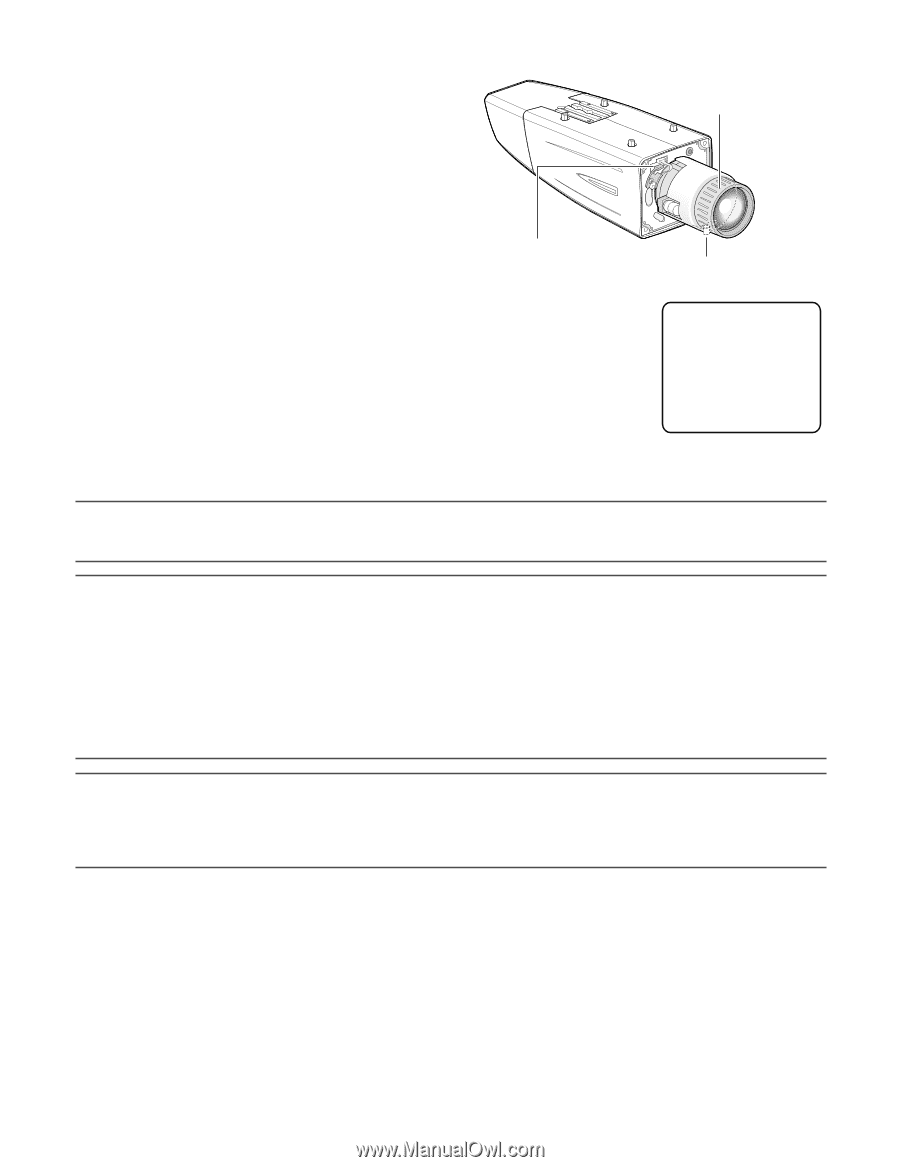
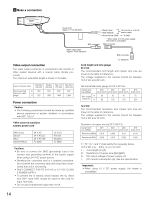
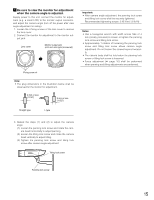
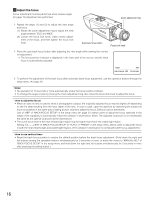
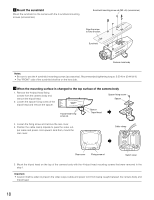
n Adjust the focus Focus adjustment must be performed when camera angle ( page 15) adjustment are performed. Zoom adjustment ring 1. Repeat the steps (1) and (2) to adjust the view angle and focus. (1) Rotate the zoom adjustment ring to adjust the view angle between TELE and WIDE. (2) Loosen the focus lock knob, make coarse adjustment of the focus, and then tighten the focus lock knob. Auto back focus button Focus lock knob 2. Press the auto back focus button after adjusting the view angle while viewing the monitor for adjustment. → The focus position indicator is displayed in the lower part of the screen, and the back focus is automatically adjusted. NEAR FAR INDICATOR 255 FOCUSING 3. To perform fine adjustment of the back focus after automatic back focus adjustment, use the operation buttons through the setup menu. ( page 31) Notes: • No operation for 10 seconds or more automatically clears the focus position indicator. • To change the angle of view by moving the zoom adjustment ring, also move the focus lock knob to adjust the focus. • When an auto iris lens is used to shoot a photographic subject, the originally adjusted focus may be slightly off depending on the iris state resulting from the focal depth of the lens. In such a case, open the aperture by darkening the subject as much as possible in the same way of taking picture, and then adjust the focus. Defocus can be prevented. Use of "ABF" of "BACK-FOCUS SETUP" in the setup menu ( page 31) allows users to adjust the focus optimally in the range of the capability to automatically follow the variation in illuminance. (Note: The adjusted focal point is not necessarily the same as the optimal focal point at the illuminance.) • The out-of-focus level in the near-infrared light region may be higher than that in the visible light region. Setting "C/L ←→ B/W" of "BACK-FOCUS SETUP" to "AUTO" or "PRESET" in the setup menu allows users to adjust the focus in both the near-infrared light and visible light regions. (The variation in illuminance is not followed after focus adjustment.) • Reset the back focus position to restore the default position before the back focus adjustment. (Hold down the right and left buttons among the operation buttons simultaneously for 2 seconds or more, or move the cursor to "MANUAL-ADJ" of "BACK-FOCUS SETUP" in the setup menu and hold down the right and left buttons simultaneously for 2 seconds or more after pressing the setting button.) 16
-
 1
1 -
2
-
3
-
4
-
5
-
6
-
7
-
8
-
9
-
10
-
 11
11 -
 12
12 -
 13
13 -
 14
14 -
 15
15 -
 16
16 -
 17
17 -
 18
18 -
 19
19 -
 20
20 -
 21
21 -
22
-
23
-
24
-
25
-
26
-
27
-
28
-
29
-
30
-
31
-
32
-
33
-
34
-
35
-
36
-
37
-
38
-
39
-
40
-
41
-
42
-
43
-
44
-
45
-
46
-
47
-
48
-
49
-
50
-
51
-
52
-
53
-
54
-
55
-
56
-
57
-
58
-
59
-
60
-
61
-
62
-
63
-
64
-
65
-
66
-
67
-
68
-
69
-
70
-
71
-
72
-
73
-
74
 |
 |