Panasonic WVCW384 WVCW384 User Guide - Page 24
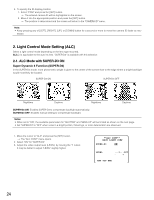
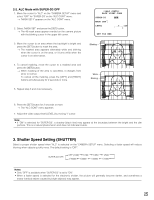
Light Control Mode Setting ALC, 1. ALC Mode with SUPER-D3
 |
UPC - 791871505830
View all Panasonic WVCW384 manuals
Add to My Manuals
Save this manual to your list of manuals |
Page 24 highlights
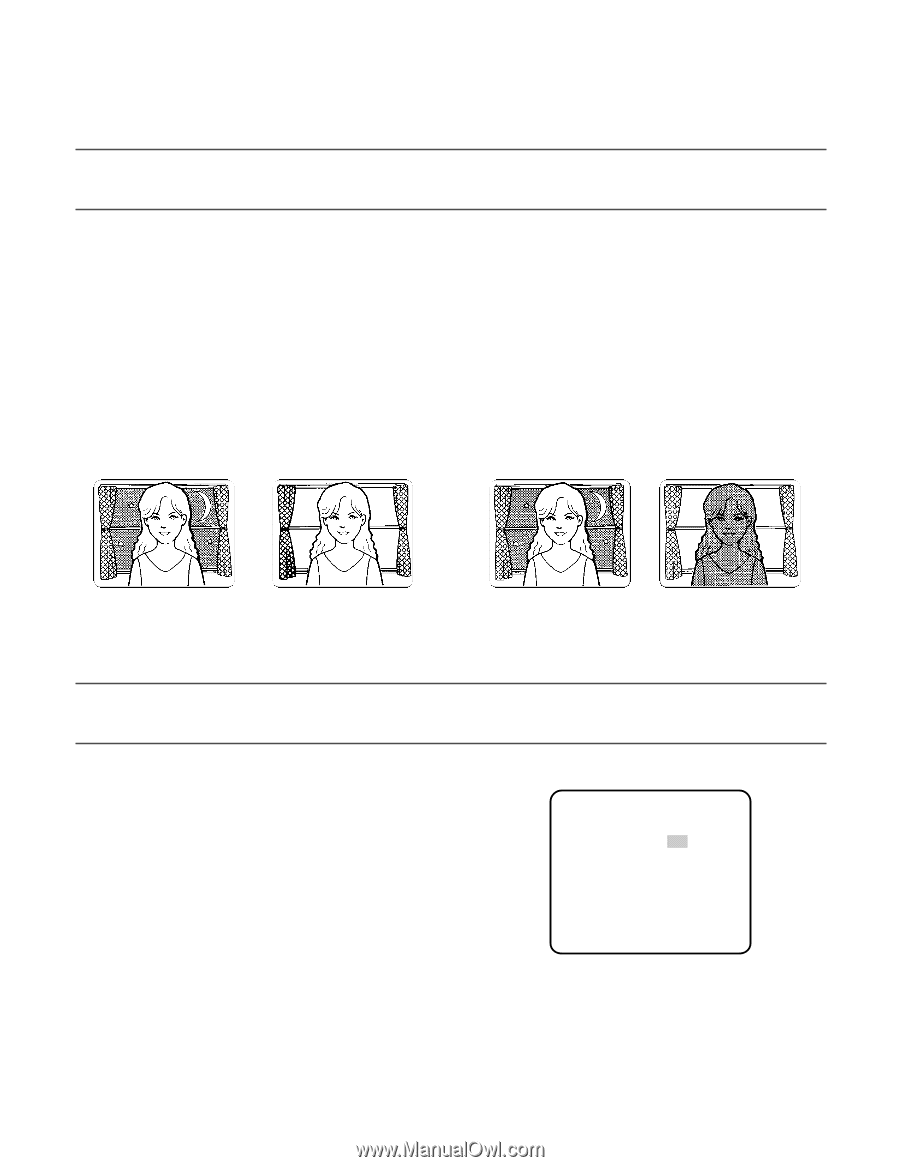
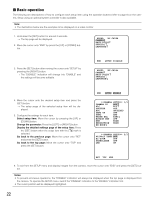
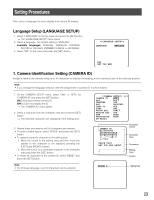
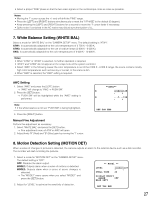
4. To specify the ID display position: 1. Select "POSI" and press the [SET] button. → The entered camera ID will be highlighted on the screen. 2. Move it into the appropriate position and press the [SET] button. → The position is determined and the screen will return to the "CAMERA ID" menu. Note: • Keep pressing any of [LEFT], [RIGHT], [UP], or [DOWN] button for a second or more to move the camera ID faster as nec- essary. 2. Light Control Mode Setting (ALC) Select a light control mode depending on the lens type mounted. ALC↓: Is applicable to the auto iris lens. "SUPER-D3" is available with this selection. 2-1. ALC Mode with SUPER-D3 ON Super Dynamic 3 Function (SUPER-D3) In the SUPER-D3 mode, more photometric weight is given to the center of the screen than to the edge where a bright backlight would most likely be located. SUPER-D3 ON SUPER-D3 OFF Nighttime Daytime Nighttime Daytime SUPER-D3 ON: Enables SUPER-D3 to compensate backlight automatically. SUPER-D3 OFF: Enables manual setting to compensate backlight. Notes: • When set to "ON", the available parameters for "SHUTTER" and "SENS-UP" will be limited as shown on the next page. • Set "SUPER-D3" to "OFF" when noise in a bright portion, flickerings, or color deterioration are observed. 1. Move the cursor to "ALC" and press the [SET] button. → The "ALC CONT" menu opens. 2. Select "ON" for "SUPER-D3". 3. Adjust the video output level (LEVEL) by moving the "I" cursor. It may be better to adjust "LEVEL" slightly higher. **ALC CONT** BACK LIGHT COMP SUPER-D3 ON LEVEL ...I...128 - + RET TOP END 24
-
 1
1 -
2
-
3
-
4
-
5
-
6
-
7
-
8
-
9
-
10
-
11
-
12
-
13
-
14
-
15
-
16
-
17
-
18
-
 19
19 -
 20
20 -
 21
21 -
 22
22 -
 23
23 -
 24
24 -
 25
25 -
 26
26 -
 27
27 -
 28
28 -
 29
29 -
30
-
31
-
32
-
33
-
34
-
35
-
36
-
37
-
38
-
39
-
40
-
41
-
42
-
43
-
44
-
45
-
46
-
47
-
48
-
49
-
50
-
51
-
52
-
53
-
54
-
55
-
56
-
57
-
58
-
59
-
60
-
61
-
62
-
63
-
64
-
65
-
66
-
67
-
68
-
69
-
70
-
71
-
72
-
73
-
74
 |
 |