Panasonic WVCW384 WVCW384 User Guide - Page 30
Privacy Zone Setting PRIVACY ZONE, Electronic Zoom EL-ZOOM, ZONE NUMBER 1/8, RET TOP END, POSITION
 |
UPC - 791871505830
View all Panasonic WVCW384 manuals
Add to My Manuals
Save this manual to your list of manuals |
Page 30 highlights
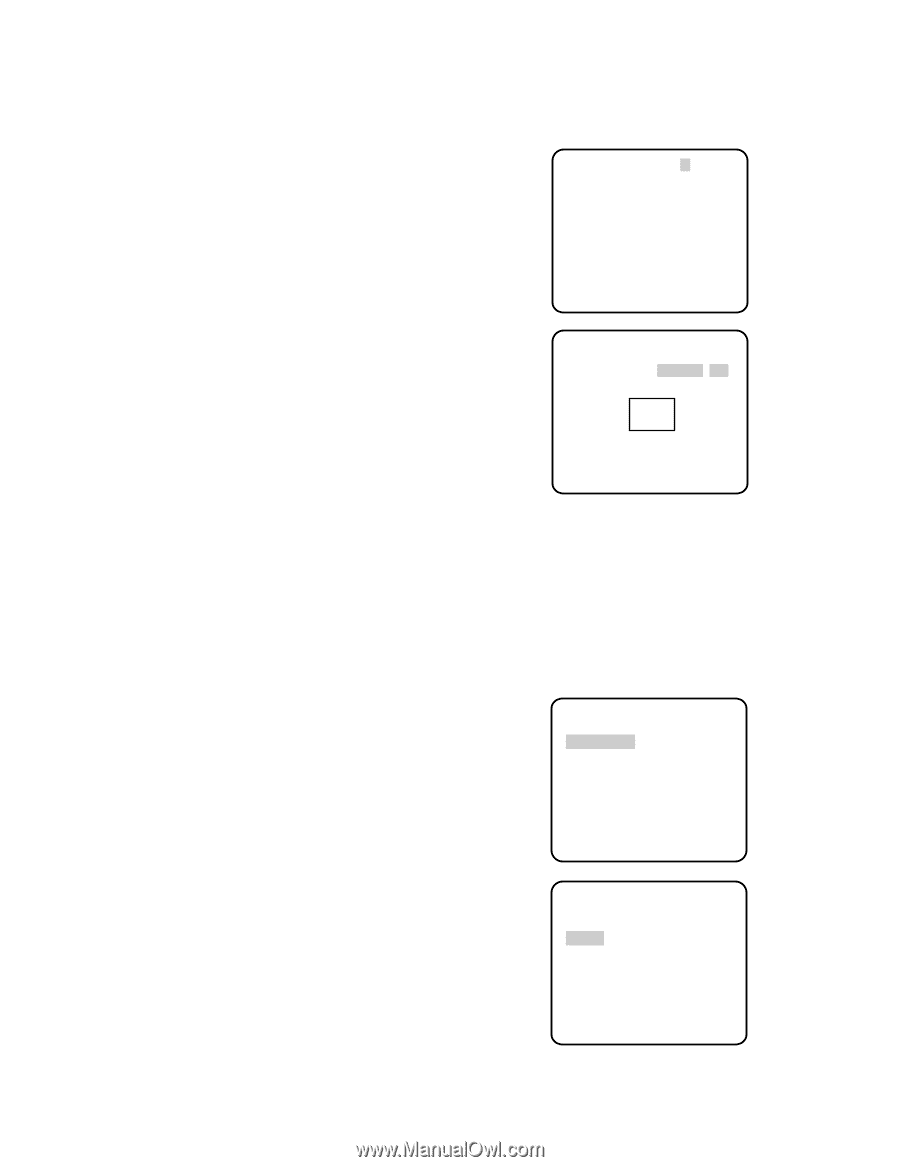
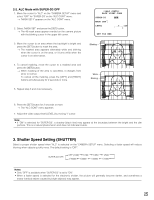
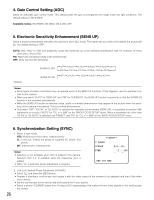
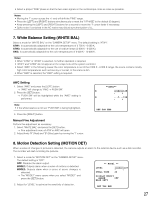
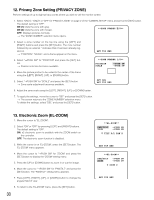
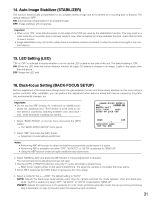
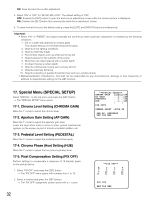
12. Privacy Zone Setting (PRIVACY ZONE) Perform settings of up to eight privacy zones where you wish to veil the monitor screen. 1. Select "ON(1)", "ON(2)" or "OFF" for "PRIVACY ZONE" on page 2 of the "CAMERA SETUP" menu and press the [SET] button. The default setting is "OFF". ON (1): Veils the zone with grey. ON (2): Veils the zone with mosaic. **ZONE NUMBER 1/8** OFF: Displays pictures normally. → The "ZONE NUMBER" selection menu opens. 2. Select a zone number on the top line using the [LEFT] and [RIGHT] buttons and press the [SET] button. The zone number followed by an asterisk * indicates that it has been already registered. → "POSITION", "SCALE", and a frame appear on the menu. RET TOP END 3. Select "→PUSH SW" for "POSITION" and press the [SET] button. → Position selection becomes available. **ZONE NUMBER 1/8** POSITION SCALE →PUSH SW →PUSH SW 4. Move the picture portion to be veiled to the center of the frame using the [LEFT], [RIGHT], [UP], or [DOWN] button. 5. Select "→PUSH SW" for "SCALE" and press the [SET] button. → Zone scale adjustment becomes available. SET DEL RET TOP END 6. Adjust the zone scale using the [LEFT], [RIGHT], [UP], or [DOWN] button. 7. To apply the settings, move the cursor to "SET" and press the [SET] button. → The screen returns to the "ZONE NUMBER" selection menu. To delete the settings, select "DEL" and press the [SET] button. 13. Electronic Zoom (EL-ZOOM) 1. Move the cursor to "EL-ZOOM". 2. Select "ON" or "OFF" by pressing [LEFT] and [RIGHT] buttons. The default setting is "OFF". ON: x2 electronic zoom is available with the ZOOM switch on the controller. OFF: The electronic zoom function is disabled. 3. While the cursor is on "EL-ZOOM", press the [SET] button. The "EL-ZOOM" menu appears. 4. Move the cursor to "→PUSH SW" for "ZOOM" and press the [SET] button to display the "ZOOM" setting menu. 5. Press the [UP] or [DOWN] button to zoom in or out the image. 6. Move the cursor to "→PUSH SW" for "PAN/TILT" and press the [SET] button. The "PAN/TILT" setting menu appears. 7. Press [LEFT], [RIGHT], [UP], or [DOWN] button to change the angular field of view. 8. To return to the "EL-ZOOM" menu, press the [SET] button. 30 **EL-ZOOM** PAN/TILT →PUSH SW ZOOM →PUSH SW U TILT D/L PAN R RET TOP END **EL-ZOOM** PAN/TILT →PUSH SW ZOOM →PUSH SW U ZOOM D RET TOP END
-
 1
1 -
2
-
3
-
4
-
5
-
6
-
7
-
8
-
9
-
10
-
11
-
12
-
13
-
14
-
15
-
16
-
17
-
18
-
19
-
20
-
21
-
22
-
23
-
24
-
 25
25 -
 26
26 -
 27
27 -
 28
28 -
 29
29 -
 30
30 -
 31
31 -
 32
32 -
 33
33 -
 34
34 -
 35
35 -
36
-
37
-
38
-
39
-
40
-
41
-
42
-
43
-
44
-
45
-
46
-
47
-
48
-
49
-
50
-
51
-
52
-
53
-
54
-
55
-
56
-
57
-
58
-
59
-
60
-
61
-
62
-
63
-
64
-
65
-
66
-
67
-
68
-
69
-
70
-
71
-
72
-
73
-
74
 |
 |