Pfaff 130-6 Owner's Manual - Page 10
materials.
 |
View all Pfaff 130-6 manuals
Add to My Manuals
Save this manual to your list of manuals |
Page 10 highlights
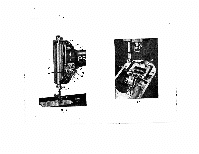
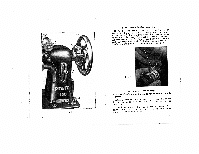
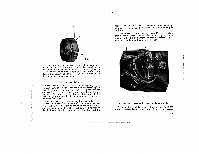
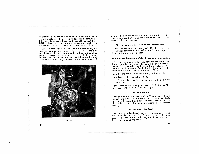
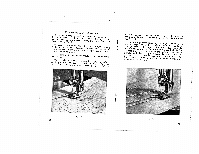
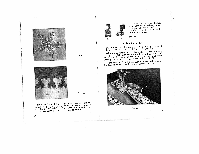
to remove the upper and lower parts of the bobbin case. Turn the balance wheel so as to see clearly screws E-1, E-2, and E-3. Unscrew these, and take off the hook bow. NOTE: Since these screws are extremely small, it is necessary to use great care so as not to lose them. Grasp center hook between thumb and forefinger, and turn the balance wheel gently until the lower case slips out. Clear out the dirt with a cloth, and put a drop of oil on the running surface under the case. Replace lower bobbin case. Do not force ii, as it will damage the part. Replace the hook bow, and screw the three screws back Fig. 13 16 into position. If this is difficult, do not force it-call for your mechanic. Parts damaged by force will not be replaced free of charge. 13. To regulate pressure of the presser foot Screw or unscrew the bushing (V), (Fig. 4), to increase or decrease pressure of the presser foot, and to regulate it for the type of material used. 14. Adjusting the tension of the thread controller spring ttsehenrwFesoiianrodgne.mcsoWhbnorhtuoreliodndlleebrwrienosgrtpikgraiihnnntggder.aodnaTlrionttthiltneiicggk,hmteeoonarresehthtahetrahdnetenmitnesianottshneieor, inatculasors,nfe the of the the lever of the tension sleeve as shown in Fig. 4. a) indicating the position for darning and embroidering; b) indicating the normal position; c) indicating the position for sewing thick and hard materials. The direction for turning the lever is indicated by "L" for loose (light), and "F" for fast (tight). 15. The needle Make for your sure that you use machine-Needle the PFAFF needles Series 130 R. These designed are finely machined, tempered and polished steel, and are avail able in sizes 7 to 11, for the most delicate to the heaviest sewing. 16. To lower the feed For darning and embroidering, the by turning the knob (X), (Fig. 6), on feed the can be lowered front right-hand side of the bed plate. Turn it right to lower the feed; turn it left to raise the feed.
-
 1
1 -
2
-
3
-
4
-
 5
5 -
 6
6 -
 7
7 -
 8
8 -
 9
9 -
 10
10 -
 11
11 -
 12
12 -
 13
13 -
 14
14 -
 15
15 -
16
-
17
-
18
-
19
-
20
-
21
-
22
 |
 |
