Pfaff 130-6 Owner's Manual - Page 17
the fabric.
 |
View all Pfaff 130-6 manuals
Add to My Manuals
Save this manual to your list of manuals |
Page 17 highlights
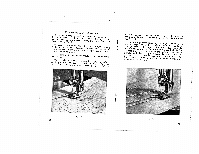
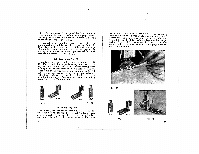
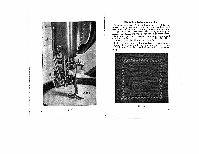
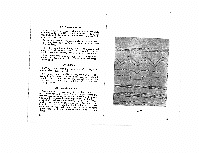
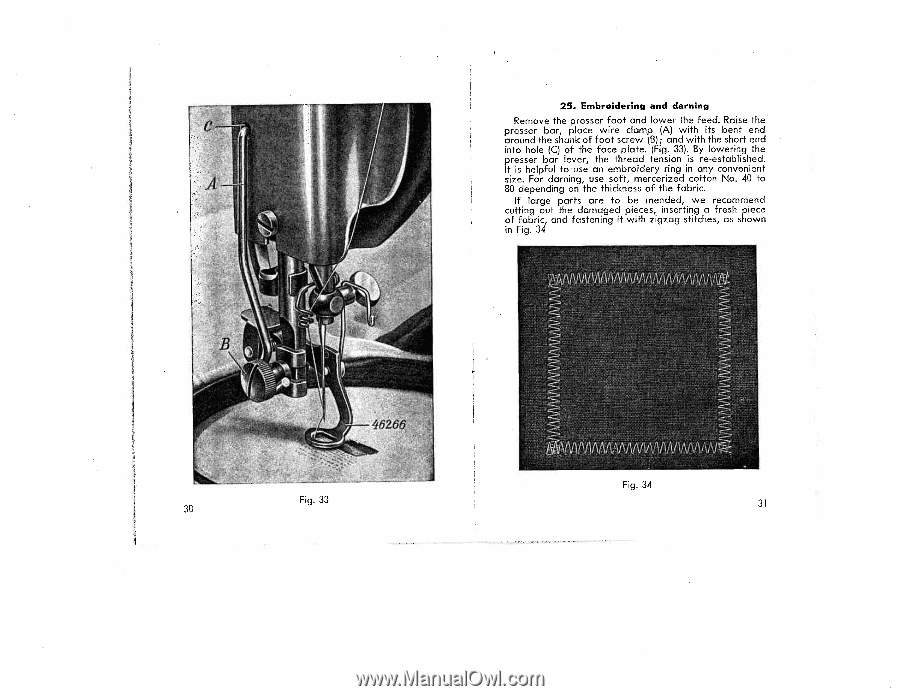
25. Embreidering and darning Remove the presser foot and lower the feed. Raise the presser bar, place wire clamp (A) with its bent end around the shank of foot screw (13); and with the short end into hole (C) of the face plate. (Fig. 33). By lowering the presser bar lever, the thread tension is re-established. It is helpful to use an embroidery ring in any convenient size. For darning, use soft, mercerized cotton No. 40 to 80 depending on the thickness of the fabric. If large parts are to be mended, we recommend cutting out the damaged pieces, inserting a fresh piece of fabric, and fastening it with zigzag stitches, as shown in Fig. 34 Fig. 33 30 Fig. 34 31
-
 1
1 -
2
-
3
-
4
-
5
-
6
-
7
-
8
-
9
-
10
-
11
-
 12
12 -
 13
13 -
 14
14 -
 15
15 -
 16
16 -
 17
17 -
 18
18 -
 19
19 -
 20
20 -
 21
21 -
 22
22
 |
 |
25.
Embreidering
and
darning
Remove
the
presser
foot
and
lower
the
feed.
Raise
the
presser
bar,
place
wire
clamp
(A)
with
its
bent
end
around
the
shank
of
foot
screw
(13);
and
with
the
short
end
into hole
(C)
of
the
face plate.
(Fig.
33).
By
lowering
the
presser
bar
lever,
the
thread
tension
is
re-established.
It
is
helpful
to
use
an
embroidery
ring
in
any
convenient
size.
For
darning,
use
soft,
mercerized
cotton
No.
40
to
80
depending
on
the
thickness
of
the fabric.
If
large
parts
are
to
be
mended,
we
recommend
cutting
out the
damaged
pieces,
inserting
a
fresh
piece
of
fabric,
and
fastening
it
with
zigzag
stitches,
as
shown
in
Fig.
34
Fig.
34
Fig.
33
30
31