Pfaff GrandQuilter 18.8 Owner's Manual - Page 16
Left controller with Auto Stitch
 |
View all Pfaff GrandQuilter 18.8 manuals
Add to My Manuals
Save this manual to your list of manuals |
Page 16 highlights
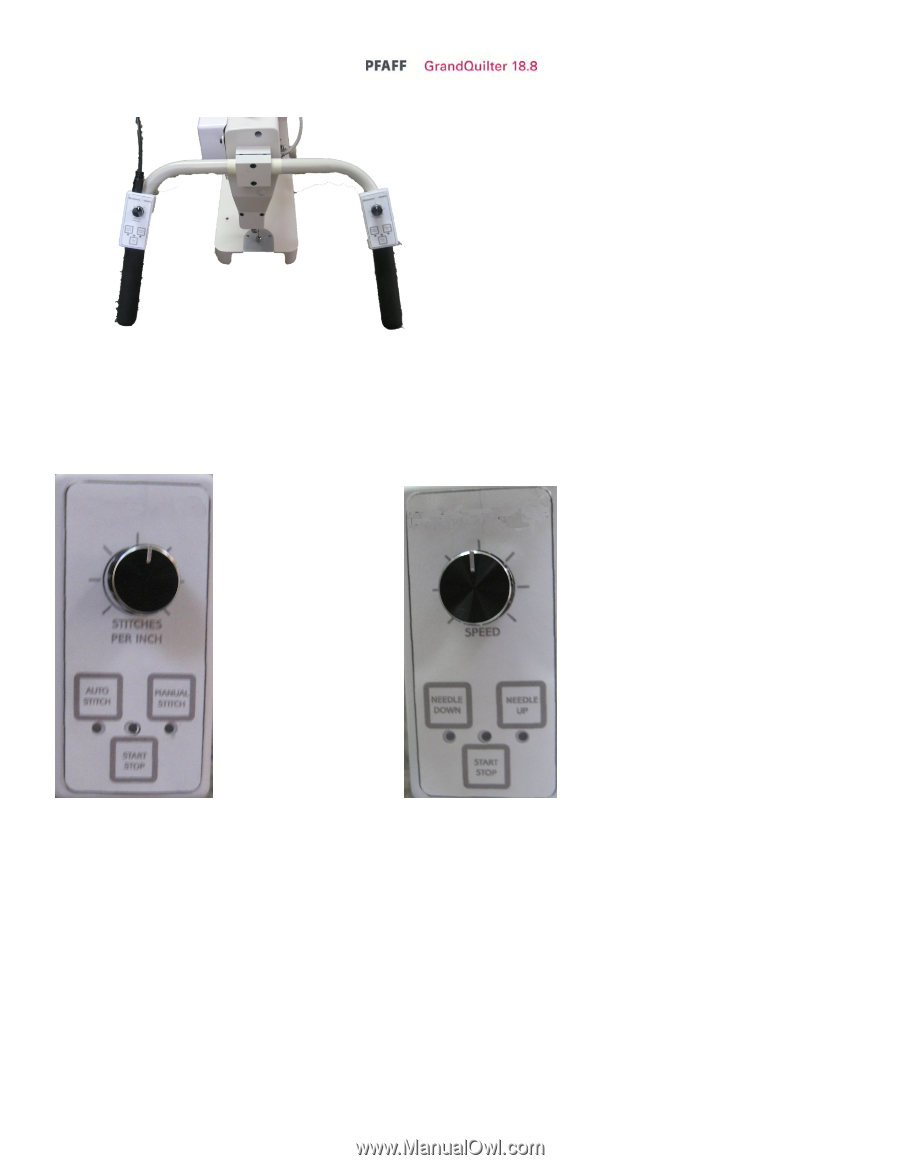
The Control Unit The control unit is shown here. To activate the Auto Stitch Press the Auto Stitch Button and ensure that the light under the button is on. Now to start press the start/stop button this can be found on either controller. As the machine is moved movement is detected and the speed of the machine will adjust to keep the stitch length constant. The dial on the left side is for the stitch length adjustment. To activate the manual stitch, press the manual stitch button and ensure that the light under the button is lit. Now press the start/stop button on either controller to start. This keeps the machine speed constant. The dial on the right controller sets the machine speed. YOU ONLY USE ONE MODE OR THE OTHER. The needle position sets your machine to stop with the needle up or down. For a single stitch press the button that has a light under it lit and the machine will complete one full turn. So if the needle up is on you can press the needle up and it will cycle and you can now pull you bobbin thread to the top. Left controller with Auto Stitch (stitch regulation) and Manual Stitch Knob adjust stitches per Inch in Auto Stitch. Right controller with needle up and needle down. Knob adjust speed when in manual Stitch. Both controllers have a start stop button. 16
-
 1
1 -
2
-
3
-
4
-
5
-
6
-
7
-
8
-
9
-
10
-
 11
11 -
 12
12 -
 13
13 -
 14
14 -
 15
15 -
 16
16 -
 17
17 -
 18
18 -
 19
19 -
 20
20 -
 21
21 -
22
-
23
-
24
-
25
-
26
-
27
-
28
 |
 |