Pfaff creative 2140 Owner's Manual - Page 172
Quilt/edge, guide
 |
View all Pfaff creative 2140 manuals
Add to My Manuals
Save this manual to your list of manuals |
Page 172 highlights
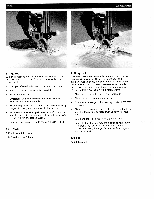
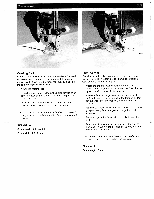
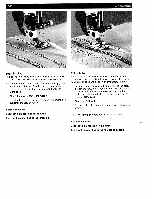
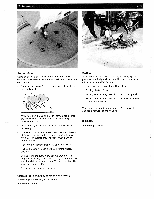
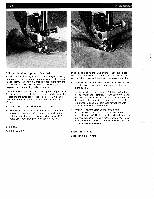
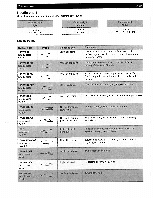
7. Accessories 7-15 : Free-motion quilt foot The free-motion quilt foot in combination with the straight stitch is well suited for free-motion quilting. The three layers of your quilt are guided manually during free-motion quilting. The faster you sew, the more consistent and uniform your stitches will become. Try out this technique on a test piece first. Free-motion quilting is possible in both curved and straight lines. For free-motion, straight-line quilting (center needle position), with a spacing of 1/4 inch (6 mm), use the four red markings on the corners of the foot as a guide. The distance between the markings is 1/2 inch (13 mm) Loosen the knurled screw on the presser foot holder. • Press the free motion quilting foot gently together with thumb and index finger. • Guide the pin of the free-motion quilt foot into the hole of the presser foot holder as far as it will go. The long fork of the free-motion quilt foot must be positioned behind the needle clamp. Tighten the knurled screw. • Bring the free motion quilting foot into the darning position and lower the feed dog. Quilt/edge guide This guide is especially useful when quilting. The guide can be attached both on the left and the right side of the presser foot. Insert the guide in the hole (C) and tighten the screw (F). Stitch No: Optional Stitch lenght: According to the stitch Stitch width: According to the stitch Tip: Free-motion embroidery (e.g. monograms) can also be completed using the free-motion quilting foot. Stitch No: 1 Stitch length: 2.5 mm
-
 1
1 -
2
-
3
-
4
-
5
-
6
-
7
-
8
-
9
-
10
-
11
-
12
-
13
-
14
-
15
-
16
-
17
-
18
-
19
-
20
-
21
-
22
-
23
-
24
-
25
-
26
-
27
-
28
-
29
-
30
-
31
-
32
-
33
-
34
-
35
-
36
-
37
-
38
-
39
-
40
-
41
-
42
-
43
-
44
-
45
-
46
-
47
-
48
-
49
-
50
-
51
-
52
-
53
-
54
-
55
-
56
-
57
-
58
-
59
-
60
-
61
-
62
-
63
-
64
-
65
-
66
-
67
-
68
-
69
-
70
-
71
-
72
-
73
-
74
-
75
-
76
-
77
-
78
-
79
-
80
-
81
-
82
-
83
-
84
-
85
-
86
-
87
-
88
-
89
-
90
-
91
-
92
-
93
-
94
-
95
-
96
-
97
-
98
-
99
-
100
-
101
-
102
-
103
-
104
-
105
-
106
-
107
-
108
-
109
-
110
-
111
-
112
-
113
-
114
-
115
-
116
-
117
-
118
-
119
-
120
-
121
-
122
-
123
-
124
-
125
-
126
-
127
-
128
-
129
-
130
-
131
-
132
-
133
-
134
-
135
-
136
-
137
-
138
-
139
-
140
-
141
-
142
-
143
-
144
-
145
-
146
-
147
-
148
-
149
-
150
-
151
-
152
-
153
-
154
-
155
-
156
-
157
-
158
-
159
-
160
-
161
-
162
-
163
-
164
-
165
-
166
-
 167
167 -
 168
168 -
 169
169 -
 170
170 -
 171
171 -
 172
172 -
 173
173 -
 174
174 -
 175
175 -
 176
176 -
 177
177 -
178
-
179
-
180
-
181
-
182
-
183
-
184
-
185
-
186
-
187
-
188
-
189
-
190
-
191
 |
 |
