Pfaff creative 7530 Owner's Manual - Page 162
Pfaff creative 7530 Manual
 |
View all Pfaff creative 7530 manuals
Add to My Manuals
Save this manual to your list of manuals |
Page 162 highlights
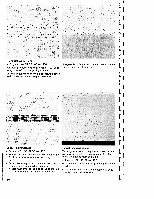
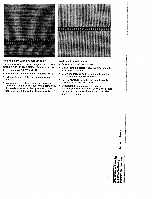
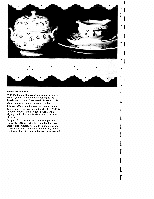
I nd this is how it is done: Cut out the pieces of your quilt with templates you have made or bought. A seam allowance of 0.63 5 cm (0.4 of an inch) should already be included in the templates. Arrange the pieces as in the pattern and form small squares that you can match together. These squares are then sewn together to form the surface of the quilt. The seam allowances of quilts are not serged. • Baste your finished quilt top onto the layer of batting with the back layer of the quilt under neath. • In traditional quilts, these three layers of ma terial are sewn together by hand with small stitches but this is quicker and more practical with the sewing machine. 11 Nhen your quilt is finished, you can make it into a Embroidery stitches are particularly suitable for ushion, a wall hanging or a bedspread. tone on tone quilting. d a u, JCl) .= c 155 Xco
-
 1
1 -
2
-
3
-
4
-
5
-
6
-
7
-
8
-
9
-
10
-
11
-
12
-
13
-
14
-
15
-
16
-
17
-
18
-
19
-
20
-
21
-
22
-
23
-
24
-
25
-
26
-
27
-
28
-
29
-
30
-
31
-
32
-
33
-
34
-
35
-
36
-
37
-
38
-
39
-
40
-
41
-
42
-
43
-
44
-
45
-
46
-
47
-
48
-
49
-
50
-
51
-
52
-
53
-
54
-
55
-
56
-
57
-
58
-
59
-
60
-
61
-
62
-
63
-
64
-
65
-
66
-
67
-
68
-
69
-
70
-
71
-
72
-
73
-
74
-
75
-
76
-
77
-
78
-
79
-
80
-
81
-
82
-
83
-
84
-
85
-
86
-
87
-
88
-
89
-
90
-
91
-
92
-
93
-
94
-
95
-
96
-
97
-
98
-
99
-
100
-
101
-
102
-
103
-
104
-
105
-
106
-
107
-
108
-
109
-
110
-
111
-
112
-
113
-
114
-
115
-
116
-
117
-
118
-
119
-
120
-
121
-
122
-
123
-
124
-
125
-
126
-
127
-
128
-
129
-
130
-
131
-
132
-
133
-
134
-
135
-
136
-
137
-
138
-
139
-
140
-
141
-
142
-
143
-
144
-
145
-
146
-
147
-
148
-
149
-
150
-
151
-
152
-
153
-
154
-
155
-
156
-
 157
157 -
 158
158 -
 159
159 -
 160
160 -
 161
161 -
 162
162 -
 163
163 -
 164
164 -
 165
165 -
 166
166 -
 167
167 -
168
-
169
-
170
-
171
-
172
-
173
-
174
-
175
-
176
-
177
-
178
-
179
-
180
-
181
-
182
-
183
-
184
-
185
 |
 |
