Philips 42PFL7432D User manual - Page 10
Philips - ambilight
 |
UPC - 609585129399
View all Philips 42PFL7432D manuals
Add to My Manuals
Save this manual to your list of manuals |
Page 10 highlights
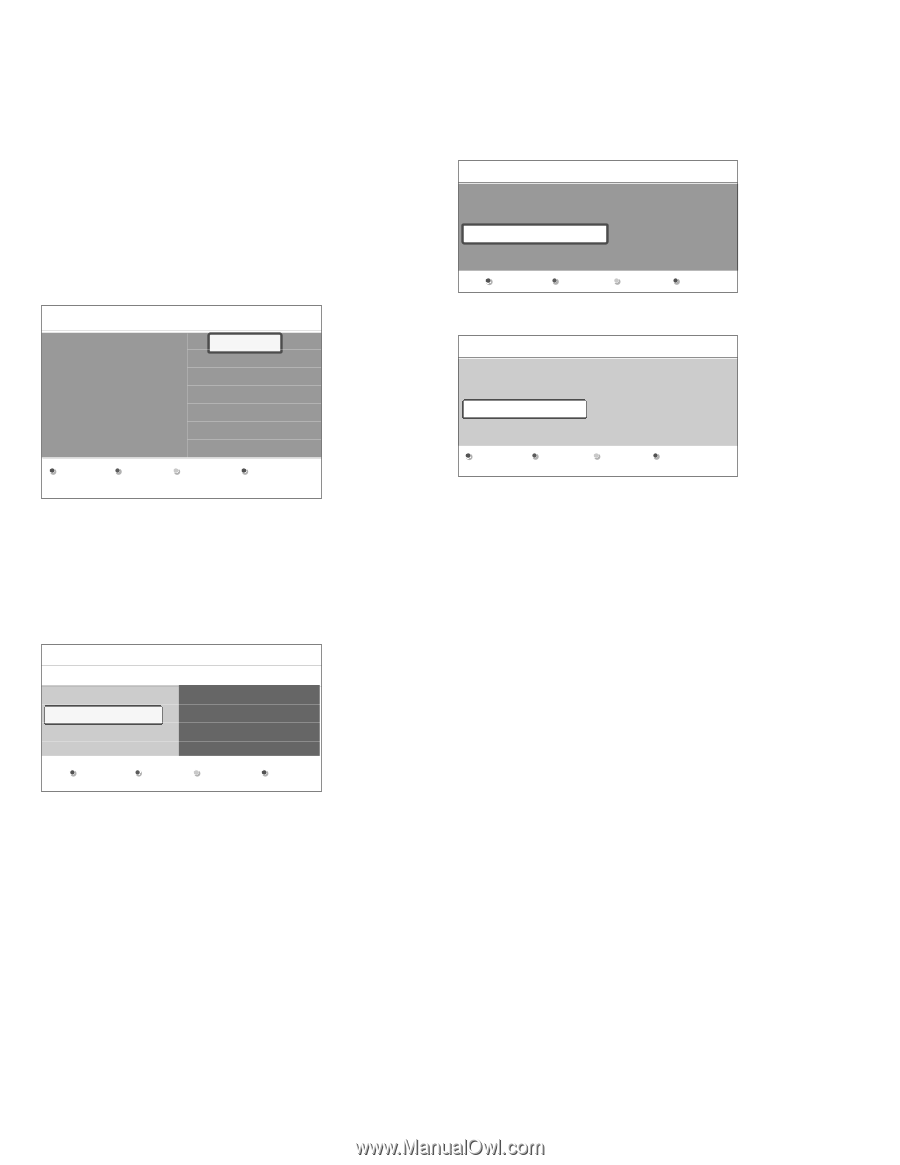
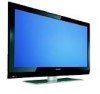
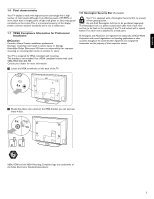
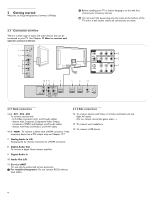
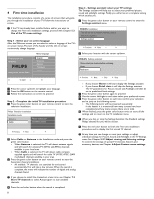
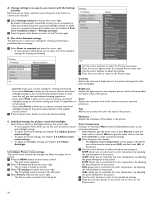
4 First time installation The installation procedure consists of a series of screens that will guide you through the installation of your TV. Follow the instructions on screen. Step 3 - Settings assistant: select your TV settings The Settings assistant will help you to select your preferred picture, sound and ambilight settings. Finally you will arrive at a complete setting which satisfies you. ‡ Press the green color button on your remote control to enter the Settings assistant menu. ç If the TV has already been installed before and/or you want to change the First time installation settings, proceed with Chapter 5.2 Use of the TV menu settings. Step 1 - Select your on-screen language After the Welcome screen you are asked to select a language of the TV's on-screen menus.The text of the header and the info on screen continuously change language. PHILIPS Installation This will help you to install the following sections: Television installation Settings assistant Previous Next Please select your language..... PHILIPS using cursor up and down Menu language English Français Español Português ® Select your location with the cursor up/down. PHILIPS Settings assistant Please select your location before continuing: Home Retail store NEXT ‡ Press the cursor up/down to highlight your language. ® Press the OK button on the remote control. Ò Follow the instructions on screen to proceed. Step 2 - Complete the initial TV installation procedure ‡ Press the green color button on your remote control to start the television installation. Philips Television installation Installation mode Antenna Cable Please select your installation mode. Previous Next Skip Stop > If you choose Home it will start display the Settings assistant. > If you choose Retail store it will skip the Settings assistant. The TV parameters for Picture, Sound and Ambilight will then be set to predefined fixed settings. Ò Press the green color button again to proceed. † Use the cursor left/right to each time select your preferred screen. º Press the green color button to each time confirm your selection and to jump to the following screen. > The following items will be presented sequentially. In the header it is mentioned how many screens have been completed and how many screens there are in total. ◊When finished, press the green color button twice to store all the settings and to return to the TV installation menu. ç When you skip or stop the Settings Assistant, the Standard settings Philips selected for you will be chosen. Previous Next ® Select Cable or Antenna in the Installation mode and press the green color button. > When Antenna is selected, the TV will detect antenna signals and will search for antenna TV (NTSC and ATSC) channels available in your local area. > When Cable is selected, the TV will detect cable company supplied signals and will search for cable TV (NTSC, ATSC, QAM modulated) channels available in your area. Ò Press the green color button on your remote control to start the Automatic channel installation. > All available TV channels are searched for and stored automatically.This will take a few minutes.When the search is complete, the menu will indicate the number of digital and analog channels found. ‹ Press the red color button to finish the First time installation procedure and to display the first stored TV channel. ç At any time you can change or reset your settings or adjust individual settings for Picture, Sound and Ambilight in the TV Settings menu. See Chapter 5.2.1 Adjust viewing and listening settings. To control the settings of special TV functions, features and accessory devices, see Chapter 6 Adjust Feature menu settings. ç If you choose to install the channels at a later time, see Chapter 7.3 Store TV channels to select Autoprogram to scan available channels. † Press the red color button when the search is completed. 8
-
 1
1 -
2
-
3
-
4
-
 5
5 -
 6
6 -
 7
7 -
 8
8 -
 9
9 -
 10
10 -
 11
11 -
 12
12 -
 13
13 -
 14
14 -
 15
15 -
16
-
17
-
18
-
19
-
20
-
21
-
22
-
23
-
24
-
25
-
26
-
27
-
28
-
29
-
30
-
31
-
32
-
33
-
34
-
35
-
36
-
37
-
38
-
39
-
40
 |
 |