Philips 42PFL7432D User manual - Page 12
Adjust picture - lcd
 |
UPC - 609585129399
View all Philips 42PFL7432D manuals
Add to My Manuals
Save this manual to your list of manuals |
Page 12 highlights
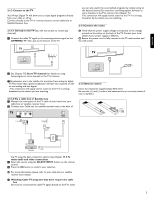
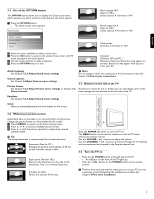
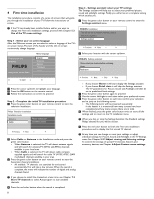
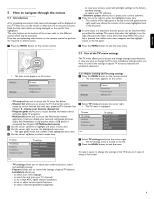
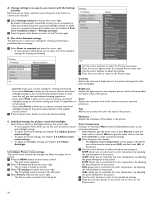
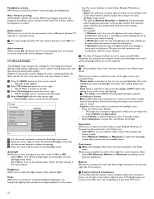
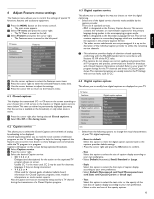
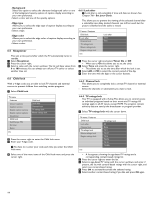
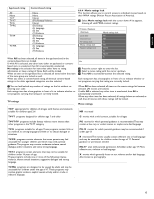
A. Change settings in an easy-to-use manner with the Settings assistant Each time you've made a selection, press the green color button to confirm your selection. ‡ Select Settings assistant and press the cursor right. > By means of several split screens/full screens you are prompted to select your preferred picture, sound and ambilight settings to finally arrive at a complete setting which satisfies you. See Chapter 4 First time installation, Step 3 - Settings assistant. ® Press the green color button to return to the TV menu again. B. Use of the Standard settings This allows you to reset your settings for viewing and listening to predefined factory settings. ‡ Select Reset to standard and press the cursor right. > A menu appears which allows you to select one of the standard settings for viewing and listening. TV menu TV settings Settings assistant Reset to standard Picture Sound Ambilight Info Reset to standard Current Natural Vivid Movie TV menu TV settings Settings assistant Reset to standard Picture Sound Ambilight Info Picture Contrast Brightness Color Tint Sharpness Color temperature Perfect Pixel HD 120 Hz Clear LCD Dynamic contrast Noise reduction MPEG artefact reduction Color enhancement Active Control Light sensor Picture format º Use the cursor up/down to select the Picture menu items. ◊Press the cursor right to enter the selected Picture menu item. ‹ Use the cursor buttons to adjust the settings. ≈Press the cursor left to return to the Picture menu. Contrast Adjusts the intensity of bright parts in the picture but keeps the dark parts unchanged. - Current shows your current settings for viewing and listening. - If you select Natural, it allows you to set your picture, sound and ambilight settings to the recommended standard values. In most cases this will give the best balanced viewing experience. - If you select Vivid, it allows you to set your picture, sound and ambilight settings to rich values, making use of the TV capabilities to its full extend. - If you select Movie, it allows you to set your picture, sound and ambilight settings to the purest representation of the original source content. ® Press the green color button to store the selected setting. C. Individual settings for picture, sound and ambilight < Select Picture, Sound or Ambilight and press the cursor right. > A menu appears which allows you to fine tune the picture, sound and ambilight settings. > To adjust the Picture settings, see Chapter 5.2.2 Adjust picture menu settings. > To adjust the Sound settings, see Chapter 5.2.3 Adjust sound menu settings. > To adjust the Ambilight settings, see Chapter 5.2.4 Enjoy Ambilight. 5.2.2 Adjust Picture menu settings The picture menu contains the settings that affect the quality of the picture. ‡ Press the MENU button on the remote control. > The main menu appeaears. ® Select TV menu and press the cursor right. > The TV menu is moved to the left. Ò Select TV settings and press the cursor right. > The TV settings menu is moved to the left panel. † Select Picture and press the cursor right. > The Picture menu is moved to the left panel. Brightness Adjusts the light output of the complete picture, which will mainly affect the darker areas of the picture. Color Adjusts the saturation level of the colors to suit your personal preference. Tint Allows you to select the color mix (tint) of the picture. Sharpness Adjusts the sharpness of fine details in the picture. Color temperature Increases or decreases Warm (red) and Cool (blue) colors to suit personal preferences. < Select Cool to give the white colors a blue, Normal to give the white colors a neutral, Warm to give the white colors a red tint. < Select Custom to make customized settings. ‡ Press the green color button. > The Custom color temperature screen appears.This allows you to fine tune the white point (WP) and black level (BL) of the picture. ® Use the cursor buttons to select and adjust the settings of: R-WP: allows you to customize the color temperature by adjusting the red whitepoint of the picture. G-WP: allows you to customize the color temperature by adjusting the green whitepoint of the picture. B-WP: allows you to customize the color temperature by adjusting the blue whitepoint of the picture. R-BL: allows you to customize the color temperature by adjusting the red blacklevel of the picture. G-BL: allows you to customize the color temperature by adjusting the green blacklevel of the picture. Ò Use the color buttons to reset to the predefined settings. † Press the red color button or the cursor left to return to the Picture menu. 10
-
 1
1 -
2
-
3
-
4
-
5
-
6
-
 7
7 -
 8
8 -
 9
9 -
 10
10 -
 11
11 -
 12
12 -
 13
13 -
 14
14 -
 15
15 -
 16
16 -
 17
17 -
18
-
19
-
20
-
21
-
22
-
23
-
24
-
25
-
26
-
27
-
28
-
29
-
30
-
31
-
32
-
33
-
34
-
35
-
36
-
37
-
38
-
39
-
40
 |
 |