Philips NP1100 User manual - Page 19
Network setup, Set sleep timer
 |
UPC - 609585152809
View all Philips NP1100 manuals
Add to My Manuals
Save this manual to your list of manuals |
Page 19 highlights
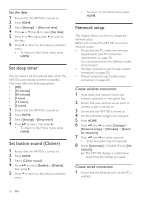
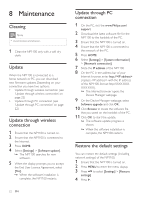
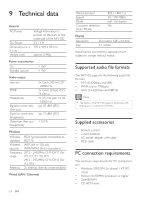
Set the date 1 Ensure that the NP1100 is turned on. 2 Press HOME. 3 Select [Settings] > [Date and time]. 4 Press or , then to select [Set date]. 5 Press or to adjust, then to confirm the date. 6 Press to return to the previous selection menu. • To return to the Home menu, press HOME. Set sleep timer You can select a set time period after which the NP1100 automatically switches to standby. The timer offers the following options: • [Off] • [15 minutes] • [30 minutes] • [1 hour] • [1.5 hours] • [2 hours] 1 Ensure that the NP1100 is turned on. 2 Press HOME. 3 Select [Settings] >[Sleep timer]. 4 Press to select, then press . • To return to the Home menu, press HOME. Set button sound (Clicker) 1 Ensure that the NP1100 is turned on. 2 Press HOME. 3 Select [Clicker sound]. 4 Press to select [Enable] or [Disable], then press . 5 Press to return to the previous selection menu. • To return to the Home menu, press HOME. Network setup This chapter shows you how to change the network setup. Before you connect the NP1100 to a home network router: • Ensure that the PC meets the minimum requirements. (see 'PC connection requirements' on page 24) You can choose from two different modes of connection: • Wireless connection (see 'Create wireless connection' on page 20) • Wired connection (see 'Create wired connection' on page 20) Create wireless connection 1 Hold ready your network name and network password or encryption key. 2 Ensure that your wireless access point or wireless router is turned on. 3 Ensure that the NP1100 is turned on. 4 On the NP1100, configure the network: 5 Press HOME. 6 Press , then to select [Settings] > [Network setup] > [Wireless] > [Search for networks]. 7 Press , then to select network. • Enter encryption key (if required). 8 Select [Automatic] > (Enable Proxy?) [No (default)]. » The NP1100 displays a confirmation screen that the settings are saved. Create wired connection 1 Ensure that the Ethernet port on the PC is enabled. 20 EN
-
 1
1 -
2
-
3
-
4
-
5
-
6
-
7
-
8
-
9
-
10
-
11
-
12
-
13
-
 14
14 -
 15
15 -
 16
16 -
 17
17 -
 18
18 -
 19
19 -
 20
20 -
 21
21 -
 22
22 -
 23
23 -
 24
24 -
25
-
26
-
27
-
28
-
29
-
30
-
31
-
32
-
33
-
34
-
35
-
36
 |
 |