Philips XL3402B User manual - Page 12
Getting started
 |
View all Philips XL3402B manuals
Add to My Manuals
Save this manual to your list of manuals |
Page 12 highlights
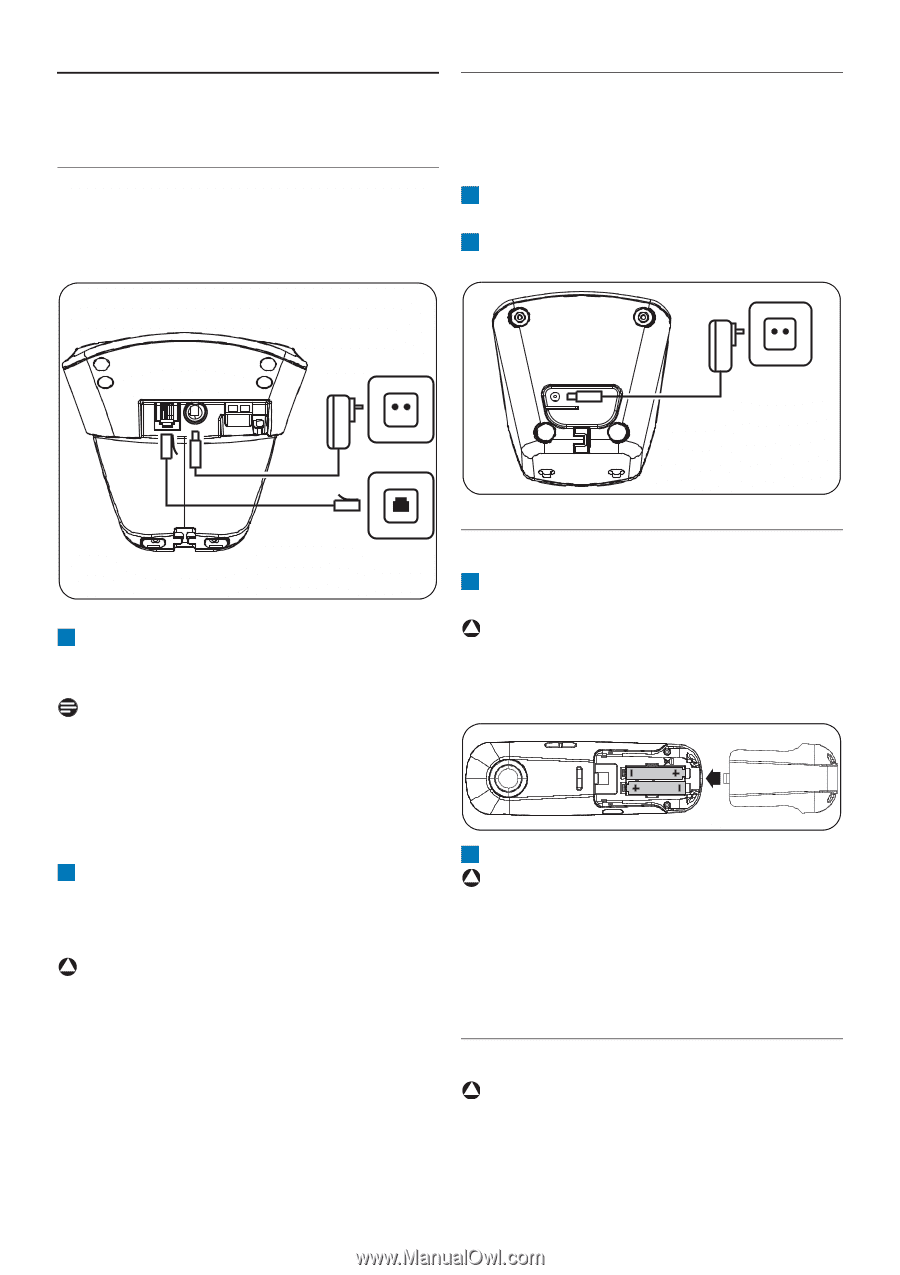
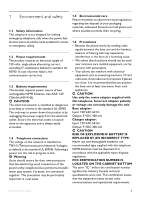
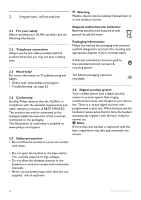
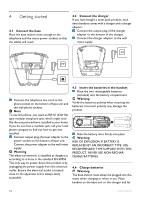
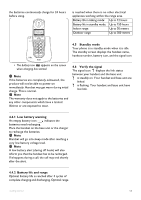
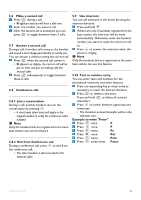
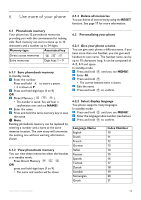
4 Getting started 4.1 Connect the base Place the base station close enough to the telephone and the mains power sockets so that the cables will reach. 4.2 Connect the charger If you have bought a multi-pack product, each extra handset comes with a charger and a charger adaptor. 1 Connect the output plug of the charger adaptor to the bottom of the charger. 2 Connect the charger adaptor to the wall mains supply. 1 Connect the telephone line cord to the phone socket on the bottom of base unit and the wall phone sockets. Note To use this phone, you need an RJ11C (CA11A) type modular telephone jack, which might look like the one pictured here, installed in your home. If you do not have a modular jack, call your local phone company to find out how to get one installed. 2 Connect output plug of power adapter to the power socket on the bottom of base unit. Connect the power adapter to the wall mains supply. ! Warning The electrical network is classified as dangerous according to criteria in the standard EN 60950. The only way to power down this product is by unplugging the power supply from the electrical outlet. Ensure the electrical outlet is located close to the apparatus and is always easily accessible. 4.3 Insert the batteries in the handset 1 Place the two rechargeable batteries (included) into the battery compartment. ! Warning Verify the batteries polarity when inserting the batteries. Incorrect polarity may damage the product. 2 Slide the battery door firmly into place. ! Warning RISK OF EXPLOSION IF BATTERY IS REPLACED BY AN INCORRECT TYPE. USE RECOMMENDED TYPE SUPPLIED WITH THIS PRODUCT. NEVER USE NON-RECHARGEABLE BATTERIES. 4.4 Charge batteries ! Warning The base station must always be plugged into the mains when charging or when in use. Place handset on the base unit or the charger and let 10 Getting started
-
 1
1 -
2
-
3
-
4
-
5
-
6
-
 7
7 -
 8
8 -
 9
9 -
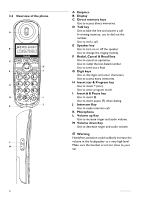 10
10 -
 11
11 -
 12
12 -
 13
13 -
 14
14 -
 15
15 -
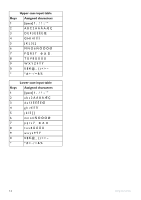 16
16 -
 17
17 -
18
-
19
-
20
-
21
-
22
-
23
-
24
-
25
-
26
-
27
-
28
-
29
-
30
-
31
-
32
 |
 |