Pioneer AVH-P4900DVD Owner's Manual - Page 66
Adjusting 3-band parametric equalizer
 |
UPC - 012562853161
View all Pioneer AVH-P4900DVD manuals
Add to My Manuals
Save this manual to your list of manuals |
Page 66 highlights
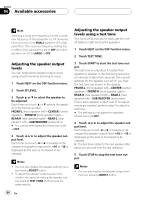
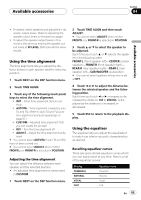
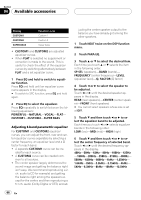
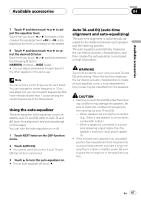
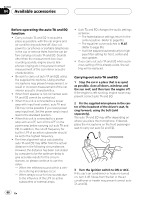
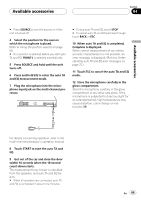
Section 04 Available accessories Display CUSTOM1 CUSTOM2 SUPER BASS Equalizer curve Custom 1 Custom 2 Super bass ! CUSTOM1 and CUSTOM2 are adjusted equalizer curves. ! When FLAT is selected no supplement or correction is made to the sound. This is useful to check the effect of the equalizer curves by switching alternatively between FLAT and a set equalizer curve. 1 Press EQ and hold to switch to equalizer function. Press EQ and hold until an equalizer curve name appears in the display. # To switch to SFC function, press EQ and hold again. 2 Press EQ to select the equalizer. Press EQ repeatedly to switch between the following equalizers: POWERFUL-NATURAL-VOCAL-FLAT- CUSTOM1-CUSTOM2-SUPER BASS Adjusting 3-band parametric equalizer For CUSTOM1 and CUSTOM2 equalizer curves, you can adjust the front, rear and center equalizer curves separately by selecting a center frequency, an equalizer level and a Q factor for each band. ! A separate CUSTOM1 curve can be cre- ated for each source. ! A CUSTOM2 curve can be created com- mon to all sources. ! The center speaker largely determines the sound image and getting the balance right isn't easy. We recommend reproducing a 2ch. audio (a CD for example) and getting the balance right among the speakers except for the center, and then reproducing a 5.1-ch. audio (Dolby Digital or DTS) and ad- justing the center speaker output to the balance you have already got among the other speakers. 1 Touch NEXT twice on the DSP function menu. 2 Touch PARA EQ. 3 Touch a or b to select the desired item. Each time you touch a or b selects the item in the following order: SP-SEL (speakers)-BAND (bands)- FREQUENCY (center frequency)-LEVEL (equalizer level)-Q. FACTOR (Q factor) 4 Touch c or d to select the speaker to be adjusted. Touch c or d until the desired speaker appears in the display. REAR (rear speakers)-CENTER (center speaker)-FRONT (front speakers) # You cannot select speakers whose size is set at OFF. 5 Touch b and then touch c or d to select the equalizer band to be adjusted. Each time you touch c or d selects equalizer bands in the following order: LOW (low)-MID (mid)-HIGH (high) 6 Touch b and then touch c or d to select the center frequency of selected band. Touch c or d until the desired frequency appears in the display. 40Hz-50Hz-63Hz-80Hz-100Hz-125Hz -160Hz-200Hz-250Hz-315Hz-400Hz- 500Hz-630Hz-800Hz-1kHz-1.25kHz- 1.6kHz-2kHz-2.5kHz-3.15kHz-4kHz- 5kHz-6.3kHz-8kHz-10kHz-12.5kHz 66 En
-
 1
1 -
2
-
3
-
4
-
5
-
6
-
7
-
8
-
9
-
10
-
11
-
12
-
13
-
14
-
15
-
16
-
17
-
18
-
19
-
20
-
21
-
22
-
23
-
24
-
25
-
26
-
27
-
28
-
29
-
30
-
31
-
32
-
33
-
34
-
35
-
36
-
37
-
38
-
39
-
40
-
41
-
42
-
43
-
44
-
45
-
46
-
47
-
48
-
49
-
50
-
51
-
52
-
53
-
54
-
55
-
56
-
57
-
58
-
59
-
60
-
 61
61 -
 62
62 -
 63
63 -
 64
64 -
 65
65 -
 66
66 -
 67
67 -
 68
68 -
 69
69 -
 70
70 -
 71
71 -
72
-
73
-
74
-
75
-
76
-
77
-
78
-
79
-
80
-
81
-
82
-
83
-
84
-
85
 |
 |
