Pioneer AVIC-W6500NEX Owners Manual - Page 7
Remote Control
 |
View all Pioneer AVIC-W6500NEX manuals
Add to My Manuals
Save this manual to your list of manuals |
Page 7 highlights
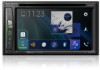
English LCD screen VOL (+/-) Press to switch between the Application screen and the AV operation screen. Press and hold to switch to the camera view mode. NOTE To activate the camera view mode with this button, set [Back Camera Input] to [On] or [AV Input] to [Camera] (page 132). Press to display the top menu screen. Press and hold to power off. To power back on, press any button. Press to display the menu bar (page 15). Press and hold to mute or unmute. Press to display the top menu screen or back to previous screen. Press and hold to turn off the display. Press to activate the voice recognition mode with a connected iPhone or smartphone. Press and hold to display the connectable device list screen or device search screen. RESET Press to reset the microprocessor (page 10). SD card slot Refer to Inserting and ejecting an SD memory card (page 86). Auto EQ microphone input jack Use to connect a microphone for acoustical measurement (sold separately). Disc-loading Refer to Inserting and ejecting a disc (page 81). slot Detachable faceplate Press to remove the detachable faceplate from this product. Remote Control VOLUME (+/-) REAR SRC Press to cycle through all the available rear sources. Press and hold to turn the rear source off. - 7 -
-
 1
1 -
 2
2 -
 3
3 -
 4
4 -
 5
5 -
 6
6 -
 7
7 -
 8
8 -
 9
9 -
 10
10 -
 11
11 -
 12
12 -
13
-
14
-
15
-
16
-
17
-
18
-
19
-
20
-
21
-
22
-
23
-
24
-
25
-
26
-
27
-
28
-
29
-
30
-
31
-
32
-
33
-
34
-
35
-
36
-
37
-
38
-
39
-
40
-
41
-
42
-
43
-
44
-
45
-
46
-
47
-
48
-
49
-
50
-
51
-
52
-
53
-
54
-
55
-
56
-
57
-
58
-
59
-
60
-
61
-
62
-
63
-
64
-
65
-
66
-
67
-
68
-
69
-
70
-
71
-
72
-
73
-
74
-
75
-
76
-
77
-
78
-
79
-
80
-
81
-
82
-
83
-
84
-
85
-
86
-
87
-
88
-
89
-
90
-
91
-
92
-
93
-
94
-
95
-
96
-
97
-
98
-
99
-
100
-
101
-
102
-
103
-
104
-
105
-
106
-
107
-
108
-
109
-
110
-
111
-
112
-
113
-
114
-
115
-
116
-
117
-
118
-
119
-
120
-
121
-
122
-
123
-
124
-
125
-
126
-
127
-
128
-
129
-
130
-
131
-
132
-
133
-
134
-
135
-
136
-
137
-
138
-
139
-
140
-
141
-
142
-
143
-
144
-
145
-
146
-
147
-
148
-
149
-
150
-
151
-
152
-
153
-
154
-
155
-
156
-
157
-
158
-
159
-
160
-
161
-
162
-
163
-
164
-
165
-
166
-
167
-
168
-
169
-
170
-
171
-
172
-
173
-
174
-
175
-
176
-
177
-
178
-
179
-
180
-
181
-
182
-
183
-
184
-
185
-
186
-
187
-
188
-
189
-
190
 |
 |
