Pioneer CDJ 100S Owner's Manual - Page 5
Connections - used
 |
UPC - 012562450261
View all Pioneer CDJ 100S manuals
Add to My Manuals
Save this manual to your list of manuals |
Page 5 highlights
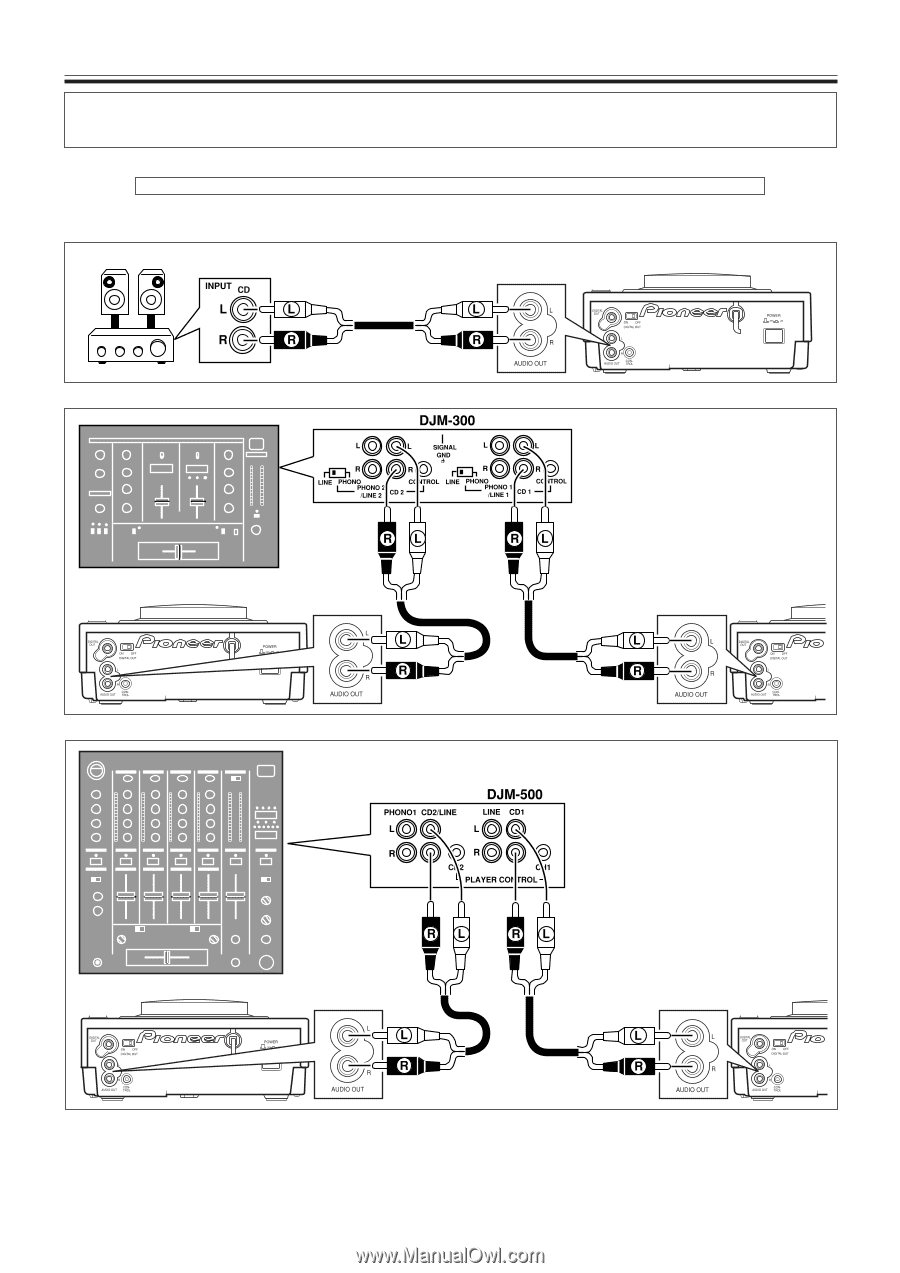
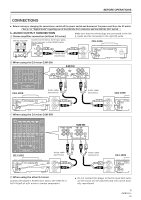
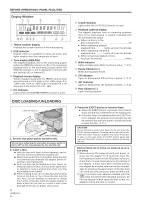
BEFORE OPERATIONS CONNECTIONS ÷ Before making or changing the connections, switch off the power switch and disconnect the power cord from the AC outlet. *See p. 14, "Digital Mode" regarding use of the DIGITAL OUT connector and the DIGITAL OUT switch. 1. AUDIO OUTPUT CONNECTION A Stereo amplifier connection (without DJ mixer) Make sure that the white plugs are connected to the left (L) jacks and the red plugs to the right (R) jacks. Stereo amplifier Connect to the CD or AUX input jacks. Do not connect to the PHONO jacks CDJ-100S Audio cable (accessory) B When using the DJ mixer DJM-300 CDJ-100S Audio cable (accessory) C When using the DJ mixer DJM-500 Audio cable (accessory) CDJ-100S CDJ-100S Audio cable (accessory) Audio cable (accessory) CDJ-100S D When using the other DJ mixer Connect the player's AUDIO OUT jack to the LINE IN or AUX IN jack of a DJ mixer or similar component. ÷ Do not connect this player to the DJ mixer MIC jacks, as the sound will be distorted and will not be properly reproduced. 5 En
-
 1
1 -
 2
2 -
 3
3 -
 4
4 -
 5
5 -
 6
6 -
 7
7 -
 8
8 -
 9
9 -
 10
10 -
 11
11 -
12
-
13
-
14
-
15
-
16
 |
 |