Pioneer CDJ 100S Owner's Manual - Page 9
Ordinary Cd Player Operations - skipping
 |
UPC - 012562450261
View all Pioneer CDJ 100S manuals
Add to My Manuals
Save this manual to your list of manuals |
Page 9 highlights
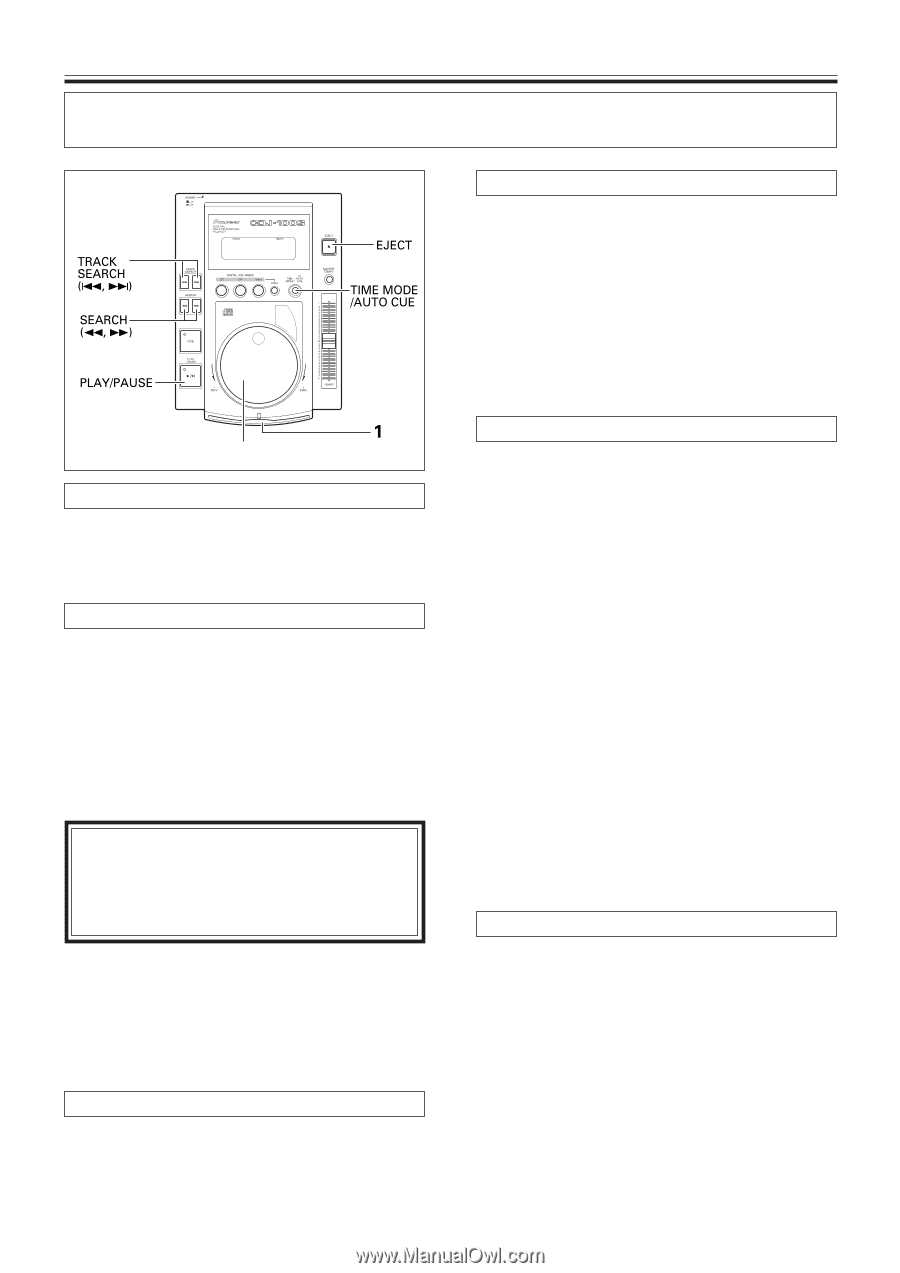
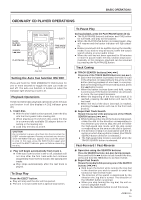
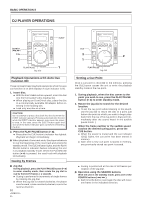
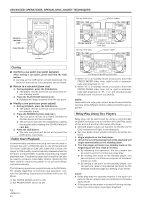
BASIC OPERATION I ORDINARY CD PLAYER OPERATIONS Jog dial Setting the Auto Cue function ON/OFF Press and hold the TIME MODE/AUTO CUE button for one or more seconds to toggle the auto cue mode on and off. The auto cue function is turned on when the indicator light showing A.CUE is lit. Playback Operations These represent basic playback operations when the auto cue function is off (the display's A.CUE indicator goes off). 1. Insert disc. ÷ With the disc's label surface upward, insert the disc into the front-panel's disc loading slot. ÷ When playing an 8 cm/3-inch disc, place the disc in a commercially available CD adapter before inserting in the loading slot. ÷ Load only one disc at a time. CAUTION Do not attempt to press a disc back into the slot when the EJECT indicator appears. Pressing a disc back into the slot while the EJECT indicator appears may cause the player to stop. In this case, press the EJECT button again and wait until the EJECT indicator goes out before reinserting the disc. 2. Play will begin automatically from track 1. ÷ If the auto-cue function is set to off, playback will not stop after the first track ends but continue sequentially from the first track to the subsequent tracks. ÷ Play stops automatically after the last track is played. To Stop Play Press the EJECT button. ÷ Play will stop and the disc will be ejected. ÷ The unit is not provided with a special stop button. To Pause Play During playback, press the PLAY/PAUSE button (6). ÷ The PLAY/PAUSE button's indicator and CUE indica- tor will flash, and play will be paused. ÷ When the PLAY/PAUSE button is pressed again, play will resume and the button indicator will light steadily. ÷ Broken sound will still be audible during the standby mode; if you wish to stop all sound, lower the output sound volume on your audio mixer. ÷ When the unit has not been operated for 80 minutes or more in pause mode, the disc rotation stops automatically. In this instance, playback can be resumed by pressing the PLAY/PAUSE button. Track Cueing 7 TRACK SEARCH buttons (4, ¢ ) Press one of the TRACK SEARCH buttons (4, ¢ ). ÷ Each time the button is pressed, the track is cued in the direction corresponding to the arrow on the button (during playback of one track, to cue playback to the beginning of the preceding track, press the 4 button twice). ÷ When the button is press down and held, cueing is continuous. If the button is held for two seconds or more, the cue speed increases. ÷ When the beginning of the first track (track 1) is reached, pressing the 4 button will cue to the last track. ÷ When the end of the disc's last track is reached, pressing the ¢ button will cue to the first track (track 1). 7 Super-Fast Track Search Rotate the jog dial while pressing one of the TRACK SEARCH buttons (4, ¢ ). ÷ While holding either one of the buttons depressed, rotate the dial in the direction corresponding to the direction you wish to skip; the unit will enter the high-speed skip mode, with the skip speed corresponding to the amount the dial is ignored. ÷ The direction of skip is in accordance with the direction in which the jog dial is rotated. (the TRACK SEARCH button direction is released.) ÷ The high-speed skip mode is canceled when the TRACK SEARCH button is released. Fast-Forward / Fast-Reverse 7 Operation using the SEARCH buttons Press the SEARCH buttons (1, ¡) during playback. Press and hold the ¡ button to fast forward the disc; press and hold the 1 button to do fast reverse. 7 Super-Fast Search Rotate the jog dial while pressing one of the SEARCH buttons (1, ¡) ÷ Hold down the button while turning the Jog dial in the direction you wish to search to enter fast forward or fast reverse mode. ÷ The direction of the search is determined by the direction the Jog dial is turned. The direction of the SEARCH button is ignored. ÷ When you stop turning the Jog dial, the unit returns to playback mode. ÷ Release the SEARCH button to exit this mode. 9 En
-
 1
1 -
2
-
3
-
 4
4 -
 5
5 -
 6
6 -
 7
7 -
 8
8 -
 9
9 -
 10
10 -
 11
11 -
 12
12 -
 13
13 -
 14
14 -
15
-
16
 |
 |