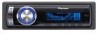
Pioneer DEH-P5900IB Owner's Manual
Pioneer DEH-P5900IB - Radio / CD Manual
 |
UPC - 012562845814
View all Pioneer DEH-P5900IB manuals
Add to My Manuals
Save this manual to your list of manuals |
Pioneer DEH-P5900IB manual content summary:
- Pioneer DEH-P5900IB | Owner's Manual - Page 1
English Français Operation Manual Mode d'emploi CD Receiver Récepteur CD DEH-P5900IB - Pioneer DEH-P5900IB | Owner's Manual - Page 2
control 8 - Installing the battery 8 - Using the remote control 8 Operating this unit What's What 9 - Head unit 9 - Remote control 9 Basic Operations 10 - Power ON/OFF 10 - Selecting a source 10 - Adjusting the volume 11 Tuner 11 - Basic Operations 11 - Storing and recalling broadcast frequencies - Pioneer DEH-P5900IB | Owner's Manual - Page 3
- Entering PIN code for Bluetooth wireless connection 28 Other Functions 28 - Using the AUX source 28 - Turning the clock display on or off 29 - Using different entertainment displays 29 - Using the PGM button 29 Available accessories Playing songs on USB portable audio player/ USB memory 31 - Basic - Pioneer DEH-P5900IB | Owner's Manual - Page 4
48 - Clearing memory 48 - Setting the automatic rejecting 49 - Setting the automatic answering 49 - Switching the ring tone 49 - Echo canceling and noise reduction 49 - Displaying BD (Bluetooth Device) address 49 - Displaying system version for repair 49 Multi-CD Player 50 - Basic Operations 50 - Pioneer DEH-P5900IB | Owner's Manual - Page 5
003. About this unit The tuner frequencies on this unit are allocated for contact with liquids. ! Keep this manual handy as a reference for operating product or cords associated with accessories sold with the product may USE OF CONTROL OR ADJUSTMENT OR by using Windows Media Player version 7 or later - Pioneer DEH-P5900IB | Owner's Manual - Page 6
separately) can be controlled by this unit. Please inquire to your dealer or nearest authorized Pioneer service station regarding the satellite radio tuner that can be connected to this unit. For satellite radio tuner operation, please refer to the satellite radio tuner owner's manual. ! The system - Pioneer DEH-P5900IB | Owner's Manual - Page 7
in the event of an insurance claim such as loss or theft. 2 Receive updates on the latest products and technologies. 3 Download owner's manuals, order product catalogues, research new products, and much more. Attaching the front panel % Replace the front panel by holding it upright to the unit and - Pioneer DEH-P5900IB | Owner's Manual - Page 8
continue reversing every 10 seconds. Pressing BAND when power to this unit is turned off while the ignition switch is set to ACC or car engine is turned off, it may drain battery power. Use and care of the remote control Installing the battery Slide the tray out on the back of the remote control - Pioneer DEH-P5900IB | Owner's Manual - Page 9
CONTROL Move to perform manual seek tuning, fast forward, reverse and track search controls. Also used for controlling functions. Turn to increase or decrease the volume. 3 OPEN button Press to open the front panel. 4 CLOCK and to cancel the control mode of functions. Remote control Operation is the - Pioneer DEH-P5900IB | Owner's Manual - Page 10
select a source. Press SOURCE repeatedly to switch between the following sources: XM tuner-SIRIUS tuner-Tuner-Television-DVD player/Multi-DVD player- Built-in CD player-Multi-CD player- iPod-USB-External unit 1-External unit 2-AUX1-AUX2-BT Audio-BT Telephone Notes ! In the following cases, the sound - Pioneer DEH-P5900IB | Owner's Manual - Page 11
set by this unit. ! When this unit's blue/white lead is connected to the vehicle's auto-antenna relay control terminal CONTROL to adjust the sound level. Tuner Basic Operations 1 23 4 5 6 1 Band indicator 2 Stereo (5) indicator Shows when the selected frequency is being broadcast in stereo - Pioneer DEH-P5900IB | Owner's Manual - Page 12
BSM (best stations memory) lets you automatically store the six strongest broadcast frequencies under 1 to 6 on the remote control and once stored there you can tune in to those frequencies with the touch of a button. ! Storing broadcast frequencies with BSM may replace broadcast frequencies you - Pioneer DEH-P5900IB | Owner's Manual - Page 13
; press to select. # You can also change the station by pushing MULTI-CONTROL up or down. Built-in CD Player Basic Operations The built-in CD player can play back audio CD (CD-DA) and compressed audio (WMA/MP3/ AAC/WAV) recorded on CD-ROM. (Refer to page 59 for files that can be played back.) Read - Pioneer DEH-P5900IB | Owner's Manual - Page 14
. # Be sure to turn up the label side of a disc. # After a CD (CD-ROM) has been inserted, press SOURCE to select the built-in CD player. # You can eject a CD (CD-ROM) by pressing EJECT. 3 Close the front panel. 4 Push MULTI-CONTROL up or down to select a folder when playing a compressed audio. # You - Pioneer DEH-P5900IB | Owner's Manual - Page 15
CONTROL to display the main menu. FUNCTION, AUDIO and ENTERTAINMENT appear on the display. 2 Use MULTI-CONTROL pressing FUNCTION on the remote control. # When playing a CD TEXT disc, you cannot CONTROL to select Scan mode in the function menu. 2 Press MULTI-CONTROL to turn scan play on. The first 10 - Pioneer DEH-P5900IB | Owner's Manual - Page 16
you adjust the sound playback quality of this unit. 1 Use MULTI-CONTROL to select Compression in the function menu. 2 Press MULTI-CONTROL to select your favorite setting. COMP/BMX OFF-COMP 1-COMP 2- COMP/BMX OFF-BMX 1-BMX 2 Searching every 10 tracks in the current disc or folder You can switch the - Pioneer DEH-P5900IB | Owner's Manual - Page 17
in memory, data for a new disc will overwrite the oldest one. ! If you connect a multi-CD player, you can input disc titles for up to 100 discs. ! When a multi-CD player that does not support disc title functions is connected, you cannot enter disc titles in this unit. Displaying text information on - Pioneer DEH-P5900IB | Owner's Manual - Page 18
this unit to control an iPod by using a cable (e.g., CD-I200), which is sold separately. 1 32 1 Song number indicator 2 Play time indicator 3 Song time (progress bar) 1 Connect the iPod to this unit. Playback will automatically start. While the iPod is connected to this unit, PIONEER (or (check mark - Pioneer DEH-P5900IB | Owner's Manual - Page 19
switch is set to OFF. Browsing for a song The operation of this unit to control an iPod is designed to be as close to the operation of the iPod as possible (pause) # You can also select the function by pressing FUNCTION on the remote control. # To return to the playback display, press BAND. # If you - Pioneer DEH-P5900IB | Owner's Manual - Page 20
play For playback of the songs on the iPod, there are two repeat play ranges: Repeat One (repeat one song) and Repeat All (repeat all songs in the list). ! While Play mode is set to Repeat One, you cannot select the other songs. 1 Use MULTI-CONTROL to select Play mode in the function - Pioneer DEH-P5900IB | Owner's Manual - Page 21
-CONTROL to display the main menu. FUNCTION, AUDIO and ENTERTAINMENT appear on the display. 2 Use MULTI-CONTROL setting)- Sub W.2 (subwoofer setting)-Bass (bass boost)-HPF (high pass filter)-SLA (source level adjustment) # You can also select the audio function by pressing AUDIO on the remote control - Pioneer DEH-P5900IB | Owner's Manual - Page 22
curve with all frequencies set to 0 cannot be adjusted. Adjusting 7-band graphic equalizer For Custom 1 and Custom 2 equalizer curves, you can adjust the level of each band. ! A separate Custom 1 curve can be created for each source. (The built-in CD player and the multi-CD player are set to the - Pioneer DEH-P5900IB | Owner's Manual - Page 23
When the subwoofer output is on, you can adjust the cut-off frequency and the output level of the subwoofer. 1 Use MULTI-CONTROL to select Sub W.2. # You can also select the subwoofer setting menu by pressing SW on the unit. # When the subwoofer output is on, you can select Sub W.2. 2 Push MULTI - Pioneer DEH-P5900IB | Owner's Manual - Page 24
MULTI-CONTROL is pushed up or down, source volume increases or decreases. SLA +4 to SLA -4 is displayed as the source volume is increased or decreased. Notes ! The AM tuner volume level can also be adjusted with source level adjustments. ! The built-in CD player and the multi-CD player are set to - Pioneer DEH-P5900IB | Owner's Manual - Page 25
You can also select the function by pressing FUNCTION on the remote control. # BT AUDIO and Pin code input can be selected only when Bluetooth adapter (e.g., CDBTB100) is connected to this unit. # To cancel initial settings, press BAND. Selecting the display language For your convenience, this unit - Pioneer DEH-P5900IB | Owner's Manual - Page 26
CONTROL to turn AUX1/ AUX2 on. # To turn AUX off, press MULTI-CONTROL again. Switching the dimmer setting To prevent the display from being too bright at night, the display is automatically dimmed when the car be adjusted 0 to 10. Setting the rear output and subwoofer controller This unit's rear - Pioneer DEH-P5900IB | Owner's Manual - Page 27
You need to activate the BT Audio source in order to use a Bluetooth audio player. ! Only when Bluetooth adapter (e.g. CD- BTB100) is connected to this unit, you can operate this function. 1 Use MULTI-CONTROL to select BT AUDIO. 2 Press MULTI-CONTROL to turn the BT Audio source on. # To turn the BT - Pioneer DEH-P5900IB | Owner's Manual - Page 28
unit in advance PIN code of your Bluetooth audio player, in order to set this unit ready for a connection from your Bluetooth audio player. ! Only when Bluetooth adapter (e.g. CDBTB100) is connected to this unit, you can operate this function. 1 Use MULTI-CONTROL to select Pin code input. 2 Push - Pioneer DEH-P5900IB | Owner's Manual - Page 29
PGM on the remote control. % Press PGM to turn pause on when selecting the following sources: ! CD - Built-in CD player ! iPod - iPod ! Multi CD - Multi-CD player ! USB - USB portable audio player/USB memory ! BT Audio - Bluetooth audio player ! DVD - DVD player/multi-DVD player # To turn pause - Pioneer DEH-P5900IB | Owner's Manual - Page 30
selecting XM or SIRIUS as the source. Press PGM repeatedly to switch between the following channel select settings: Channel number (channel number select setting)-Category (channel category select setting) % Press PGM and hold to turn BSSM on when selecting television as the source. Press PGM and - Pioneer DEH-P5900IB | Owner's Manual - Page 31
accessories Section 03 English Playing songs on USB portable audio player/USB memory Basic Operations You can use this unit to control a USB adapter, which is sold separately. For details concerning operation, refer to the USB adapter's operation manual. This section provides information on USB - Pioneer DEH-P5900IB | Owner's Manual - Page 32
Section 03 Available accessories Function name Operation Play mode Refer to Selecting a repeat play range on page 15. But the repeat play ranges you can select are different from that of the built-in CD player. The repeat play ranges of the USB portable audio player/USB memory are as below: ! - Pioneer DEH-P5900IB | Owner's Manual - Page 33
accessories Section 03 English XM tuner Basic Operations You can use this unit to control an XM satellite digital tuner (GEX-P920XM), which is sold separately. For details concerning operation, refer to the XM tuner's operation manuals setting indicator Shows what channel select setting has - Pioneer DEH-P5900IB | Owner's Manual - Page 34
30 seconds, the display is automatically returned to the ordinary display. Using the remote control % When you find a station that you want to store in memory, press setting), press and hold CLOCK again. 2 Push MULTI-CONTROL up or down to select the desired channel category. 3 Push MULTI-CONTROL - Pioneer DEH-P5900IB | Owner's Manual - Page 35
accessories Section 03 English SIRIUS Satellite Radio tuner Basic Operations You can use this unit to control operation manual. ! setting indicator Shows what channel select setting the remote control, CONTROL to display the main menu. FUNCTION, AUDIO and ENTERTAINMENT appear on the display. En 35 - Pioneer DEH-P5900IB | Owner's Manual - Page 36
select mode setting) -Team setting (team setting)-Game info (game info) # You can also select the function by pressing FUNCTION on the remote control. # select setting), press and hold CLOCK again. 2 Push MULTI-CONTROL up or down to select the desired channel category. 3 Push MULTI-CONTROL left or - Pioneer DEH-P5900IB | Owner's Manual - Page 37
Alert function is on at the default setting. 1 Use MULTI-CONTROL to select Team setting in the function menu. 2 Press and hold MULTI-CONTROL to turn the Game Alert on. -CONTROL to switch to that station, and you can listen to that game. ! If you do not operate the function within about 10 seconds - Pioneer DEH-P5900IB | Owner's Manual - Page 38
available on the market, operations with your Bluetooth audio player using this unit vary in great range. Please refer to the instruction manual that came with your Bluetooth audio player as well as this manual while operating your player on this unit. ! Information about songs (e.g. the elapsed - Pioneer DEH-P5900IB | Owner's Manual - Page 39
the BT audio source in the initial setting. For detailes, refer to Activating the BT Audio source on page 27. # For this unit to control your Bluetooth audio player it needs to establish a Bluetooth wireless connection. (Refer to Connecting a Bluetooth audio player on this page.) 2 To perform fast - Pioneer DEH-P5900IB | Owner's Manual - Page 40
Section 03 Available accessories 2 Press MULTI-CONTROL to open the connection. Always Waiting is displayed. This unit is now on standby for connection from Bluetooth audio player. If your Bluetooth audio player is set ready for Bluetooth wireless connection, the connection to this unit will be - Pioneer DEH-P5900IB | Owner's Manual - Page 41
accessories Section 03 English Bluetooth Telephone Basic Operations If you use Bluetooth adapter (e.g. CD-BTB100), you can connect a cellular phone featuring Bluetooth Bluetooth adapter's operation manual call has been received and not checked Setting the automatic rejecting on page 49). 7 Clock - Pioneer DEH-P5900IB | Owner's Manual - Page 42
accessories # Your phone should now be temporarily connected; however, to make best use of the technology, we recommend you register the phone to this unit. 2 Registration Refer to Registering connected cellular phone on page 44 for instructions call comes in, push MULTI-CONTROL up. # If the private - Pioneer DEH-P5900IB | Owner's Manual - Page 43
the function by pressing FUNCTION on the remote control. # PH.B.Name view (phone book name view) cannot be selected for cellular phone registered guest phone. # If cellular phone is connected to this unit via Bluetooth wireless technology with HSP (Head Set Profile), PH.B.Name view, Clear memory - Pioneer DEH-P5900IB | Owner's Manual - Page 44
to 0000 as default. You can change this code in the initial setting. Refer to Entering PIN code for Bluetooth wireless connection on page 28. Disconnecting a cellular phone 1 Use MULTI-CONTROL to select Disconnect phone in the function menu. Device name of the connected phone appears in the display - Pioneer DEH-P5900IB | Owner's Manual - Page 45
, Connected is displayed. Connecting to a registered phone automatically 1 Use MULTI-CONTROL to select Auto connect in the function menu. 2 Press MULTI-CONTROL to turn automatic connection on. If your cellular phone is set ready for Bluetooth wireless connection, the connection to this unit will be - Pioneer DEH-P5900IB | Owner's Manual - Page 46
or right to move the cursor to the previous or next character position. 6 Press MULTI-CONTROL to store the new name. Editing phone numbers Important You are required to park your vehicle and set the parking brake in order to perform this operation. You can edit the numbers of Phone Book entries - Pioneer DEH-P5900IB | Owner's Manual - Page 47
Phone Book entry list. Using the Call History Important You are required to park your vehicle and set the parking brake in order to perform this operation. The 12 most recent calls made (dialled), received and missed, are stored in the Call History. You can browse the Call History and call numbers - Pioneer DEH-P5900IB | Owner's Manual - Page 48
from the Phone Book or the Call History, see the instructions explained in previous pages. To directly enter a desired phone number, see Making a call by entering phone number on this page. 2 Press and hold one of 1 to 6 on the remote control to store the phone number. The selected phone number has - Pioneer DEH-P5900IB | Owner's Manual - Page 49
Available accessories Section 03 English Setting the automatic rejecting 1 Use MULTI-CONTROL to select Refuse calls in the function menu. 2 Press MULTI-CONTROL to turn automatic call rejection on. # To turn automatic call rejection off, press MULTI-CONTROL again. Setting the automatic answering 1 - Pioneer DEH-P5900IB | Owner's Manual - Page 50
Section 03 Available accessories Multi-CD Player Basic Operations You can use this unit to control a multi-CD player, which is sold separately. ! Only those functions described in this man- ual are supported by 50-disc multi-CD players. ! This unit is not designed to operate disc title list - Pioneer DEH-P5900IB | Owner's Manual - Page 51
accessories -CD player has DBE (dynamic bass emphasis) function instead of BMX. The settings CD players sold before the CDX-P1250 and CDX-P650, up to 24 tracks can be stored in the playlist.) 1 Play a CD that you want to program. Push MULTI-CONTROL up or down to select the CD. 2 Use MULTI-CONTROL - Pioneer DEH-P5900IB | Owner's Manual - Page 52
Section 03 Available accessories 5 Press BAND to return to the playback display. Note the multi-CD player will begin to play. 1 Select the repeat range. Refer to Playing tracks in random order on page 15. 2 Use MULTI-CONTROL to select ITS play mode in the function menu. 3 Press MULTI-CONTROL to - Pioneer DEH-P5900IB | Owner's Manual - Page 53
Available accessories Section 03 English Entering disc titles Use the disc title input feature to store up to 100 CD titles (with ITS playlist) into the multiCD player. Each title can be up to 10 characters long. For details concerning operation, refer to Entering disc titles on page 16. ! Titles - Pioneer DEH-P5900IB | Owner's Manual - Page 54
6 on the remote control to select the desired disc. Selecting a folder ! You can operate this function only when a DVD player which is corresponding to compressed audio playback is connected to this unit. % Push MULTI-CONTROL up or down to select a folder. 5 1 DVD-V/VCD/CD/MP3/WMA indicator Shows - Pioneer DEH-P5900IB | Owner's Manual - Page 55
select the function by pressing FUNCTION on the remote control. # To return to the playback display, press BAND. Function and operation Play mode, Random mode, Scan mode, Pause and TitleInput "A" operations are basically the same as that of the built-in CD player. Also, ITS play mode and ITS memo - Pioneer DEH-P5900IB | Owner's Manual - Page 56
Section 03 Available accessories TV tuner Basic Operations You can use this unit to control a TV tuner, which is sold separately. For details concerning operation, refer to the TV tuner's operation manual. This section provides information on TV operations with this unit which differs from that - Pioneer DEH-P5900IB | Owner's Manual - Page 57
accessories Storing the strongest broadcast stations sequentially 1 Press MULTI-CONTROL to display the main menu. FUNCTION, AUDIO and ENTERTAINMENT appear on the display. 2 Use MULTI-CONTROL stations with BSSM may replace broadcast stations you have saved using P.CH1 to P.CH12. Section 03 En 57 - Pioneer DEH-P5900IB | Owner's Manual - Page 58
the iPod. Understanding error messages When you contact your dealer or your nearest Pioneer Service Center, be sure to record the error message. Built-in CD Player Message Cause Action ERROR-11, 12, Dirty disc 17, 30 Clean disc. ERROR-11, 12, Scratched disc Replace disc. 17, 30 ERROR-10, 11 - Pioneer DEH-P5900IB | Owner's Manual - Page 59
may damage the player. ! Unfinalized CD-R/CD-RW disc playback CD standard, it may not be possible to play the CD side with this unit. ! Frequent loading and ejecting of a Dual Disc may result in scratches on the disc. Serious scratches can lead to playback problems such as .wma, .mp3, .m4a or .wav) - Pioneer DEH-P5900IB | Owner's Manual - Page 60
pedal. For details, refer to the iPod's manuals. About iPod settings ! You cannot operate the iPod Equalizer on the Pioneer products. We recommend that you set the iPod Equalizer to off, before connecting the iPod to this unit. ! You cannot set Repeat to off on the iPod when using this unit. Even if - Pioneer DEH-P5900IB | Owner's Manual - Page 61
(100 Hz), +11 dB (10 kHz) (volume: -30 dB) HPF: Frequency 50/63/80/100/125 Hz Slope 12 dB/oct Subwoofer (mono): Frequency 50/63/80/100/125 Hz Slope 18 dB/oct Gain 6 dB to -24 dB Phase Normal/Reverse Bass boost: Gain 12 dB to 0 dB CD player System Compact disc audio - Pioneer DEH-P5900IB | Owner's Manual - Page 62
Service après-vente des produits Pioneer 66 Visitez notre site Web 66 Protection de l'appareil contre le vol 67 - Détacher la face avant 67 - Pose de la face avant 67 Quelques mots sur le mode démonstration 67 Utilisation et soin de la télécommande 68 - Installation Lecteur de CD intégré 10 plages - Pioneer DEH-P5900IB | Owner's Manual - Page 63
Activation de la source BT Audio 91 - Saisie du code PIN pour la connexion sans fil Bluetooth 92 Autres fonctions 93 - Utilisation de la source AUX 93 - Mise en service ou hors service de l'affichage de l'horloge 93 - Utilisation des divers affichages divertissants 94 - Utilisation de la touche PGM - Pioneer DEH-P5900IB | Owner's Manual - Page 64
service de la sonnerie 115 - Annulation d'écho et réduction de bruit 115 - Affichage de l'adresse BD (Bluetooth Device) 116 - Affichage de la version du système pour les réparations 116 Lecteur de CD compressés 128 Quelques mots sur la manipulation du iPod 129 - Quelques mots sur les réglages de - Pioneer DEH-P5900IB | Owner's Manual - Page 65
WMA peuvent être encodées en utilisant Windows Media Player version 7 ou ultérieure. Windows Media et le ée pour encoder les fichiers WMA. Quelques mots sur MP3 La fourniture de ce produit comporte seulement une licence é iPod® Cet appareil peut contrôler un iPod et écouter des plages musicales de - Pioneer DEH-P5900IB | Owner's Manual - Page 66
2004-10-20. Consultez votre revendeur agréé Pioneer le plus proche pour avoir des informations sur les versions supportées. ! Les modes opératoires peuvent différer selon la version du logiciel iPod. A propos de la marque SAT RADIO READY La marque SAT RADIO READY imprimée sur la face avant indique - Pioneer DEH-P5900IB | Owner's Manual - Page 67
service ou hors service du signal sonore d'avertissement. Important ! Lorsque vous enlevez ou remontez la face avant, manipulez-la doucement. ! Évitez de heurter la face avant. ! Conservez la face s'inverser, puis continuent à s'inverser toutes les 10 secondes. Appuyer sur la touche BAND quand l' - Pioneer DEH-P5900IB | Owner's Manual - Page 68
charger la batterie. Utilisation et soin de la télécommande Installation de la pile Sortez le porte-pile de l'arri usagées, respectez les règlements nationaux ou les instructions locales en vigueur dans le pays ou la la télécommande dans la direction de la face avant de l'appareil à télécommander. ! - Pioneer DEH-P5900IB | Owner's Manual - Page 69
en service en sélectionnant une source. Appuyez sur cette touche pour parcourir les différentes sources disponibles. 2 MULTI-CONTROL Déplacez sonore. 3 Touche OPEN Appuyez sur cette touche pour ouvrir la face avant. 4 Touche CLOCK Appuyez sur cette touche pour modifier l'affichage de l'horloge. - Pioneer DEH-P5900IB | Owner's Manual - Page 70
fonctions sont les mêmes que celles de MULTI-CONTROL sauf pour la commande du volume. d Touche DIRECT la recherche de numéro de disque pour le lecteur de CD à chargeur. g Touche PGM Appuyez sur cette touche pour niveau de volume initial. i Touche ENTERTAINMENT Appuyez sur cette touche pour modifier - Pioneer DEH-P5900IB | Owner's Manual - Page 71
-Lecteur de CD intégré-Lecteur de CD à chargeur -iPod-USB-Appareil externe service ou hors service de l'entrée auxiliaire). ! Source extérieure fait référence à un produit Pioneer service. Pour rétracter l'antenne, mettez la source hors service. Réglage du volume % Utilisez MULTI-CONTROL pour ré - Pioneer DEH-P5900IB | Owner's Manual - Page 72
Indicateur LOC Il indique quand l'accord automatique sur une station locale est en service. 4 Indicateur de numéro de présélection 5 Indicateur de niveau du CONTROL. Remarque L'écoute de la radio AM lors de la connexion de l'iPod à cet appareil peut générer du bruit. Dans ce cas, déconnectez l'iPod - Pioneer DEH-P5900IB | Owner's Manual - Page 73
sur MULTI-CONTROL pour afficher le menu principal. FUNCTION, AUDIO et ENTERTAINMENT apparaissent sur l'écran. 2 Utilisez MULTI-CONTROL pour choisir commande. 1 Utilisez MULTI-CONTROL pour sélectionner BSM dans le menu des fonctions. 2 Appuyez sur MULTI-CONTROL pour mettre en service BSM. Les six fré - Pioneer DEH-P5900IB | Owner's Manual - Page 74
service, appuyez à nouveau sur MULTI-CONTROL. 3 Poussez MULTI-CONTROL vers CD intégré Opérations de base Le lecteur de CD intégré peut lire un CD audio (CD-DA) et des fichiers audio compressé (WMA/MP3 affichée. ! Lors de la lecture de fichiers MP3 enregistrés en mode VBR (débit binaire variable), VBR - Pioneer DEH-P5900IB | Owner's Manual - Page 75
étiquette du disque vers le haut. # Après avoir inséré un CD (CD-ROM), appuyez sur SOURCE pour sélectionner le lecteur de CD intégré. # Vous pouvez éjecter le CD (CD-ROM) en appuyant sur EJECT. 3 Fermez la face avant. 4 Poussez MULTI-CONTROL vers le haut ou vers le bas pour sélectionner un dossier - Pioneer DEH-P5900IB | Owner's Manual - Page 76
sur MULTI-CONTROL pour afficher le menu principal. FUNCTION, AUDIO et ENTERTAINMENT apparaissent sur l'écran. 2 Utilisez MULTI-CONTROL pour choisir FUNCTION changera en répétition du disque. # Lors de la lecture d'un CD, l'exécution d'une recherche de plage ou d'une avance/d'un retour rapide annule automatiquement - Pioneer DEH-P5900IB | Owner's Manual - Page 77
un ordre aléatoire. # Appuyez à nouveau sur MULTI-CONTROL pour mettre hors service la fonction lecture aléatoire. Examen du contenu des dossiers MULTI-CONTROL pour sélectionner Scan mode dans le menu des fonctions. 2 Appuyez sur MULTI-CONTROL pour activer la lecture du contenu du disque. Les 10 premi - Pioneer DEH-P5900IB | Owner's Manual - Page 78
de titre de disque pour enregistrer jusqu'à 48 titres de CD dans l'appareil. Chaque titre peut avoir une longueur maximum de 10 caractères. 1 Jouez un CD pour lequel vous voulez entrer un titre. 2 Utilisez MULTI-CONTROL pour sélectionner TitleInput "A" dans le menu des fonctions. 3 Appuyez sur - Pioneer DEH-P5900IB | Owner's Manual - Page 79
l'appareil un lecteur de CD à chargeur qui ne supporte pas la saisie de MP3 sur un disque, les in- formations de commentaire peuvent ne pas s'afficher correctement. ! Selon la version de Windows Media Player aussi changer de titre de plage en poussant MULTI-CONTROL vers le haut ou vers le bas. # Si - Pioneer DEH-P5900IB | Owner's Manual - Page 80
les écouteurs de l'iPod. # Après avoir connecté l'iPod à cet appareil, appuyez sur SOURCE pour sélectionner l'iPod. # Quand vous débranchez l'iPod de cet appareil, l'appareil est mis hors service. 2 Pour une avance rapide ou un retour rapide, poussez et maintenez MULTI-CONTROL vers la gauche ou - Pioneer DEH-P5900IB | Owner's Manual - Page 81
il ne peut pas lui-même être mis en service ou hors service. ! L'iPod connecté à cet appareil est mis hors service environ deux minutes après que le commutateur d'allumage est mis en position OFF (coupé). # Vous pouvez aussi changer de catégorie en poussant MULTI-CONTROL vers le haut ou vers le bas - Pioneer DEH-P5900IB | Owner's Manual - Page 82
sur MULTI-CONTROL pour afficher le menu principal. FUNCTION, AUDIO et ENTERTAINMENT apparaissent sur l'écran. 2 Utilisez MULTI-CONTROL pour choisir joue toutes les plages de l'iPod dans un ordre aléatoire. % Appuyez de façon prolongée sur MULTI-CONTROL pour mettre en service la lecture aléatoire de - Pioneer DEH-P5900IB | Owner's Manual - Page 83
mettre la pause hors service. Réglages sonores Introduction aux réglages sonores Français 1 1 Affichage des réglages sonores Il indique l'état des réglages sonores. 1 Appuyez sur MULTI-CONTROL pour afficher le menu principal. FUNCTION, AUDIO et ENTERTAINMENT apparaissent sur l'écran. 2 Utilisez - Pioneer DEH-P5900IB | Owner's Manual - Page 84
entre les haut-parleurs avant et arrière. Chaque fois que vous poussez MULTI-CONTROL vers le haut ou vers le bas, l'équilibre des haut-parleurs avant-arri des haut-parleurs gauche-droite. Chaque fois que vous poussez MULTI-CONTROL vers la gauche ou vers la droite, l'équilibre des haut-parleurs - Pioneer DEH-P5900IB | Owner's Manual - Page 85
être créée pour chaque source. (Le lecteur de CD intégré et le lecteur de CD à chargeur sont automatiquement placés dans les mêmes conditions niveaux d'écoute. 1 Utilisez MULTI-CONTROL pour choisir LOUD. 2 Appuyez sur MULTI-CONTROL pour mettre en service la correction physiologique. Le niveau de - Pioneer DEH-P5900IB | Owner's Manual - Page 86
sortie hautparleur d'extrêmes graves Cet appareil est équipé d'une sortie haut-parleur d'extrêmes graves qui peut être mise en service ou hors service. 1 Utilisez MULTI-CONTROL pour choisir Sub W.1. # Vous pouvez aussi sélectionner le menu de réglage du haut-parleur d'extrêmes graves en appuyant sur - Pioneer DEH-P5900IB | Owner's Manual - Page 87
lieu de 80Hz. # Pour mettre hors service le filtre passe-haut, appuyez à nouveau sur MULTI-CONTROL. 3 Poussez MULTI-CONTROL vers la gauche ou vers la droite aide de cette fonction. ! Le lecteur de CD intégré et le lecteur de CD à chargeur sont automatiquement placés dans les mêmes conditions de niveau - Pioneer DEH-P5900IB | Owner's Manual - Page 88
CONTROL pour choisir un des réglages initiaux. Tournez MULTI-CONTROL pour parcourir les fonctions dans l'ordre suivant : Language select (choix de la langue)-Clock (audio Bluetooth)-Pin code input (saisie du code pin) Pour de plus amples détails sur chaque réglage, reportez-vous aux instructions qui - Pioneer DEH-P5900IB | Owner's Manual - Page 89
seulement quand un adaptateur Bluetooth (par exemple, CD-BTB100) est connecté instructions pour régler l'horloge. 1 Utilisez MULTI-CONTROL pour choisir Clock. 2 Poussez MULTI-CONTROL 10:36 devient 11:00.) Mise en service ou hors service du signal sonore d'avertissement Si vous ne retirez pas la face - Pioneer DEH-P5900IB | Owner's Manual - Page 90
sont allumés. Vous pouvez mettre l'atténuateur de luminosité en service ou hors service. 1 Utilisez MULTI-CONTROL pour choisir Dimmer. 2 Appuyez sur MULTI-CONTROL pour mettre en service l'atténuateur de luminosité. # Appuyez à nouveau sur MULTI-CONTROL pour mettre l'atténuateur de luminosité hors - Pioneer DEH-P5900IB | Owner's Manual - Page 91
à nouveau sur MULTI-CONTROL pour mettre la fonction Ever Scroll hors service. Activation de la source BT Audio Pour utiliser un lecteur audio Bluetooth, vous devez activer la source BT Audio. ! Vous pouvez utiliser cette fonction seule- ment quand un adaptateur Bluetooth (par exemple, CD-BTB100) est - Pioneer DEH-P5900IB | Owner's Manual - Page 92
pour mettre la source BT Audio en service. # Pour mettre la source BT Audio hors service, appuyez à nouveau sur MULTI-CONTROL. saisie du code PIN, et vous pouvez changer le code PIN. Saisie du code PIN pour la connexion sans fil Bluetooth Pour connecter votre téléphone cellulaire à cet appareil - Pioneer DEH-P5900IB | Owner's Manual - Page 93
d'installation. CONTROL et sélectionnez FUNCTION pour afficher TitleInput "A". 2 Saisissez un titre de la même façon que pour le lecteur de CD service, l'horloge apparaît sur l'afficheur. % Appuyez sur CLOCK pour mettre l'affichage de l'horloge en service ou hors service. Chaque pression sur CLOCK - Pioneer DEH-P5900IB | Owner's Manual - Page 94
suivantes : ! CD - Lecteur de CD intégré ! iPod - iPod ! Multi CD - Lecteur de CD à chargeur ! USB - Lecteur audio portable USB/Mé- moire USB ! BT Audio - Lecteur audio Bluetooth ! DVD - Lecteur de DVD/Lecteur de DVD à chargeur # Appuyez à nouveau sur PGM pour mettre la pause hors service. % Appuyez - Pioneer DEH-P5900IB | Owner's Manual - Page 95
23 5 4 1 Indicateur WMA/MP3/AAC Il indique le type du fichier en cours de lecture. 2 Indicateur du numéro de dossier 3 Indicateur du numéro de plage 4 Indicateur du temps de lecture 5 Indicateur de débit binaire 1 Appuyez sur SOURCE pour choisir USB. 2 Poussez MULTI-CONTROL vers le haut ou vers - Pioneer DEH-P5900IB | Owner's Manual - Page 96
Mais les étendues de répétition de lecture que vous pouvez choisir diffèrent de celles du lecteur de CD intégré. Les plages de répétition de lecture du lecteur audio portable USB/de la mémoire USB sont comme suit : ! Track repeat - Répétition du fichier en cours de lecture seulement ! Folder repeat - Pioneer DEH-P5900IB | Owner's Manual - Page 97
. Les canaux qui ne peuvent pas être sélectionnés actuellement sont sautés, et le canal suivant est sélectionné. # Si vous poussez de façon prolongée MULTI-CONTROL vers la gauche ou vers la droite, vous pouvez augmenter ou diminuer le numéro de canal de façon continue. # Vous pouvez aussi effectuer - Pioneer DEH-P5900IB | Owner's Manual - Page 98
number (réglage sélection du numéro de canal), appuyez à nouveau de façon prolongée sur CLOCK. 2 Poussez MULTI-CONTROL vers le haut ou vers le bas pour sélectionner la catégorie de canal désirée.. 3 Poussez MULTI-CONTROL vers la gauche ou vers la droite pour sélectionner le canal désiré dans la cat - Pioneer DEH-P5900IB | Owner's Manual - Page 99
Accessoires disponibles Section 03 Français Remarque Vous pouvez aussi sélectionner le réglage sélection du canal XM dans le menu qui s'affiche en utilisant MULTI-CONTROL. Affichage de l'ID de la radio Réglage de la sélection du numéro de canal Si vous sélectionnez CH 000, le code ID est affiché. - Pioneer DEH-P5900IB | Owner's Manual - Page 100
. Le nom de la fonction s'affiche sur l'écran. 3 Tourner MULTI-CONTROL pour sélectionner la fonction. Tournez MULTI-CONTROL pour parcourir les fonctions dans l'ordre suivant : Channel mode (réglage du mode de sélection du canal)-Team setting (paramétrage de l'équipe)-Game info (informations sur les - Pioneer DEH-P5900IB | Owner's Manual - Page 101
number (réglage sélection du numéro de canal), appuyez à nouveau de façon prolongée sur CLOCK. 2 Poussez MULTI-CONTROL vers le haut ou vers le bas pour sélectionner la catégorie de canal désirée.. 3 Poussez MULTI-CONTROL vers la gauche ou vers la droite pour sélectionner le canal désiré dans la cat - Pioneer DEH-P5900IB | Owner's Manual - Page 102
Alerte Match Après avoir effectué les sélections d'équipes, vous devez mettre en service la fonction Alerte Match. ! En réglage par défaut, la fonction Alerte Match est en service. 1 Utilisez MULTI-CONTROL pour sélectionner Team setting dans le menu des fonctions. 2 Maintenez la pression sur MULTI - Pioneer DEH-P5900IB | Owner's Manual - Page 103
MULTI-CONTROL pour passer sur cette station et écouter le match. Remarques ! Si vous n'avez effectué aucune sélection d'équipes, NOT SET s' CONTROL vers la gauche ou vers la droite pour sélectionner CH 000. Audio Bluetooth Opérations de base Si vous connectez un adaptateur Bluetooth (par exemple CD - Pioneer DEH-P5900IB | Owner's Manual - Page 104
la technologie sans fil Bluetooth (disponible sur le marché) à votre lecteur audio et connectez un adaptateur Bluetooth (par exemple CD-BTB100) à cet sur MULTI-CONTROL pour afficher le menu principal. FUNCTION, AUDIO et ENTERTAINMENT apparaissent sur l'écran. 2 Utilisez MULTI-CONTROL pour choisir - Pioneer DEH-P5900IB | Owner's Manual - Page 105
é de cet appareil. Affichage de l'adresse BD (Bluetooth Device) 1 Utilisez MULTI-CONTROL pour sélectionner Device info. dans le menu des fonctions. Le nom d'appareil (Pioneer BT Unit) de cet appareil apparaît sur l'afficheur. 2 Poussez MULTI-CONTROL vers la gauche pour passer à l'adresse BD. Une - Pioneer DEH-P5900IB | Owner's Manual - Page 106
la gauche affiche la version du module Bluetooth de cet appareil. Pousser MULTI-CONTROL vers la droite ramène à l'affichage de la version du système de cet appareil. Téléphone Bluetooth Opérations de base Si vous utilisez un adaptateur Bluetooth (par exemple CD-BTB100), vous pouvez connecter un - Pioneer DEH-P5900IB | Owner's Manual - Page 107
la réponse automatique). Affiche REFUSE quand la fonction rejet automatique est en service (pour plus de détails, reportez-vous à la page 115, Réglage Connexion Pour des instructions détaillées sur la connexion de votre téléphone à cet appareil via la technologie sans fil Bluetooth, reportez-vous à - Pioneer DEH-P5900IB | Owner's Manual - Page 108
un appel en attente. Introduction aux opérations avancées 1 Appuyez sur MULTI-CONTROL pour afficher le menu principal. FUNCTION, AUDIO et ENTERTAINMENT apparaissent sur l'écran. 2 Utilisez MULTI-CONTROL pour choisir FUNCTION. Tournez pour changer l'option de menu, appuyez pour la sélectionner - Pioneer DEH-P5900IB | Owner's Manual - Page 109
connecté à cet appareil via la technologie sans fil Bluetooth avec HSP (Head Set Profile), PH.B.Name view, Clear memory, Number dial CONTROL pour connecter le téléphone cellulaire sélectionné. Pendant la connexion, Connecting clignote. Pour achever la connexion, vérifiez le nom de l'appareil (Pioneer - Pioneer DEH-P5900IB | Owner's Manual - Page 110
fil Bluetooth. Déconnexion d'un téléphone cellulaire 1 Utilisez MULTI-CONTROL pour CONTROL pour sélectionner Set phone dans le menu des fonctions. 2 Poussez MULTI-CONTROL ERROR s'affiche. Dans ce cas, revenez à l'étape 1 et réessayez. Suppression d'un téléphone enregistré 1 Utilisez MULTI-CONTROL - Pioneer DEH-P5900IB | Owner's Manual - Page 111
la connexion automatique. Si votre téléphone cellulaire est réglé prêt à une connexion sans fil Bluetooth, la connexion à cet appareil sera établie automatiquement. # Appuyez à nouveau sur MULTI-CONTROL pour désactiver la connexion automatique. Utilisation de l'Annuaire Transfert des entrées dans - Pioneer DEH-P5900IB | Owner's Manual - Page 112
précédente, Appel d'un numéro de l'Annuaire pour la procédure à suivre pour effectuer cette opération. 2 Appuyez de façon prolongée sur MULTI-CONTROL pour afficher l'écran d'entrée de nom. Edit name s'affiche. 3 Appuyez sur DISPLAY pour choisir le type de caractères désiré. Chaque pression sur la - Pioneer DEH-P5900IB | Owner's Manual - Page 113
de la mémoire. Edit name (écran saisie des noms)- Edit number (écran saisie des numéros)- Clear memory (écran effacement de la mémoire) 4 Poussez MULTI-CONTROL vers la droite pour afficher un écran de confirmation. Clear memory YES s'affiche. # Si vous ne voulez pas effacer la mémoire que vous avez - Pioneer DEH-P5900IB | Owner's Manual - Page 114
éro est déjà dans l'Annuaire, le nom est aussi affiché. # Tourner MULTI-CONTROL fait passer au numéro de téléphone précédent ou suivant affiché dans la Ou entrez directement un numéro de téléphone désiré. Reportez-vous aux instructions données dans les pages précédentes sur la façon de sélectionner - Pioneer DEH-P5900IB | Owner's Manual - Page 115
technologie sans fil Bluetooth, Phone book ne peut pas être sélectionné. 3 Poussez MULTI-CONTROL vers la droite CONTROL pour mettre la sonnerie en service. # Appuyez à nouveau sur MULTI-CONTROL pour mettre la sonnerie hors service. Annulation d'écho et réduction de bruit 1 Utilisez MULTI-CONTROL - Pioneer DEH-P5900IB | Owner's Manual - Page 116
service. # Appuyez à nouveau sur MULTI-CONTROL pour mettre l'annulation d'écho hors service. Affichage de l'adresse BD (Bluetooth Device) 1 Utilisez MULTI-CONTROL pour sélectionner Device info. dans le menu des fonctions. Le nom d'appareil (Pioneer de CD à chargeur. 2 Poussez MULTI-CONTROL vers - Pioneer DEH-P5900IB | Owner's Manual - Page 117
(compression et DBE) seulement avec un lecteur de CD à chargeur qui supporte ces fonctions. 1 Appuyez sur MULTI-CONTROL pour afficher le menu principal. FUNCTION, AUDIO et ENTERTAINMENT apparaissent sur l'écran. 2 Utilisez MULTI-CONTROL pour choisir FUNCTION. Tournez pour changer l'option de - Pioneer DEH-P5900IB | Owner's Manual - Page 118
à chargeur vendus avant le CDX-P1250 et le CDX-P650, la liste de lecture est limitée à 24 plages.) 1 Jouez un CD que vous voulez programmer. Poussez MULTI-CONTROL vers le haut ou vers le bas pour choisir le CD. 2 Utilisez MULTI-CONTROL pour sélectionner ITS memo dans le menu des fonctions. 118 Fr - Pioneer DEH-P5900IB | Owner's Manual - Page 119
Vous pouvez supprimer une plage musicale de la liste de lecture ITS si la lecture ITS est en service. Si la lecture ITS est déjà en service, passez à la plage 2. Sinon, utilisez MULTI-CONTROL. 1 Jouez le CD qui contient la plage que vous voulez supprimer de votre liste ITS, et activez la lecture ITS - Pioneer DEH-P5900IB | Owner's Manual - Page 120
100 titres de CD (avec la liste ITS) dans le lecteur de CD à chargeur. Chaque titre peut avoir une longueur maximum de 10 caractères. Pour titres de disques pendant l'affichage des conditions de lecture. 2 Utilisez MULTI-CONTROL pour choisir le titre de disque désiré. Tournez pour changer de titre - Pioneer DEH-P5900IB | Owner's Manual - Page 121
6 de la télécommande pour sélectionner le disque désiré. 5 1 Indicateur DVD-V/VCD/CD/MP3/WMA Indique le type du disque en cours de lecture. 2 Indicateur du numéro de -CONTROL pour afficher le menu principal. FUNCTION, AUDIO et ENTERTAINMENT apparaissent sur l'écran. 2 Utilisez MULTI-CONTROL pour - Pioneer DEH-P5900IB | Owner's Manual - Page 122
étendues de répétition de la lecture du lecteur du DVD/lecteur de DVD à chargeur sont comme indiqué ci-dessous : Pendant la lecture PBC des CDs Vidéo, cette fonction ne peut pas être utilisée. ! Disc repeat - Répétition du disque en cours de lecture ! Folder repeat - Répétition du dossier en cours - Pioneer DEH-P5900IB | Owner's Manual - Page 123
lecture ITS avec un lecteur de CD à chargeur. Avec un lecteur de DVD à chargeur, la lecture ITS s'applique seulement au CD en cours de lecture. Pour accord manuel, poussez MULTI-CONTROL vers la gauche ou vers la droite. 4 Pour effectuer un accord automatique, poussez MULTI-CONTROL vers la gauche ou - Pioneer DEH-P5900IB | Owner's Manual - Page 124
sur MULTI-CONTROL pour afficher le menu principal. FUNCTION, AUDIO et ENTERTAINMENT apparaissent sur l'écran. 2 Utilisez MULTI-CONTROL et sélectionnez sur FUNCTION de la télécommande. 3 Appuyez sur MULTI-CONTROL pour mettre BSSM en service. Searching s'affiche. Pendant que Searching est affiché, les - Pioneer DEH-P5900IB | Owner's Manual - Page 125
Accessoires disponibles # Vous pouvez aussi changer de station en poussant MULTI-CONTROL vers le haut ou vers le bas. # Appuyez sur BAND pour revenir à l'affichage des canaux. # Si vous ne réglez aucun paramètre de la liste - Pioneer DEH-P5900IB | Owner's Manual - Page 126
le Service d'entretien agréé par Pioneer le plus proche, n'oubliez pas de noter le message d'erreur. Lecteur de CD intégré Message Causes possi- Action corrective bles ERROR-11, 12, Disque sale 17, 30 Nettoyez le disque. ERROR-11, 12, Disque rayé 17, 30 Utilisez un autre disque. ERROR-10, 11 - Pioneer DEH-P5900IB | Owner's Manual - Page 127
Disques Duaux sont des disques à deux faces avec un CD enregistrable pour l'audio sur une face et un DVD enregistrable pour la vidéo sur l'autre. ! Comme la face CD des Disques Duaux n'est pas physiquement compatible avec le standard CD général, la lecture de la face CD sur cet appareil peut ne pas - Pioneer DEH-P5900IB | Owner's Manual - Page 128
premiers caractères d'un nom de fichier (incluant l'extension telle que .wma, .mp3, .m4a ou .wav) ou d'un nom de dossier peuvent être affichés. ! audio compressés WMA ! Format compatible : WMA encodé par Windows Media Player Ver. 7, 7.1, 8, 9 ou 10 ! Débit binaire : 48 kbit/s à 320 kbit/s (CBR), 48 - Pioneer DEH-P5900IB | Owner's Manual - Page 129
(LPCM), 22,05 kHz à 44,1 kHz (MS ADPCM) Quelques mots sur les réglages de l'iPod ! Vous ne pouvez pas utiliser l'Egaliseur iPod sur les produits Pioneer. Nous vous recommandons de mettre l'Egaliseur iPod hors service avant de connecter l'iPod à cet appareil. ! Vous ne pouvez pas mettre Repeat hors - Pioneer DEH-P5900IB | Owner's Manual - Page 130
Accentuation des graves : Gain 12 dB à 0 dB Lecteur de CD Système Compact Disc Digital Audio Disques utilisables Disques compacts Format du Format de décodage MP3 ... MPEG-1 & 2 Couche Audio 3 Format de décodage WMA Ver. 7, 7.1, 8, 9, 10 (2 canaux audio) (Windows Media Player) Format de - Pioneer DEH-P5900IB | Owner's Manual - Page 131
ELECTRONICS OF CANADA, INC. 300 Allstate Parkway, Markham, Ontario L3R OP2, Canada TEL: 1-877-283-5901 PIONEER ELECTRONICS DE MEXICO, S.A. de C.V. Blvd.Manuel Avila Camacho 138 10 piso Col.Lomas de Chapultepec, Mexico, D.F. 11000 TEL: 55-9178-4270 44號13 02) 2521-3588 9樓901-6 0852) 2848-6488
-
 1
1 -
 2
2 -
 3
3 -
 4
4 -
 5
5 -
 6
6 -
 7
7 -
8
-
9
-
10
-
11
-
12
-
13
-
14
-
15
-
16
-
17
-
18
-
19
-
20
-
21
-
22
-
23
-
24
-
25
-
26
-
27
-
28
-
29
-
30
-
31
-
32
-
33
-
34
-
35
-
36
-
37
-
38
-
39
-
40
-
41
-
42
-
43
-
44
-
45
-
46
-
47
-
48
-
49
-
50
-
51
-
52
-
53
-
54
-
55
-
56
-
57
-
58
-
59
-
60
-
61
-
62
-
63
-
64
-
65
-
66
-
67
-
68
-
69
-
70
-
71
-
72
-
73
-
74
-
75
-
76
-
77
-
78
-
79
-
80
-
81
-
82
-
83
-
84
-
85
-
86
-
87
-
88
-
89
-
90
-
91
-
92
-
93
-
94
-
95
-
96
-
97
-
98
-
99
-
100
-
101
-
102
-
103
-
104
-
105
-
106
-
107
-
108
-
109
-
110
-
111
-
112
-
113
-
114
-
115
-
116
-
117
-
118
-
119
-
120
-
121
-
122
-
123
-
124
-
125
-
126
-
127
-
128
-
129
-
130
-
131
 |
 |

Operation Manual
Mode d
’
emploi
CD Receiver
Récepteur CD
DEH-P5900IB
English
Français