Pioneer DEHP3900MP Owner's Manual - Page 31
Adjusting loudness, Using subwoofer output, Using the high pass filter, Audio Adjustments
 |
UPC - 012562840093
View all Pioneer DEHP3900MP manuals
Add to My Manuals
Save this manual to your list of manuals |
Page 31 highlights
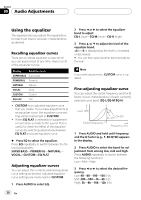
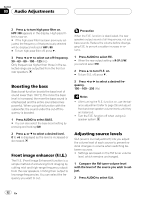
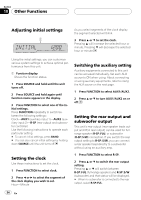
Audio Adjustments Section 09 English 4 Press a or b to select the desired Q factor. 2N-1N-1W-2W Note If you make adjustments, CUSTOM curve is updated. Adjusting loudness Loudness compensates for deficiencies in the low- and high-sound ranges at low volume. 1 Press AUDIO to select LOUD. 2 Press a to turn loudness on. Loudness level (e.g., LOUD :MID) appears in the display. # To turn loudness off, press b. 3 Press c or d to select a desired level. LOW (low)-MID (mid)-HI (high) Using subwoofer output This unit is equipped with a subwoofer output which can be turned on or off. 1 Press SW to select SUB.W. # You can also select the subwoofer setting menu by pressing AUDIO on the unit. 2 Press a to turn subwoofer output on. SUB.W:NOR appears in the display. Subwoofer output is now on. # If the subwoofer output phase has been set to the reverse, SUB.W:REV will be displayed. # To turn subwoofer output off, press b. 3 Press c or d to select the phase of subwoofer output. Press c to select reverse phase and REV appears in the display. Press d to select normal phase and NOR appears in the display. Adjusting subwoofer settings When the subwoofer output is on, you can adjust the cut-off frequency and the output level of the subwoofer. 1 Press SW to select 80: 0. # You can also select the subwoofer setting menu by pressing AUDIO on the unit. # When the subwoofer output is on, you can select 80: 0. # If the subwoofer setting has been previously adjusted, the frequency of that previously selected will be displayed instead of 80. 2 Press c or d to select cut-off frequency. 50-63-80-100-125 (Hz) Only frequencies lower than those in the selected range are outputted from the subwoofer. 3 Press a or b to adjust the output level of the subwoofer. +6 to -24 is displayed as the level is increased or decreased. Using the high pass filter When you do not want low sounds from the subwoofer output frequency range to play from the front or rear speakers, turn on the HPF (high pass filter). Only frequencies higher than those in the selected range are outputted from the front or rear speakers. 1 Press AUDIO to select HPF. En 31
-
 1
1 -
2
-
3
-
4
-
5
-
6
-
7
-
8
-
9
-
10
-
11
-
12
-
13
-
14
-
15
-
16
-
17
-
18
-
19
-
20
-
21
-
22
-
23
-
24
-
25
-
 26
26 -
 27
27 -
 28
28 -
 29
29 -
 30
30 -
 31
31 -
 32
32 -
 33
33 -
 34
34 -
 35
35 -
 36
36 -
37
-
38
-
39
-
40
-
41
-
42
-
43
-
44
-
45
-
46
-
47
-
48
-
49
-
50
-
51
-
52
-
53
-
54
-
55
-
56
-
57
-
58
-
59
-
60
-
61
-
62
-
63
-
64
-
65
-
66
-
67
-
68
-
69
-
70
-
71
-
72
-
73
-
74
-
75
-
76
-
77
-
78
-
79
-
80
-
81
-
82
-
83
-
84
-
85
-
86
-
87
-
88
-
89
-
90
-
91
-
92
-
93
-
94
-
95
-
96
-
97
-
98
-
99
-
100
-
101
-
102
-
103
-
104
-
105
-
106
-
107
-
108
-
109
-
110
-
111
-
112
-
113
-
114
-
115
-
116
-
117
-
118
-
119
-
120
-
121
-
122
-
123
-
124
-
125
-
126
-
127
-
128
-
129
-
130
-
131
-
132
 |
 |