Pioneer FHD1 Owner's Manual - Page 26
Using Color Temp, Using CTI, Using Color Management - pro 50
 |
UPC - 012562818733
View all Pioneer FHD1 manuals
Add to My Manuals
Save this manual to your list of manuals |
Page 26 highlights
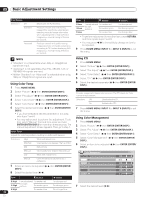
09 Basic Adjustment Settings PureCinema Selections Off Standard Advanced Deactivates the PureCinema. Produces smooth and vivid moving images (film specific) by automatically detecting recorded image information when displaying DVD or high-definition images (e.g., movies) having 24 frames per second. Produces smooth and quality moving images (as shown on theatre screens) by converting to 72 Hz when displaying DVD images (e.g., movies) having 24 frames per second. Item R Low G Low B Low button Fine adjustment For weaker red for dark portions For weaker green For weaker blue button For stronger red For stronger green For stronger blue • To perform adjustment for another item, press RETURN, and then repeat steps 7 and 8. • You may press / to immediately change an item to be adjusted. 9 Press HOME MENU, INPUT 1 to INPUT 6 (INPUT) to exit the menu. NOTE • "Standard" is not selectable when 480p or 720p@60 Hz signals are input. • "Advanced" is not selectable when PAL, SECAM, 576i, or 1080i@50 Hz signals are input. • Neither "Standard" nor "Advanced" is selectable when 576p, 1080p or 720p@ 50 Hz signals are input. Using CTI 1 Press HOME MENU. 2 Select "Picture" ( / then ENTER (ENTER/DISP.)). 3 Select "Pro Adjust" ( / then ENTER (ENTER/DISP.)). 4 Select "Color Detail" ( / then ENTER (ENTER/DISP.)). 5 Select "CTI" ( / then ENTER (ENTER/DISP.)). Using Color Temp 1 Press HOME MENU. 2 Select "Picture" ( / then ENTER (ENTER/DISP.)). 3 Select "Pro Adjust" ( / then ENTER (ENTER/DISP.)). 6 Select the desired parameter ( / then ENTER (ENTER/ DISP.)). CTI Provides images with clearer color contours. The CTI stands for Color Transient Improvement. 4 Select "Color Detail" ( / then ENTER (ENTER/DISP.)). Selections Off Deactivates the CTI. 5 Select "Color Temp" ( / then ENTER (ENTER/DISP.)). On Activates the CTI. 6 Select the desired parameter ( / then ENTER (ENTER/ DISP.)). • If you have selected a desired parameter in this step, skip steps 7 and 8. • You may rather want to perform fine adjustment. To do this, select "Manual" first and then press and hold ENTER (ENTER/DISP.) for more than three seconds. The manual adjustment screen appears. Then go to step 7. Color Temp Adjusts the color temperature, resulting in a better white balance. Selections High White with bluish tone Mid-High Intermediate tone between High and Mid Mid Natural tone 7 Press HOME MENU, INPUT 1 to INPUT 6 (INPUT) to exit the menu. Using Color Management 1 Press HOME MENU. 2 Select "Picture" ( / then ENTER (ENTER/DISP.)). 3 Select "Pro Adjust" ( / then ENTER (ENTER/DISP.)). 4 Select "Color Detail" ( / then ENTER (ENTER/DISP.)). 5 Select "Color Management" ( / then ENTER (ENTER/ DISP.)). 6 Select an item to be adjusted ( / then ENTER (ENTER/ DISP.)). Mid-Low Intermediate tone between Mid and Low Color Management Low White with reddish tone R 0 Manual Color temperature adjusted to your Y 0 preference G 0 7 Select an item to be adjusted ( / then ENTER (ENTER/ C 0 DISP.)). B 0 8 Select the desired level ( / ). M 0 Item button button R High Fine adjustment For weaker red for bright G High portions For weaker green For stronger red For stronger green B High 26 For weaker blue For stronger blue En 7 Select the desired level ( / ).
-
 1
1 -
2
-
3
-
4
-
5
-
6
-
7
-
8
-
9
-
10
-
11
-
12
-
13
-
14
-
15
-
16
-
17
-
18
-
19
-
20
-
 21
21 -
 22
22 -
 23
23 -
 24
24 -
 25
25 -
 26
26 -
 27
27 -
 28
28 -
 29
29 -
 30
30 -
 31
31 -
32
-
33
-
34
-
35
-
36
-
37
-
38
-
39
-
40
-
41
-
42
-
43
-
44
-
45
-
46
-
47
-
48
-
49
-
50
-
51
-
52
-
53
-
54
-
55
-
56
-
57
-
58
-
59
-
60
-
61
-
62
-
63
-
64
-
65
-
66
-
67
-
68
-
69
-
70
-
71
-
72
-
73
-
74
-
75
-
76
-
77
-
78
-
79
-
80
-
81
-
82
-
83
-
84
-
85
-
86
-
87
-
88
-
89
-
90
-
91
-
92
-
93
-
94
-
95
-
96
-
97
-
98
-
99
-
100
-
101
-
102
-
103
-
104
-
105
-
106
-
107
-
108
-
109
-
110
-
111
-
112
-
113
-
114
-
115
-
116
 |
 |
