Pioneer PDR-W37 Owner's Manual - Page 24
Editing CD text
 |
View all Pioneer PDR-W37 manuals
Add to My Manuals
Save this manual to your list of manuals |
Page 24 highlights
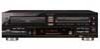
5 Recording Features DISPLAY TIME /CHARA MENU/ DELETE 1 GHI 4 PQRS 7 MARK 10/0 4 ABC 2 JKL 5 TUV 8 DEF 3 MNO 6 WXYZ 9 NAME ¢ 1 ENTER ¡ 7 COMPACT DISC RECORDER / MULTI-CD CHANGER ◊ÛB¿ˆ≤≥ 3 - COMPACT DISC MULTI CHANGER COMPACT DISC DIGITAL RECORDER OPEN/CLOSE 0 NAME MENU/ DELETE 4 1 ¶ ¡ ¢ DISPLAY CHARACTER REC VOL 7 PUSH ENTER CD TEXT Hi-bitLegatoLinkConversion 6 Confirm the character and move the cursor to the next character position by pressing the jog dial (or ¡). For the remote, move the cursor to the next character position by pressing ENTER. • Move the cursor backwards or forwards along the display using 1 and ¡. • Insert a new character into a name by moving the cursor to the character position you want and repeating steps 4- 6. • Erase the character at the current cursor position by pressing MENU/DELETE. The characters on either side of the current cursor position close to fill up the gap. 7 Press NAME again to enter the text and return to the title selection display. If you are inputting a track title, you must assign it to a track number using 4 or ¢, or the corresponding number on the remote control. Pressing NAME twice takes you back to the previous menu (step 2). Editing CD text The CD recorder can store information for up to three discs at one time. When an unfinalized CD-R containing CD text is loaded, this text will automatically return to memory. Before finalizing the CDR, you can go back and edit the text as many times as you like, or until you input CD text for a fourth disc (this will erase the oldest information in memory). 1 Load the CD-R or CD-RW you wish to edit. 2 Press NAME. Choose the name you wish to edit as in steps 1-3 of Using CD text. 3 Edit the text. See step 6 of Using CD text. 4 Eject or finalize the disc. See Finalizing a disc on page 30 if you have finished all the recording and editing that you want do to. Note: After you have finished setting the names you want in CD text, be sure to eject the disc or, if you have finished all the recording and editing that you want do to, finalize the disc as shown on page 30. 24
-
 1
1 -
2
-
3
-
4
-
5
-
6
-
7
-
8
-
9
-
10
-
11
-
12
-
13
-
14
-
15
-
16
-
17
-
18
-
 19
19 -
 20
20 -
 21
21 -
 22
22 -
 23
23 -
 24
24 -
 25
25 -
 26
26 -
 27
27 -
 28
28 -
 29
29 -
30
-
31
-
32
-
33
-
34
-
35
-
36
-
37
-
38
-
39
-
40
-
41
-
42
-
43
-
44
-
45
-
46
-
47
-
48
-
49
-
50
-
51
-
52
 |
 |
